Insignia NS-DV720PBL2 User Manual (English) - Page 21
Selecting the file format for movies, TV Format, File Format - mac
 |
UPC - 600603133848
View all Insignia NS-DV720PBL2 manuals
Add to My Manuals
Save this manual to your list of manuals |
Page 21 highlights
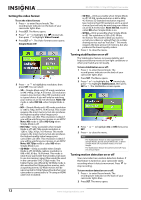
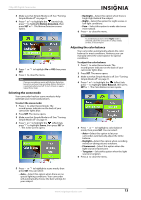
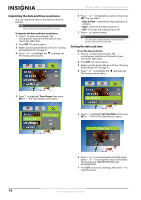
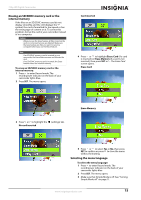
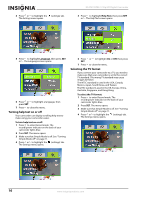
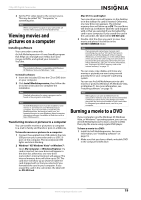
720p HD Digital Camcorder 5 Press to highlight TV Format, then press SET or . The TV Format screen opens. Selecting the file format for movies To select the file format for movies: 1 Press to enter Record mode. The record/power indicator on the back of your camcorder lights blue. 2 Press SET. The menu opens. 3 Make sure that Simple Mode is off. See "Turning Simple Mode off" on page 11. 4 Press or to highlight the (settings) tab. The Settings menu opens. 6 Press or to highlight NTSC or PAL, then press SET. 7 Press to close the menu. 5 Press to highlight File Format, then press SET or . The File Format screen opens. 6 Press or to highlight a file format then press SET. You can select: • AVI-Select this format if you are using a Windows-based computer and/or intend to use the included ArcSoft MediaImpression software to view and edit movies. • MOV-Select this format if you are using QuickTime (not included) to view movies. This setting is ideal for users of Mac computers. Note: Movies cannot be edited in ArcSoft MediaImpression if this format is selected. Note The file format cannot be changed after a recording is created. You should select the file format before you start recording. 7 Press to close the menu. www.insigniaproducts.com 17
-
 1
1 -
2
-
3
-
4
-
5
-
6
-
7
-
8
-
9
-
10
-
11
-
12
-
13
-
14
-
15
-
 16
16 -
 17
17 -
 18
18 -
 19
19 -
 20
20 -
 21
21 -
 22
22 -
 23
23 -
 24
24 -
 25
25 -
 26
26 -
27
-
28
 |
 |
