Intel RS2WC040 Hardware User Guide - Page 17
Intel® RAID Controller RS2WC040 Hardware Installation, Requirements, Installing the RAID Controller - driver
 |
View all Intel RS2WC040 manuals
Add to My Manuals
Save this manual to your list of manuals |
Page 17 highlights
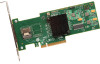
2 Intel® RAID Controller RS2WC040 Hardware Installation Requirements • An Intel® RAID Controller RS2WC040 with the provided cable • A host system with an available x8 or x16 PCI-Express* slot • The Resource CD, which contains drivers and documentation • SAS or SATA 3.0 hard drives Note: SATA II is the only type of SATA supported by this RAID Controller. In addition, Intel Corporation strongly recommends using an uninterruptible power supply (UPS). Installing the RAID Controller To install the RAID Controller, follow these steps: 1. Turn off the power to the system, all drives, enclosures, and system components. Remove the power cord(s). 2. Remove the server system cover. For instructions, see the server system documentation. 3. If necessary, change the bracket on the RAID controller to fit the height of the server system (see Figure 1). Intel® RAID Controller RS2WC040 Hardware User's Guide 7
-
 1
1 -
2
-
3
-
4
-
5
-
6
-
7
-
8
-
9
-
10
-
11
-
 12
12 -
 13
13 -
 14
14 -
 15
15 -
 16
16 -
 17
17 -
 18
18 -
 19
19 -
 20
20 -
 21
21 -
 22
22 -
23
-
24
-
25
-
26
-
27
-
28
-
29
-
30
-
31
-
32
-
33
-
34
-
35
-
36
-
37
-
38
-
39
-
40
-
41
-
42
-
43
-
44
 |
 |
