Intel SC5275-E User Guide - Page 27
Setting Up the Chassis, Tools and Supplies Needed, Installation Safety Instructions - entry server chassis
 |
UPC - 735858171168
View all Intel SC5275-E manuals
Add to My Manuals
Save this manual to your list of manuals |
Page 27 highlights
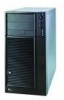
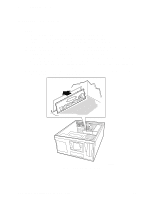
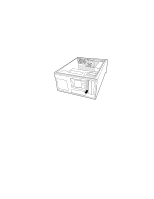
2 Setting Up the Chassis 2 Setting Up the Chassis This chapter describes how to set the server up for the first time. With the exception of replacing the front panel board (discussed in Chapter 4), it is necessary to remove only the left access cover, not the cover at the right. Tools and Supplies Needed Phillips (cross head) screwdriver (#2 bit) Small flathead screwdriver Antistatic wrist strap (recommended) Installation Safety Instructions Only technically qualified personnel should integrate this assembly. Follow these guidelines to meet and maintain safety and product regulatory requirements when integrating this chassis subassembly. Read and adhere to all of these instructions and the instructions supplied with this assembly. If you do not follow these instructions, the UL listing will be void, and the product will most likely be non-compliant with other regional product laws and regulations. Safety: Before You Remove the Access Covers Before removing the access cover for any reason, observe these safety guidelines: Turn off all peripheral devices connected to the server. Turn off the server by pressing the power button on the front of the chassis. Then unplug the AC power cord from the chassis or wall outlet. Label and disconnect all peripheral cables and all telecommunication lines connected to I/O connectors or ports on the back of the chassis. Provide some electrostatic discharge (ESD) protection by wearing an antistatic wrist strap attached to chassis ground-any unpainted metal surface-when handling components. Intel® Entry Server Chassis SC5275-E User Guide 9
-
 1
1 -
2
-
3
-
4
-
5
-
6
-
7
-
8
-
9
-
10
-
11
-
12
-
13
-
14
-
15
-
16
-
17
-
18
-
19
-
20
-
21
-
 22
22 -
 23
23 -
 24
24 -
 25
25 -
 26
26 -
 27
27 -
 28
28 -
 29
29 -
 30
30 -
 31
31 -
 32
32 -
33
-
34
-
35
-
36
-
37
-
38
-
39
-
40
-
41
-
42
-
43
-
44
-
45
-
46
-
47
-
48
-
49
-
50
-
51
-
52
-
53
-
54
-
55
-
56
-
57
-
58
-
59
-
60
-
61
-
62
-
63
-
64
-
65
-
66
-
67
-
68
-
69
-
70
-
71
-
72
-
73
 |
 |
