Intel X25-V Solid-State Drive Toolbox User Guide - Page 28
Running Secure Erase - sata review
 |
View all Intel X25-V manuals
Add to My Manuals
Save this manual to your list of manuals |
Page 28 highlights
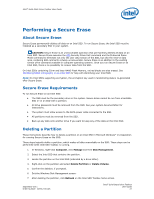
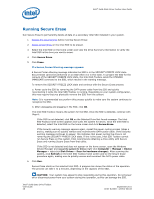
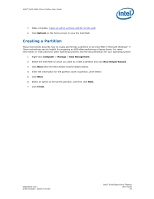
Intel® Solid-State Drive Toolbox User Guide Running Secure Erase Run Secure Erase to permanently delete all data on a secondary Intel SSD installed in your system. 1. Review the requirements before running Secure Erase: 2. Delete all partitions on the Intel SSD to be erased. 3. Select the Intel SSD on the home screen and view the Drive Summary information to verify the Intel SSD is the drive you want to erase. 4. Click Secure Erase. 5. Click Erase. If a Secure Frozen Warning message appears: A Secure Frozen Warning message indicates the SSD is in the SECURITY FREEZE LOCK state. Secure Erase cannot be performed on an SSD when it is in this state. To prepare the SSD for the removal of the SECURITY FREEZE LOCK state, the Intel SSD Toolbox sends the STANDBY IMMEDIATE command to the SSD, which results in the warning message. To remove the SECURITY FREEZE LOCK state and continue with the Secure Erase process: a. Power-cycle the SSD by removing the SATA power cable from the SSD and quickly reconnecting it while the Intel SSD Toolbox is running. Depending on your system configuration, this may require that you physically remove the SSD from the system. Note: It is recommended you perform this process quickly to make sure the system continues to recognize the SSD. b. After unplugging and plugging in the SSD, click OK. The Intel SSD Toolbox rescans the system for the SSD. Once the SSD is detected, continue with Step 6. If the SSD is not detected, click OK on the Selected Drive Not Found message. The Intel SSD Toolbox home screen appears and scans the system for drives. Once the Intel SSD is detected, select the Intel SSD on the home screen and click Secure Erase. If the Security warning message appears again, repeat the power-cycling process (steps a and b), making sure to quickly remove and reconnect the SATA power cable. If the Security warning message continues to appear, this indicates that power-cycling the drive is not removing the SECURITY FREEZE LOCK state. If this is the case, Intel SSD Toolbox cannot run Secure Erase on this system. Intel recommends obtaining a drive utility with Secure Erase and running Secure Erase from that utility. If the SSD is not detected and does not appear on the home screen, open the Windows Device Manager and rescan the system for drives (right-click Computer > Manage > Device Manager > right-click Disk Drives > Scan for hardware changes). After scanning the system, click Refresh on the Intel SSD Toolbox home screen and try the Secure Erase procedure again, making sure to quickly remove and reconnect the SATA power cable. 6. Click Run. Secure Erase starts on the selected Intel SSD. A progress bar shows the status of the operation. The process can take 1 to 2 minutes, depending on the capacity of the SSD. CAUTION: Your system may appear to stop responding during this operation. Do not power off or disconnect power from your system during the operation, as this can damage the SSD. Intel® Solid-State Drive Toolbox User Guide 28 September 2011 Order Number: 325912-001US
-
 1
1 -
2
-
3
-
4
-
5
-
6
-
7
-
8
-
9
-
10
-
11
-
12
-
13
-
14
-
15
-
16
-
17
-
18
-
19
-
20
-
21
-
22
-
 23
23 -
 24
24 -
 25
25 -
 26
26 -
 27
27 -
 28
28 -
 29
29 -
 30
30 -
 31
31 -
 32
32
 |
 |