JVC GY-DV300U Using Streamcapture / Internet Explorer with a Microsoft® Me - Page 3
My Documents, Click
 |
View all JVC GY-DV300U manuals
Add to My Manuals
Save this manual to your list of manuals |
Page 3 highlights
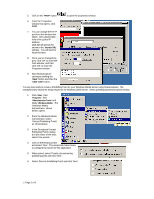
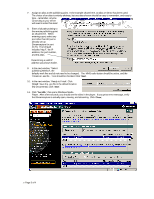
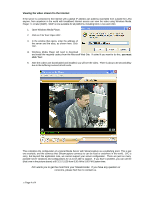
7. Assign an alias to the publishing point. In the example shown here, an alias of 'demo' has been used. The choice of an alias is entirely arbitrary, but any alias shosen should be easy to remember, and easy to type...remember, anyone connecting to your server will need to enter this alias! 8. Enter a full path pointing to the remote publishing point as shown here. When entering a port, select any port other than 80 (we've already set up Streamcapture for port 2170). The full path includes 'http://', the IP address, the port number, and the alias. Determining a valid IP address was shown earlier. 9. In the next window, "Select publishing Method", the defaults work fine and do not need to be changed. The MMS radio button should be active, and the 'Create an .asx file...' box should be checked. Click ' Next'. 10. In the next window, 'Ready to Finish'. Click 'Finish'. Save the .asx file in the default location (My Documents), Click ' Save'. 11. Click 'Test URL', this opens Windows Media Player. After a few seconds, you should see the video in the player. If you get an error message, verify that Streamcapture is actually open, viewing, and streaming. Click 'Close;. ? Page 3 of 4
-
 1
1 -
 2
2 -
 3
3 -
 4
4
 |
 |
