JVC GZ MG37u Instructions - Page 43
Select the insertion point., Select [SAVE AND QUIT]., Displaying Files, When selecting [IMPORT
 |
UPC - 492410838180
View all JVC GZ MG37u manuals
Add to My Manuals
Save this manual to your list of manuals |
Page 43 highlights
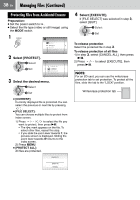
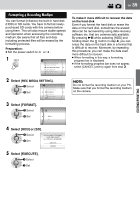
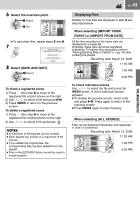
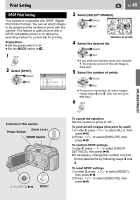
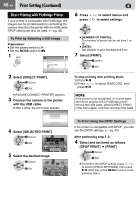
6 Select the insertion point. Select Set ● To add other files, repeat steps 5 and 6. 7 QUIT PLAYLIST SAVE EDITED CONTENTS? SAVE AND QUIT DELETE AND QUIT CANCEL 8 Select [SAVE AND QUIT]. Select Set To check a registered scene 1) Press after step 6 to move to the registered file column shown on the right. 2) Use / to select a file and press 49. 3) Press INDEX to return to the previous screen. To delete a registered scene 1) Press after step 6 to move to the registered file column shown on the right. 2) Use / to select a file and press . NOTES: ● A maximum of 99 playlists can be created. ● Each playlist can consist of a maximum of 99 scenes. ● If you delete the original files, the corresponding files are also deleted from the playlist. ● Files in the [EXTMOV] folder cannot be used to create playlists. EN 43 Displaying Files Details on how files are displayed in step 4 are described below. When selecting [IMPORT FROM EVENT] or [IMPORT FROM DATE] All the files recorded on the same date are displayed as a single file. Originally, these files cannot be registered separately. To register files separately, perform "Adding/Deleting Files in Playlist" (੬ pg. 44) after creating the playlist. Recording date: March 12, 2006 EDIT 11:00 AM 1:00 PM 3:00 PM To check individual scenes Use / to select the file and press the INDEX button. A list of individual scenes appears. ● To display the preview screen, select a file and press 49. Press again to return to the previous screen. ● Press INDEX again to stop checking. When selecting [ALL SCENES] Files can be displayed individually and registered in order of preference. Recording date: March 12, 2006 11:00 AM 1:00 PM 3:00 PM EDITING/PRINTING
-
 1
1 -
2
-
3
-
4
-
5
-
6
-
7
-
8
-
9
-
10
-
11
-
12
-
13
-
14
-
15
-
16
-
17
-
18
-
19
-
20
-
21
-
22
-
23
-
24
-
25
-
26
-
27
-
28
-
29
-
30
-
31
-
32
-
33
-
34
-
35
-
36
-
37
-
 38
38 -
 39
39 -
 40
40 -
 41
41 -
 42
42 -
 43
43 -
 44
44 -
 45
45 -
 46
46 -
 47
47 -
 48
48 -
49
-
50
-
51
-
52
-
53
-
54
-
55
-
56
-
57
-
58
-
59
-
60
-
61
-
62
-
63
-
64
-
65
-
66
-
67
-
68
-
69
-
70
-
71
-
72
 |
 |
