JVC LT47X579 Instructions - Page 27
Display continued, Notes - support
 |
UPC - 046838033308
View all JVC LT47X579 manuals
Add to My Manuals
Save this manual to your list of manuals |
Page 27 highlights
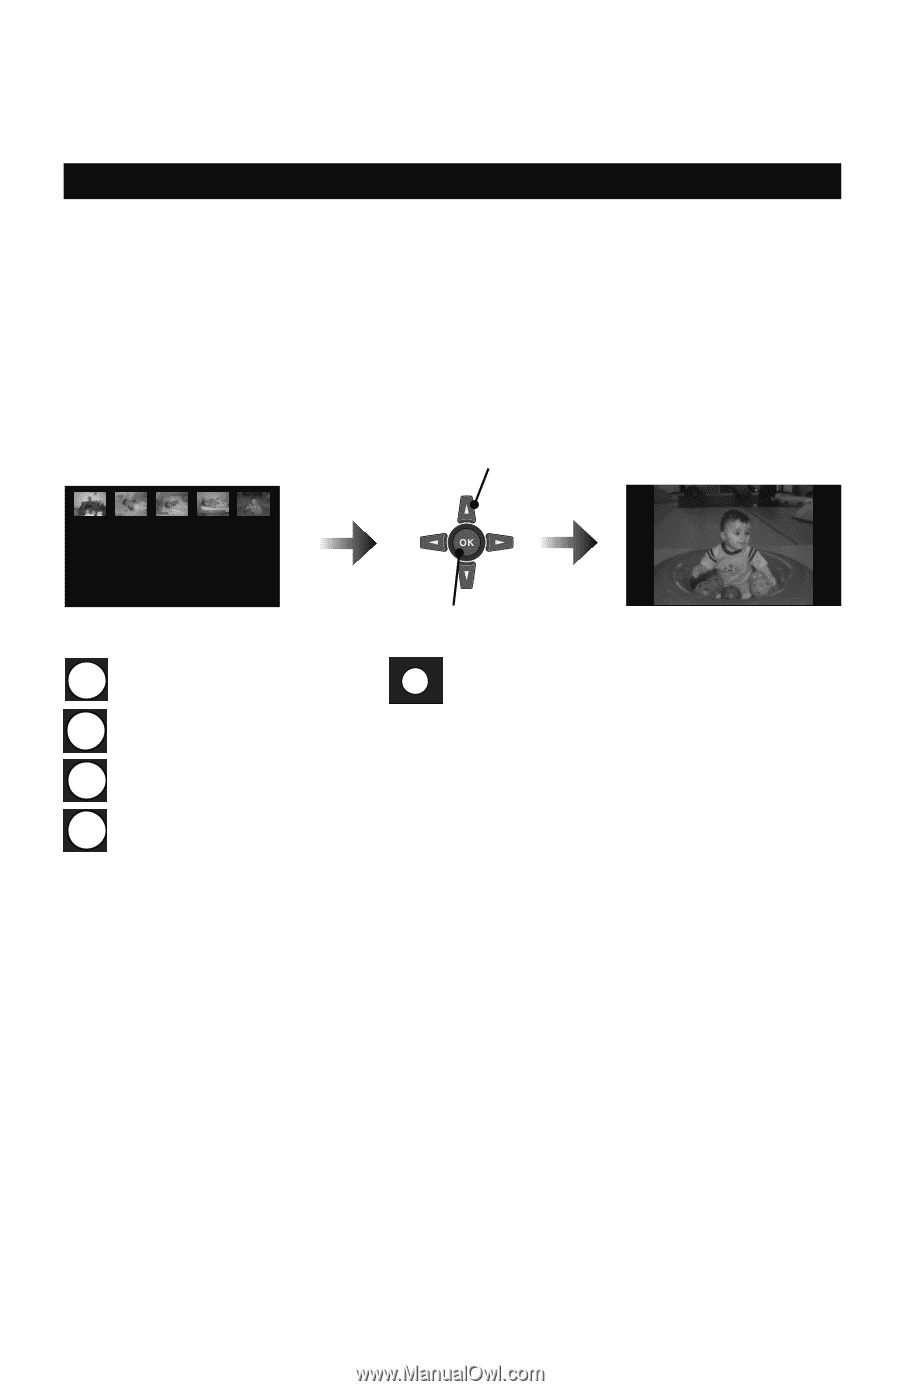
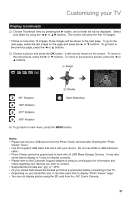
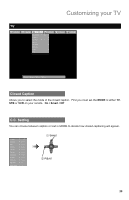
Customizing your TV Display (continued) 2) Choose Thumbnail View by pressing the ® button, and a folder list will be displayed. Select your folder by using the √ ® or π† buttons. The screen will show the first 10 images. * If there is more than 10 images, those images will be shown in the next page. To go to the next page, select the last image on the page and press the ® or † buttons. To go back to the previous page, press the √ or π buttons. 3) Choose a picture and press the OK button. It will now be shown on the screen. To move to the next picture, press the ® or † buttons. To move to the previous picture, press the √ or π buttons. 1 Select 2 Display 2 90º Rotation 4 180º Rotation 8 270º Rotation 6 360º Rotation TUNE Start Slideshow 4) To go back to main menu, press the MENU button. Notes: • Please pull out your USB device from the Photo Viewer terminal after finishing the "Photo Viewer" menu. • Use the supplied USB cable that came with your device. Do not use HUB or USB extension cable. • Photo Viewer cannot be guaranteed to work with all USB Mass Storage Devices. It may take some time to display or it may not display correctly. • Please refer to the Customer Support website at www.jvc.com/support for information and notes regarding your devices you wish to connect. • Supported file formats are ".jpg" or ".JPG". • All your stored data should be backed up first as a precaution before connecting to the TV. • Depending on your stored file size, it can take extra time to display "Photo Viewer" page. • You can not display photos using the SD card from the JVC Everio Camera. 27
-
 1
1 -
2
-
3
-
4
-
5
-
6
-
7
-
8
-
9
-
10
-
11
-
12
-
13
-
14
-
15
-
16
-
17
-
18
-
19
-
20
-
21
-
 22
22 -
 23
23 -
 24
24 -
 25
25 -
 26
26 -
 27
27 -
 28
28 -
 29
29 -
 30
30 -
 31
31 -
 32
32 -
33
-
34
-
35
-
36
-
37
-
38
-
39
-
40
-
41
-
42
-
43
-
44
-
45
-
46
-
47
-
48
-
49
-
50
-
51
-
52
 |
 |