JVC NX-PN10 Instruction Manual
JVC NX-PN10 Manual
 |
View all JVC NX-PN10 manuals
Add to My Manuals
Save this manual to your list of manuals |
JVC NX-PN10 manual content summary:
- JVC NX-PN10 | Instruction Manual - Page 1
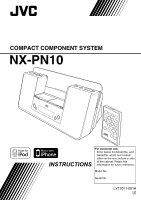
COMPACT COMPONENT SYSTEM NX-PN10 INSTRUCTIONS For customer use: Enter below the Model No. and Serial No. which are located either on the rear, bottom or side of the cabinet. Retain this information for future reference. Model No. Serial No. LVT2011-001A [J] - JVC NX-PN10 | Instruction Manual - Page 2
the system is on standby, the STANDBY lamp lights red. • When the system is turned on, the STANDBY lamp goes off. The power can be remote controlled. ATTENTION radiate radio frequency energy and, if not installed and used in accordance with the instructions, may cause harmful interference to radio - JVC NX-PN10 | Instruction Manual - Page 3
APPARATUS DOES NOT EXCEED THE CLASS B LIMITS FOR RADIO NOISE EMISSIONS FROM DIGITAL APPARATUS AS SET OUT IN THE , such as lighted candles, on the apparatus. • When discarding batteries, environmental problems must be considered and local rules or laws governing the disposal of these batteries - JVC NX-PN10 | Instruction Manual - Page 4
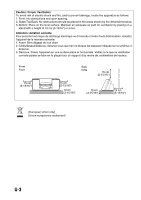
- dessous. 3. Dessous: Posez l'appareil sur une surface plane et horizontale. Veillez à ce que sa ventilation correcte puisse se faire en le plaçant sur un support d'au moins dix centimètres de hauteur. Front Face Side Côté G-3 - JVC NX-PN10 | Instruction Manual - Page 5
the Display Demonstration (Demo 6 Turning on the Power Automatically (Motion Sensor 6 Basic Operations 7 Main Unit 7 Remote Control 9 Playing Back from iPod Devices 12 Connecting iPod 13 Operations 14 Listening to FM Broadcasts 17 Basic Operations 17 Playing Back from Other Equipment - JVC NX-PN10 | Instruction Manual - Page 6
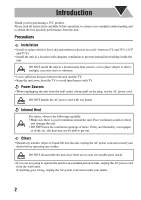
Introduction Thank you for purchasing a JVC product. Please read all instructions carefully before operation, to ensure your dealer before operating any further. DO NOT disassemble the unit since there are no user serviceable parts inside. • If you are not going to operate the unit for an extended - JVC NX-PN10 | Instruction Manual - Page 7
Started • In this manual, operations using the remote control are mainly explained; however, you can use the buttons and controls on the unit if they have the same (or similar) name and marks. • In this manual, "iPod" means both iPod and iPhone devices. When iPhone device is especially mentioned - JVC NX-PN10 | Instruction Manual - Page 8
Connections Do not connect the AC power cord until all other connections have been made. Connecting the Antenna FM antenna (supplied): Extend it so that you can obtain the best reception. For better FM reception Disconnect the supplied FM antenna and connect to an outdoor FM antenna using a 75 Ω - JVC NX-PN10 | Instruction Manual - Page 9
/picture from iPod on your TV, use a composite video cord (not supplied) to connect the VIDEO OUT jack on the unit and the composite video input on your TV. • After you have connected the unit, change the video input mode on your TV. For details, also refer to the instruction manual for your - JVC NX-PN10 | Instruction Manual - Page 10
object closer to Motion sensor (P.7), the unit turns on automatically. • iPod starts playback or an FM broadcast is received if you selected either activate Motion Sensor. " M.S ON" appears on the display. • When you select Clock as the display information or the unit is on standby, " " is shown on - JVC NX-PN10 | Instruction Manual - Page 11
Main Unit Basic Operations Illumination panel (P.10) Dock A (P.13) Dock B (P.13) STANDBY lamp Display (P.8) Motion sensor (P.6) Remote control sensor Operating on the Main Unit Buttons Operations Turns on or off (standby) the power. Activates or deactivates Motion Sensor (P.6). 7 - JVC NX-PN10 | Instruction Manual - Page 12
skip. Hold down: Reverse search/forward search. • FM (P.17): Tunes in to a station. • Changes the source to iPod /iPod (P.14). • Starts playback and pauses for iPod (P.14). Changes the source to FM (P.17) or AUDIO IN (P.19). FM AUDIO IN Adjusts the volume level (VOL MIN/VOL 0 to VOL MAX/VOL 30 - JVC NX-PN10 | Instruction Manual - Page 13
monaural reception mode is activated. Lights up when an FM station of sufficient signal strength is tuned in. Lights up when 21). • 1/2/3 icon flashes while Timer is working. Lights up when Sleep Timer is activated (P.11). Remote Control P.11 P.20, P.22 P.14, P.20, P.22 P.14, P.17, P.18 P.15, P.18 - JVC NX-PN10 | Instruction Manual - Page 14
iPod A/iPod B/AUDIO IN: Source name Clock Day of the week • For FM: Frequency Clock Day of the week • When the unit is turned off: Clock Day of the week Changes the source to FM (P.17) or AUDIO IN (P.19). • Changes the source to iPod /iPod (P.14). • Starts playback and pauses for iPod - JVC NX-PN10 | Instruction Manual - Page 15
To turn off the unit after a certain period of time-Sleep Timer Press repeatedly to specify the time (in minutes) as follows: 10 20 30 60 90 OFF 180 (Canceled) 150 120 • To check the time remaining before the shut-off time, press SLEEP once. If you press the button repeatedly, you can change - JVC NX-PN10 | Instruction Manual - Page 16
web site . • JVC does not assure the compatibility of iPod released after April 2009 with this unit. • iPod is a trademark of Apple Inc., registered in the U.S. and other countries. • iPhone is a trademark of Apple Inc. • "Made for iPod" means that an electronic accessory has - JVC NX-PN10 | Instruction Manual - Page 17
About the battery charge of iPod The battery of iPod is always charged through the unit except when the unit is in ECO mode (see page 10). • When 2 iPod devices are connected, both batteries are charged at the same time. • For details of the battery charging, see the instruction manual for iPod. 13 - JVC NX-PN10 | Instruction Manual - Page 18
the instruction manual for iPod. • For iPhone and iPod touch Operate iPhone or iPod touch itself in the following cases: - when operating the home button - when selecting application icons on the home screen - when dragging the slider Buttons On the unit On the remote Operations Control of iPod - JVC NX-PN10 | Instruction Manual - Page 19
Buttons On the unit On the remote - Operations Confirms an item on the menu/screen. Control of iPod Center button* Press: Applies Shuffle Play to iPod or iPod selected as the source. Select the desired shuffle mode. "SHUFFLE" appears for a while. • The shuffle icon lights up on the display - JVC NX-PN10 | Instruction Manual - Page 20
on operating iPod, see the instruction manual for iPod. • Turn off the unit when disconnecting iPod. • Remove iPod from the dock when you do not use it. • When you cannot operate iPod connected through the unit or using the remote control, operate iPod itself. • After connecting iPod, wait until - JVC NX-PN10 | Instruction Manual - Page 21
the unit On the remote Operations Selects FM as the source. FM AUDIO IN When an FM program is broadcasted in stereo, ST (stereo) lights up on the display (only when the reception is good). Press: Changes the frequency. Hold down and release: The unit starts searching for stations and stops when - JVC NX-PN10 | Instruction Manual - Page 22
on the display for a few seconds. • Complete the following operations while the indication is flashing. Select a preset number for the station you want to store. 4 5 Store the station. "STORED" appears on the display for a while. NOTES: • When you unplug the AC power cord or if a power failure - JVC NX-PN10 | Instruction Manual - Page 23
(not supplied), you can connect other equipment with analog audio output jacks, such as a portable audio player, etc. To headphones or audio out Portable audio player Stereo mini plug cord (not supplied) Rear side • Refer to the instruction manual supplied with the equipment. NOTE: Make sure the - JVC NX-PN10 | Instruction Manual - Page 24
loses the setting and is reset to "AM12:00." You need to adjust the clock again. Using Timer Using Timer, you can wake up with music, etc. • Deactivate Motion Sensor when you use Timer (P.6) . • When using iPod or other equipment as the playback source, connect it to the unit beforehand. (P.13 - JVC NX-PN10 | Instruction Manual - Page 25
iPod A," "iPod B," "FM" or "AUDIO IN." • When "FM" is selected, select the preset number of the station you want to 5 listen to. When you select "FM - - " the preset station (on standby). • To exit from Timer setting, press CLOCK/TIMER as required. • To correct a misentry during the process, - JVC NX-PN10 | Instruction Manual - Page 26
To Cancel Timer Select Timer you want to cancel. TIMER 1 TIMER 2 1 TIMER 3 2 "CANCEL" flashes on the display. The icon and the timer number indicator (1/2/3) disappear. NOTE: The settings you have made are memorized though you cancel Timer. To Turn off the Timer Sound briefly-Snooze Using - JVC NX-PN10 | Instruction Manual - Page 27
the video input mode on your TV. For details, refer to the instruction manual for your TV. Unable to operate the unit from the remote control. The path between the remote control and the remote sensor on the unit is blocked. Point it at the remote sensor on the front panel. Signals cannot reach the - JVC NX-PN10 | Instruction Manual - Page 28
8 Ω (10%THD) Terminals AUDIO IN Input Sensitivity/Impedance (1 kHz): LEVEL 1: 500 mV/47 kΩ LEVEL 2: 315 mV/47 kΩ LEVEL 3: 125 mV/47 kΩ Dock A and B for iPod/iPhone Compatible iPod/iPhone models: See page 12. Output power (each iPod dock): DC 5 V 500 mA VIDEO OUT (For iPod/iPhone) Composite Tuner FM - JVC NX-PN10 | Instruction Manual - Page 29
Do not attempt to service the product yourself - JVC NX-PN10 | Instruction Manual - Page 30
- JVC NX-PN10 | Instruction Manual - Page 31
EN © 2009 Victor Company of Japan, Limited 0409YAMMDWBET NX-PN10 COMPACT COMPONENT SYSTEM
-
 1
1 -
 2
2 -
 3
3 -
 4
4 -
 5
5 -
 6
6 -
 7
7 -
8
-
9
-
10
-
11
-
12
-
13
-
14
-
15
-
16
-
17
-
18
-
19
-
20
-
21
-
22
-
23
-
24
-
25
-
26
-
27
-
28
-
29
-
30
-
31
 |
 |

COMPACT COMPONENT SYSTEM
NX-PN10
INSTRUCTIONS
LVT2011-001A
[J]
For customer use:
Enter below the Model No. and
Serial No. which are located
either on the rear, bottom or side
of the cabinet. Retain this
information for future reference.
Model No.
Serial No.