Jabra PRO 9450 Quick Start Guide - Page 5
Setup - battery
 |
View all Jabra PRO 9450 manuals
Add to My Manuals
Save this manual to your list of manuals |
Page 5 highlights
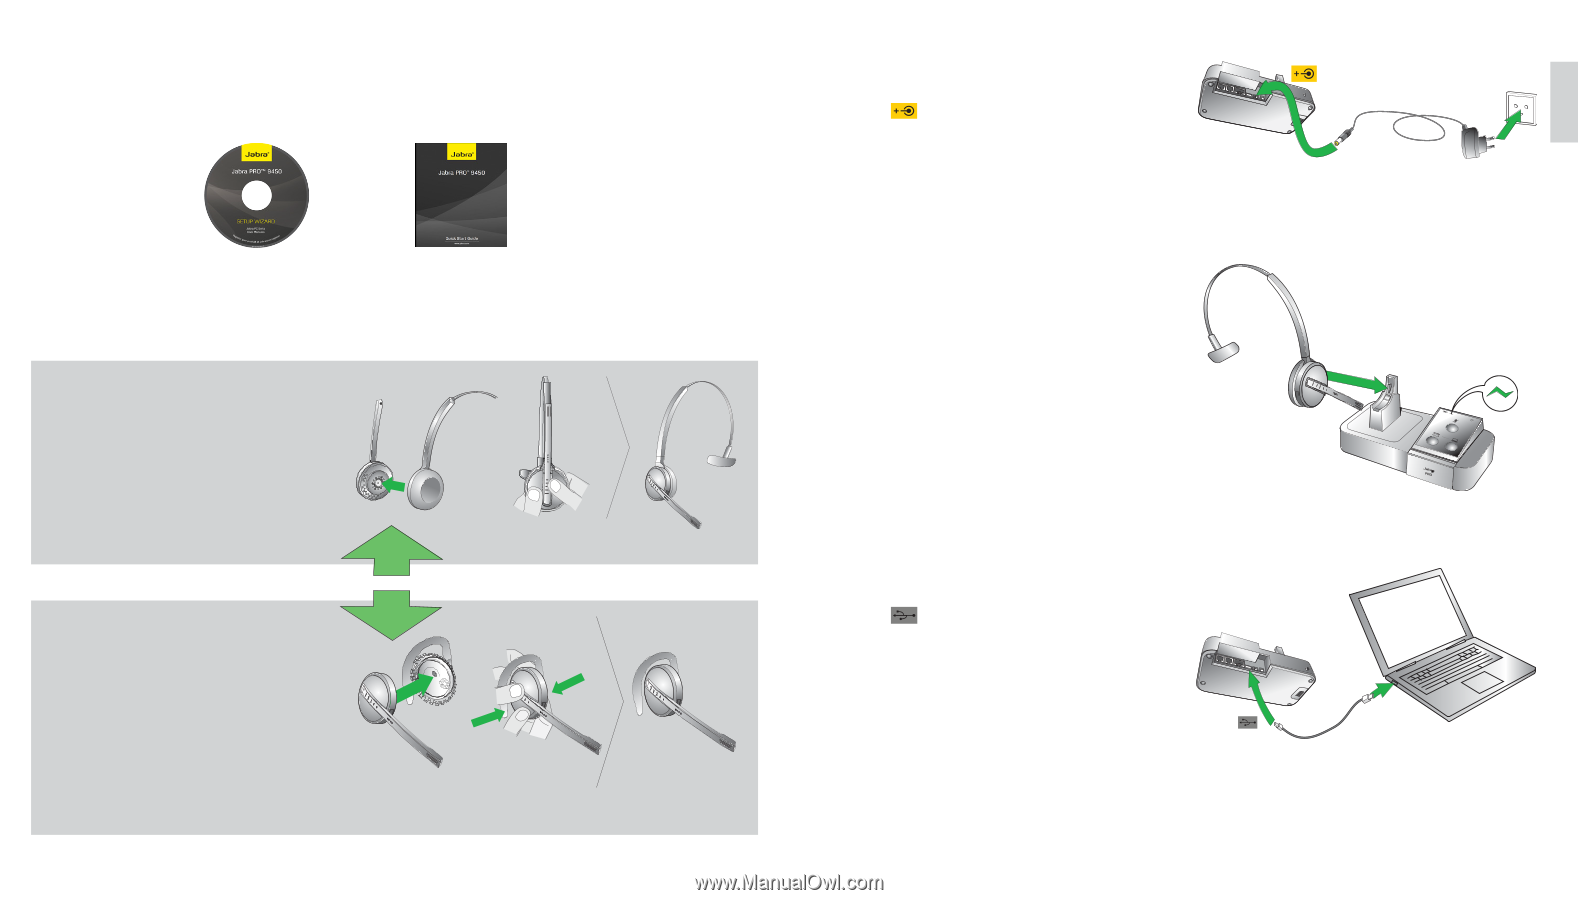
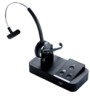
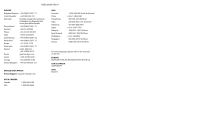
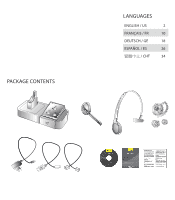
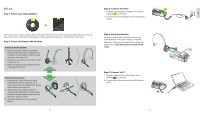
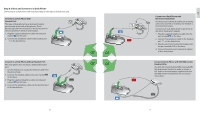
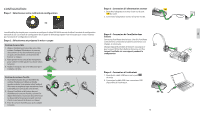
SETUP Step 1: Select your Setup Method or The easiest way to connect and configure the Jabra PRO 9450 is to use the Interactive Setup Wizard on the CD. The setup section of this quick start guide is only needed if the Interactive Setup Wizard is not used. Step 2: Select and Prepare the Headset Attaching the Headband 1. Align the headset and the headband wearing-style attachment, as illustrated, and press firmly together until they click into place (snap-to-click). 2. Rotate the microphone boom arm for left or right ear use. 3. Adjust the length of the headband to fit snug against the head. or Attaching the Earhook or 1. Assemble the earhook wearing-style attachment for left or right ear use. If necessary, remove the earbud and replace with another size for best fit. 2. Align the headset and the earhook wearing-style attachment, as illustrated, and press firmly together until they click into place (snap-to-click). 3. Shape the earhook to fit snug around the ear. 4 Step 3: Connect to Power 1. Plug the supplied power adapter into the port marked on the base. 2. Connect the power adapter to the mains power socket. Step 4: Dock the Headset Dock the headset. When docked correctly the headset battery will begin charging, if needed. Charge for 20 minutes or until battery indicator is steady green. Keep the headset docked during setup. Step 5: Connect to PC 1. Plug the supplied USB cable into the port marked on the base. 2. Connect the USB cable to any free USB slot on the PC. 5 US
-
 1
1 -
 2
2 -
 3
3 -
 4
4 -
 5
5 -
 6
6 -
 7
7 -
 8
8 -
 9
9 -
 10
10 -
 11
11 -
12
-
13
-
14
-
15
-
16
-
17
-
18
-
19
-
20
-
21
-
22
-
23
 |
 |