Kenmore 4433 Use and Care Guide - Page 5
Sides & Top - dishwasher
 |
View all Kenmore 4433 manuals
Add to My Manuals
Save this manual to your list of manuals |
Page 5 highlights
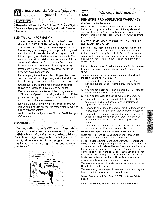
This Owner's Guide provides specific operating instructions for your model. Use the refrigerator only as instructed in this Use & Care Manual. Before starting the refrigerator, follow these important first steps. LOCATION • Choose a place that is near a grounded electrical outlet. Do Not use an extension cord or an adapter plug. • If possible, place the refrigerator out of direct sunlight and away from the range, dishwasher or other heat sources. The refrigerator must be installed on a floor that is level and strong enough to support a fully loaded refrigerator. Consider water supply availability for models equipped with an automatic ice maker. INSTALLATION TOE GRILLE iNSTALLATION / REMOVAL Open both doors and remove the toe grille by unscrewing its two mounting screws and gently pulling forward (see illustration). Replace the toe grille by fitting it into place and refastening its mounting screws. S Installation Clearances • Allow the following clearances for ease of installation, proper air circulation, and plumbing and electrical connections: Sides & Top 3/8" Back 1" DOOR OPENING LEVELING All four corners of your refrigerator must rest firmly on a solid floor. Your refrigerator is equipped with adjustable front rollers to help level your unit. To ensure proper door seal and assist door closing, the refrigerator should be tilted 1/4" (6 mm), front to back. To Level Your Refrigerator: 1. Remove toe grille. 2. Use flat-blade screwdriver or 3/8" socket wrench to adjust front rollers. Your refrigerator should be positioned to allow easy access to a counter when removing food. For best use of drawers and freezer baskets, the refrigerator should be in a position where both the refrigerator and freezer doors can be fully opened. 3. Check both doors to be sure seals touch cabinet on all four sides.
-
 1
1 -
 2
2 -
 3
3 -
 4
4 -
 5
5 -
 6
6 -
 7
7 -
 8
8 -
 9
9 -
 10
10 -
 11
11 -
12
-
13
-
14
-
15
-
16
-
17
-
18
-
19
-
20
-
21
-
22
-
23
-
24
-
25
-
26
-
27
 |
 |
