Kenmore 8787 Use and Care Guide
Kenmore 8787 - Elite HE3 7.0 cu. Ft. Electric Dryer Manual
 |
View all Kenmore 8787 manuals
Add to My Manuals
Save this manual to your list of manuals |
Kenmore 8787 manual content summary:
- Kenmore 8787 | Use and Care Guide - Page 1
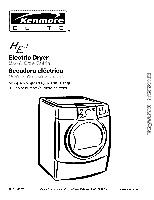
® Electric Dryer Secadora el_ctrica Models/Modelos 110.8787#, 8789# # = color number/nOmero de color W10114657 Sears Roebuck and Co., Hoffman Estates, IL 60179 U.S.A. www.sears.com - Kenmore 8787 | Use and Care Guide - Page 2
Lint Screen 25 Cleaning the Dryer Interior 25 Removing Accumulated Lint 25 Vacation and Moving Care 25 Changing the Drum Light 26 TROUBLESHOOTING 26 SERVICE NUMBERS BACK COVER Master Protection Agreements Congratulations on making a smart purchase. Your new Kenmore ®product is designed and - Kenmore 8787 | Use and Care Guide - Page 3
KENMORE ELITE®APPLIANCE WARRANTY ONE YEAR LIMITED WARRANTY When installed, operated and maintained according to all instructions supplied with the product, if this appliance A service technician to instruct the user in correct product installation, operation or maintenance. 3. A service technician - Kenmore 8787 | Use and Care Guide - Page 4
DRYER SAFETY Your safety and the safety of others are very important. We have provided many important safety messages in this manual and on your appliance part of the dryer or attempt any servicing unless specifically recommended in this Use and Care Guide or in published user-repair instructions - Kenmore 8787 | Use and Care Guide - Page 5
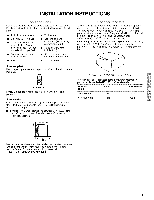
the required tools and parts before starting installation. Read and follow the instructions provided with any tools listed here. • Flat-blade screwdriver • #2 Phillips screwdriver • Adjustable wrench that opens to 1" (2.54 cm) or hex-head socket wrench (for adjusting dryer feet) • Wire stripper - Kenmore 8787 | Use and Care Guide - Page 6
floor to support the total dryer weight of 200 Ibs (90.7 kg). The combined weight of a companion appliance should also be considered. A level floor with a maximum slope of 1" (2.5 cm) under entire dryer. (If slope is greater than 1" [2.5 cm], install Extended Dryer Feet Kit, Part Number 279810 - Kenmore 8787 | Use and Care Guide - Page 7
spacing for recessed or closet installation, with stacked washer and dryer The dimensions shown are for the recommended spacing. 48 Part 280). Mobile home installations require: • Metal exhaust system hardware, which is available for purchase from your local Sears store or Sears Service - Kenmore 8787 | Use and Care Guide - Page 8
dryer cabinet is isolated from the neutral conductor. A 4-wire power supply connection must be used when the appliance long. GROUNDING iNSTRUCTiONS [] For a grounded, cord-connected dryer: This dryer must be grounded. service representative or personnel if you are in doubt as to whether the dryer is - Kenmore 8787 | Use and Care Guide - Page 9
Power Supply Cord li!!ect sica !s cot n Direct Wire Fire Hazard Use a new UL listed 30 amp power supply cord. Use a UL listed strain relief. Disconnect power before making electrical connections. Connect neutral wire (white or center wire) to center terminal (silver). Ground wire (green or bare - Kenmore 8787 | Use and Care Guide - Page 10
strain relief. The strain relief should have a tight fit with the dryer cabinet and be in a horizontal position. Do not further tighten listed strain relief G. Ring terminals 4. Now complete installation following instructions for your type of electrical connection: 4-wire (recommended) 3-wire - Kenmore 8787 | Use and Care Guide - Page 11
of 3-wire connections. Direct wire cable must have 5 ft (1.52 m) of extra length so dryer can be moved if needed. Strip 5" (12.7 cm) of outer covering from end of relief screws. 6. Insert tab of terminal block cover into slot of dryer rear panel. Secure cover with hold-down screw. 7. You have - Kenmore 8787 | Use and Care Guide - Page 12
wire Use where local codes permit connecting cabinet-ground conductor to neutral wire. Direct wire cable must have 5 ft (1.52 m) of extra length so dryer can be moved if needed. Strip 31/2'' (8.9 cm) of outer covering from end of cable. Strip insulation back 1" (2.5 cm). If using 3-wire cable with - Kenmore 8787 | Use and Care Guide - Page 13
to outer terminal block screws. Tighten screws. !! !! ----= 4. Tighten strain relief screw. 5. Insert tab of terminal block cover into slot of dryer rear panel. Secure cover with hold-down screw. 6. You have completed your electrical connection. Now go to "Venting Requirements." 4= Tighten strain - Kenmore 8787 | Use and Care Guide - Page 14
instructions can result in death or fire. WARNING: To reduce the risk of fire, this dryer MUST BE EXHAUSTED OUTDOORS. IMPORTANT: Observe all governing codes and ordinances. The dryer flexible heavy metal vent. • Review Vent system chart. Modify existing extended and supported when the dryer is in - Kenmore 8787 | Use and Care Guide - Page 15
problems and health problems. Choose your exhaust installation type Recommended exhaust installations Typical installations vent the dryer from the rear of the dryer . Failure to follow these instructions can result in death, fire, electrical shock, or serious injury. A. Dryer B. Elbow C. Wall D. - Kenmore 8787 | Use and Care Guide - Page 16
26-49900 Periscope Installation (For use with dryer vent to wall vent mismatch): Part Number 26-49901 - Less than 5" (12.7 cm) mismatch Part Number 26-49908 - 5" (12.7 cm) to 18" (45.72 cm) mismatch Part Number 26-49904 - 18" (45.72 cm) to 29" (73.66 cm) mismatch Part Number 26-49905 - 29" (73.66 - Kenmore 8787 | Use and Care Guide - Page 17
no kinks in the flexible gas line. 4. Once the exhaust vent connection is made, remove the corner posts and cardboard. Check the levelness of the dryer. Check levelness first side to side, then front to back. 5. Lift the inner door assembly off of the outer door assembly. Set the outer door - Kenmore 8787 | Use and Care Guide - Page 18
Guide and apply over original hinge holes. A. Dryer door B. Dryer front panel C. Insert this hinge screw first. 5. Close the door and check that it latches securely. 6. Check for fingerprints on the glass. Clean the glass if necessary. w........ . 1. Check that all parts - Kenmore 8787 | Use and Care Guide - Page 19
dryer. Do not dry anything that has ever had anything flammable on it (even after washing). Failure to follow these instructions INSTRUCTIONS before operating this appliance. Follow these basic steps to start your dryer. Please refer to specific sections of this manual Hazard No washer can completely - Kenmore 8787 | Use and Care Guide - Page 20
a fabric softener sheet. Follow package instructions. • To reduce wrinkling, remove the load from the dryer as soon as tumbling stops. This or Timed Cycles Preset Settings chart (in the "Cycles" section) for a guide to drying various loads. • Drying temperature and Dryness Level are preset when you - Kenmore 8787 | Use and Care Guide - Page 21
Cycle, the Wet light will glow green after 5 minutes and remain on until the dryer enters Cool Down. Damp The Damp light glows green in an Auto Cycle when Options." Cool Down The Cool Down light glows green during the cool down part of the cycle. Laundry cools for ease in handling. Clothes Dry The - Kenmore 8787 | Use and Care Guide - Page 22
to 2 hours of heat-free, periodic tumbling at the end of a cycle. • Stop WRINKLE GUARD ® at any time by pressing WRINKLE GUARD ® or opening the dryer door. • For the Casual cycle, WRINKLE GUARD ®is preset to ON. The other cycles will retain the WRINKLE GUARD ®setting. For example, if you select - Kenmore 8787 | Use and Care Guide - Page 23
Modifier and/or Option. 3. Press and hold START to continue the cycle. NOTE: If you happen to press Stop twice, the program clears and your dryer shuts down. Restart the selection process. Changing the Preset Dryness Level Settings If all of your loads on all Auto Dry cycles are consistently not - Kenmore 8787 | Use and Care Guide - Page 24
when the drying cycle is finished. Promptly removing clothes at the end of the cycle reduces wrinkling. 2. Place dryer rack over the bottom of the dryer door opening. Rest the back wire on the dryer back ledge. Push down on the frame front to secure over lint screen. Soft I Ooffud Cycle Sgnal HOLD - Kenmore 8787 | Use and Care Guide - Page 25
CARE Keep dryer area clear and free from items that would obstruct the flow of combustion and ventilation air. To wash 1. Roll lint off the Explosion Hazard Keep flammable materials and vapors, such as gasoline, away from dryer. Place dryer at least 18 inches (46 cm) above the floor for a garage - Kenmore 8787 | Use and Care Guide - Page 26
counterclockwise. Replace the bulb with a 10-watt appliance bulb only. Replace the cover and secure with the screw. 4. Plug in dryer or reconnect power. TROUBLESHOOTING First try the solutions suggested here and possibly avoid the cost of a service call... Dryer will not run Has a fuse blown, or - Kenmore 8787 | Use and Care Guide - Page 27
openings at the top and bottom of the door. The front of the dryer requires a minimum of 1" (2,5 cm) of airspace, and, for most installations, the rear of the dryer requires 5" (12.7 cm). See "Installation Instructions." • Has an air dry cycle been selected? Select the right cycle for the - Kenmore 8787 | Use and Care Guide - Page 28
54 NUMEROS DE SERVICIO CONTRAPORTADA CONTRATOS DE PROTECCION Contratos Maestros de Proteccibn iFelicitaciones por su inteligente adquisici6n! Su nuevo producto Kenmore ®ha sido diser_ado y fabricado para brindarle a_os de funcionamiento confiable. Pero al igual que todos los productos, puede - Kenmore 8787 | Use and Care Guide - Page 29
GARANTJA DE LOS ELECTRODOMI STICOS KENMORE ELITE GARANTIA LIMITADA DE UN AI_IO Cuando este electrodomestico haya sido instalado, operado y mantenido segt]n las instrucciones provistas con el producto, si este electrodomestico falla por - Kenmore 8787 | Use and Care Guide - Page 30
. Heroes incluido muchos mensajes importantes de seguridad en este manual yen su electrodomestico. Lea y obedezca siempre todos los mensajes las areas adyacentes a esta apertura sin pelusa, polvo o tierra. [] La parte interior de la secadora y el ducto de escape se deben limpiar peri6dicamente. - Kenmore 8787 | Use and Care Guide - Page 31
INSTRUCCIONES DE INSTALACION ReL_nalas herramientas y piezas necesarias antes de comenzar la instalaci6n. Lea y siga las instrucciones provistas con cualquiera de las herramientas enlistadas aqui. Destornillador de hoja • Nivel plana • Abrazaderas para ducto Destornillador Phillips # 2 - Kenmore 8787 | Use and Care Guide - Page 32
colocar la secadora a una altura minima de 18" (46 cm) encima del piso. Siva a usar un pedestal, necesitara 18" (46 cm) hasta la parte inferior de la secadora, No ponga a funcionar su secadora en temperaturas que sean inferiores a 45°F (7°C), A temperaturas inferiores, es posible que la secadora no - Kenmore 8787 | Use and Care Guide - Page 33
de la secadora. (12,7 cm) (80,0 cm) (2,6 cm) (2,5 cm)(68,6 cm)(2,5 cm) * Espacio necesario **Para la ventilaci6n lateral o por la parte inferior, se permite 0" (0 cm) de espacio. Recomendaciones de espacios de instalacibn para instalacibn empotrada o en armario, con lavadora y secadora apiladas - Kenmore 8787 | Use and Care Guide - Page 34
Conexibn el_ctrica Para instalar su secadora adecuadamente, usted debe determinar el tipo de conexi6n electrica que va a usar y seguir las instrucciones que aqui se proveen para el caso. [] Si los c6digos locales no permiten la conexi6n de un conductor para conexi6n a tierra del equipo al alambre - Kenmore 8787 | Use and Care Guide - Page 35
Cable de suministro el_ctrico Cable directo Peligro de Incendio Use un cable de suministro eleetrico nuevo de 30 amperes que este en la lista de UL Use un protector de cables que este en la Ista de UL. Desconecte el suministro eleetrico antes de hacer las conexiones electrieas. Conecte el alambre - Kenmore 8787 | Use and Care Guide - Page 36
• Haga pasar el cable de suministro electrico a traves del protector de cables. AsegQrese de que el aislamiento de alambre del cable de suministro electrico este dentro del protector de cables. El protector de cables debera encajar bien con el gabinete de la secadora y estar en posici6n horizontal. - Kenmore 8787 | Use and Care Guide - Page 37
Saque el hilo neutro de puesta a tierra del tornillo conductor de tierra externo. Conecte el hilo neutro de puesta a tierra y el hilo neutro (hilo blanco o central) del cable de suministro de energia debajo del tornillo central de color plateado del bloque de terminal. Apriete el tornillo. 7. Usted - Kenmore 8787 | Use and Care Guide - Page 38
3, Conecte el hilo de tierra (verde o desnudo) del cable de conexi6n directa al tornillo del conductor de tierra externo. Apriete el tornillo. 1. Afloje o saque el tornillo central de color plateado del bloque de terminal. 2. Conecte el hilo neutro (hilo blanco o central) del cable de suministro - Kenmore 8787 | Use and Care Guide - Page 39
AI conectar el hilo al bloque de terminal, coloque el extremo del hilo en forma de gancho debajo del tornillo del bloque de terminal (con el gancho mirando hacia la derecha). Apriete y junte el extremo en forma de gancho y apriete el tornillo, come se muestra. 1. Afloje o saque el tornillo central - Kenmore 8787 | Use and Care Guide - Page 40
c(®qs stos < de v@l_t 8C ©_ Ducto de escape de metal rigido • Para un 6ptimo rendimiento de secado, se recomiendan ductos de escape de metal rfgido. • Se recomienda el ducto de escape de metal rfgido para evitar que se aplaste o se tuerza. Peligro de Incendio Use un ducto de escape de metal - Kenmore 8787 | Use and Care Guide - Page 41
salud. Instalaciones opcionales de escape Esta secadora puede ser adaptada con el escape hacia el lade derecho, hacia el lado izquierdo o en la parte inferior. P6ngase en contacto con su distribuidor local para hacer convertir su secadora. Peligro de Incendio Cubra los orificios de escape no ussdos - Kenmore 8787 | Use and Care Guide - Page 42
juegos para instalaciones alternas en espacios limitados. Para mas informaci6n, por favor Ilame al 1-800-4-MY-HOME ® (1-800-469-4663). • Instalaci6n en la parte superior: Pieza nQmero 26-49900 • Instalaci6n de periscopio (Para usar si hay desacoplo entre el ducto de escape de la secadora y el ducto - Kenmore 8787 | Use and Care Guide - Page 43
Peligro de Peso Excesive Use dos e mas personas para mover e instalar la secadora. No seguir esta instrucci6n puede ocasionar una lesion en la espalda u otto tipo de lesiones. 1. Para proteger el piso, use un pedazo grande y piano de cart6n del empaque de la secadora. Coloque el cart6n debajo de - Kenmore 8787 | Use and Care Guide - Page 44
4= Coloque la puerta de la secadora en una superficie plana y protegida con el conjunto interno de la puerta boca arriba. Quite los 5 tornillos para separar el conjunto externo de la puerta del conjunto interno de la puerta, tal como se indica a continuacidn. Vea la ilustraci6n. Es importante que - Kenmore 8787 | Use and Care Guide - Page 45
de la puerta con los 5 tornillos. Saque la etiqueta que esta del lado opuesto de la puerta y desechela. Busque la etiqueta provista con el Manual de uso y cuidado, y aplfquela sobre los orificios de bisagra originales. Alinee la puerta colocando las lengQetas de ubicacidn en la bisagra con los - Kenmore 8787 | Use and Care Guide - Page 46
antes de operar el aparato. Siga estos pasos basicos para poner su secadora en marcha. Por favor consulte las secciones especificas de este manual para obtener informaci6n mas detallada. 1. Limpie el filtro de pelusa antes de cada carga. Vea "Limpieza del filtro de pelusa". 2. Coloque la ropa - Kenmore 8787 | Use and Care Guide - Page 47
Para hacer cambios durante un ciclo automatico: Presione Parada (STOP) una vez. Ajuste el nivel de secado. NOTA: Las selecciones de nivel de sequedad (Dryness Level) funcionan 0nicamente con los ciclos automaticos. Puede seleccionar un nivel de sequedad diferente seg0n la carga, presionando Nivel de - Kenmore 8787 | Use and Care Guide - Page 48
Si desea, agregue una hoja de suavizante de telas. Siga las instrucciones del paquete, Quite la carga de la secadora tan pronto se detenga la rotaci6n para reducir la formaci6n de arrugas. Esto es de especial importancia para los tejidos de planchado permanente, de punto y de fibras sinteticas, - Kenmore 8787 | Use and Care Guide - Page 49
durante el ciclo. • Seque el artfculo por completo. Las almohadas de goma espuma tardan en secar. Ajustes de ciclos prefijados manuales i Ciclos manuales Tipo de carga Temperatura por omisi6n Tiempo por omisi6n (Minutos) Secado programado Alta (High) 40 (TIMED DRY) Ropa pesada, ropa - Kenmore 8787 | Use and Care Guide - Page 50
Usted puede personalizar sus ciclos al seleccionar opciones. ")_°Drum Light O Luz del tambor (Drum Light) Oprima la luz del tambor (Drum Light) para encender la luz que esta dentro del tambor de la secadora. Durante un ciclo, si se selecciona la luz del tambor, esta se enciende y permanecera - Kenmore 8787 | Use and Care Guide - Page 51
. Para usar el estante t_rmico: No quite el filtro de pelusa. 1. Abra la puerta de la secadora. Coloque el estante de secado encima de la parte inferior de la abertura de la puerta de la secadora. Coloque el alambre posterior sobre el reborde posterior de la secadora. Empuje hacia abajo el - Kenmore 8787 | Use and Care Guide - Page 52
3= Coloque los articulos mojados encima del estante. Deje espacio alrededor de los articulos para que circule el aire. El estante no se mueve, pero el tambor rotara. AsegQrese que los art[culos no cuelguen por los bordes o entre las rejillas del estante. 4. Cierre la puerta. 5. Rote la perilla al - Kenmore 8787 | Use and Care Guide - Page 53
3. Moje un cepillo de nailon con agua caliente y detergente lquido. Refriegue el filtro de pelusa con el cepillo para quitar la acumulaciin de residuos. Para secadoras con cableado directo: 4. Enjuague el filtro con agua caliente. 5. Seque meticulosamente el filtro de pelusa con una toalla limpia. - Kenmore 8787 | Use and Care Guide - Page 54
que se escuche un sonido fuerte durante los primeros minutos de funcionamiento. &Hay una moneda, bot6n o sujetapapeles entre el tambor y la parte frontal o trasera de la secadora? Revise los bordes frontales y traseros del tambor para verificar si hay objetos pequer_os. Limpie los bolsillos antes - Kenmore 8787 | Use and Care Guide - Page 55
puertas del armario deben tener aberturas de ventilaci6n en la parte superior e inferior de la puerta. La parte anterior de la secadora necesita un minimo de 1" (2,5 cm) de espacio y, para la mayoria de las instalaciones, la parte trasera necesita 5" (12,7 cm). Vea "lnstrucciones de instalaci6n". _, - Kenmore 8787 | Use and Care Guide - Page 56
replacement parts, accessories and owner's manuals that you need to do-it-yourself. For Sears professional installation of home appliances and items W10114657 © 2006 Sears Brands, LLC ® Regis. tered Trademark / TMTrademark / s_l Servic. e Mark of Sears Brands, LLC ® Marca regl.strada / TMMarca de
-
 1
1 -
 2
2 -
 3
3 -
 4
4 -
 5
5 -
 6
6 -
 7
7 -
8
-
9
-
10
-
11
-
12
-
13
-
14
-
15
-
16
-
17
-
18
-
19
-
20
-
21
-
22
-
23
-
24
-
25
-
26
-
27
-
28
-
29
-
30
-
31
-
32
-
33
-
34
-
35
-
36
-
37
-
38
-
39
-
40
-
41
-
42
-
43
-
44
-
45
-
46
-
47
-
48
-
49
-
50
-
51
-
52
-
53
-
54
-
55
-
56
 |
 |
®
Electric
Dryer
Secadora
el_ctrica
Models/Modelos
110.8787#,
8789#
#
= color
number/nOmero
de
color
W10114657
Sears Roebuck
and Co., Hoffman
Estates,
I
L 60179 U.S.A.
www.sears.com