Kenwood TS-590S User Manual
Kenwood TS-590S Manual
 |
View all Kenwood TS-590S manuals
Add to My Manuals
Save this manual to your list of manuals |
Kenwood TS-590S manual content summary:
- Kenwood TS-590S | User Manual - Page 1
INSTRUCTION MANUAL HF/ 50 MHz ALL MODE TRANSCEIVER TS-590S NOTIFICATION This equipment complies with the essential requirements of Directive 1999/5/EC. The use of the warning symbol means the equipment is subject to restrictions - Kenwood TS-590S | User Manual - Page 2
- Kenwood TS-590S | User Manual - Page 3
THANK YOU Thank you for choosing this Kenwood TS-590S transceiver. It has been developed by a team of engineers determined to continue the tradition of excellence and innovation in Kenwood transceivers. This transceiver features a Digital Signal Processing (DSP) unit to process IF and AF signals. By - Kenwood TS-590S | User Manual - Page 4
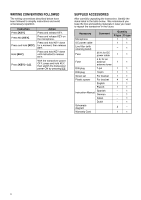
an external 1 1 antenna tuner DIN plug 7-pin 1 1 DIN plug 13-pin 1 1 Screw set For bracket 1 1 Plastic spacer For bracket 4 4 English 1 1 French 1 1 Spanish Instruction Manual German - 1 - 1 Italian - 1 Dutch - 1 Schematic diagram 2 - Warranty Card 1 1 ii - Kenwood TS-590S | User Manual - Page 5
support structure. This distance allows adequate clearance from the power lines if the support trouble. Immediately turn the power OFF and remove the power cable. Contact a Kenwood service manual or accessory manuals. Follow provided instructions kind of configuration or menu setup while driving. • - Kenwood TS-590S | User Manual - Page 6
13 SELECTING TRANSMISSION POWER 13 MICROPHONE GAIN 13 CHAPTER 4 MENU SETUP WHAT IS A MENU 14 MENU A/ MENU B 14 MENU ACCESS 14 QUICK MENU 14 PROGRAMMING THE QUICK MENU 14 USING THE QUICK MENU 14 MENU CONFIGURATION 15 CHARACTER ENTRY 20 CHAPTER 5 BASIC COMMUNICATIONS SSB TRANSMISSION - Kenwood TS-590S | User Manual - Page 7
IF Filter A and B 38 AUTO NOTCH FILTER (SSB 39 AUTO NOTCH TRACKING SPEED 39 MANUAL NOTCH FILTER (SSB/ CW/ FSK)......... 39 Notch Filter Bandwidth 39 BEAT CANCEL (SSB/ CONTROLLING THE TS-590S FROM A PC .... 58 REMOTELY CONTROLLING THE TS-590S ON THE NETWORK 58 OPTIONAL VGS-1 VOICE GUIDE & STORAGE - Kenwood TS-590S | User Manual - Page 8
BOTTOM CASE 71 VGS-1 VOICE GUIDE & STORAGE UNIT 71 SO-3 TCXO 72 REFERENCE FREQUENCY CALIBRATION ....... 72 MB-430 MOBILE BRACKET 73 PRECAUTIONS 73 CHAPTER 15 TROUBLESHOOTING GENERAL INFORMATION 74 SERVICE 74 SERVICE NOTE 74 CLEANING 74 TROUBLESHOOTING 75 MICROPROCESSOR RESET 78 INITIAL - Kenwood TS-590S | User Manual - Page 9
DC power supply and transceiver. ◆ Do not plug the DC power supply into an AC outlet until you make all connections. E-type only Fuse (25 A) TS-590S Black (−) DC Power supply (20.5 A or more) Red (+) 1 - Kenwood TS-590S | User Manual - Page 10
. Only after the problem has been resolved, replace the blown fuse with a new one with the specified ratings. If newly installed fuses continue to blow, disconnect the power plug and contact a Kenwood service center or your dealer for assistance. Fuse Location TS-590S Transceiver Supplied DC power - Kenwood TS-590S | User Manual - Page 11
Headphones Front Panel MIC : PTT @ DOWN . UP ; 2 GND (STBY) > GND (MIC) B NC = 8 V (10 mA max) MIC connector (Front view) External speaker Microphone Rear Panel • Straight key • Bug key • Electronic keyer • PC keyer output • Paddle 1 INSTALLATION 3 - Kenwood TS-590S | User Manual - Page 12
GETTING ACQUAINTED FRONT PANEL A C DE F G B H -- A -- [] Press and hold to switch the transceiver power ON and OFF {page 10}. [PF A] You can assign a function to this Programmable Function key {page 54}. [ATT (RX ANT)] Press to turn the receiver attenuator ON or OFF {page 40}. Press and hold - Kenwood TS-590S | User Manual - Page 13
A or VFO B {page 24}. Press and hold to duplicate the data in the current VFO to the other VFO {page 25}. While in Menu mode, press to select Menu A or Menu B. While in Program Memory Channel mode, press to recall the start or end frequency. [M/V] Press to toggle between Memory and VFO modes - Kenwood TS-590S | User Manual - Page 14
operating frequency up or down {page 28}. In Memory Channel mode, rotate to select a Memory Channel {page 41}. Also, used for selecting Menu numbers when accessing the Menu mode {page 14} and for various configurations. The MULTI/CH LED lights when the MULTI/CH control is not being used to adjust - Kenwood TS-590S | User Manual - Page 15
FSR) {page 11}. Appears while in Menu mode {page 14}. Appears while in Manual Notch is set to Wide. " " appears when Auto Notch is selected {page 39}. Appears when the Fine Tuning function is ON {page 29}. Appears when the MHz Step function is ON {page 28}. Also appears when the Quick Menu - Kenwood TS-590S | User Manual - Page 16
is ON {page 31}. Appears when the constant recording function is ON {page 60}. Reserved for future updates. Appears when the selected Menu No. is in the Quick Menu list {page 14}. It also appears when the transceiver is scanning the frequencies between the slow down frequency points {page 47 - Kenwood TS-590S | User Manual - Page 17
the AT-300 external antenna tuner {pages 66, 68}. Refer to the instruction manual supplied with the tuner for more information. DC 13.8 V connector Connect ] Use these keys to step the VFO frequency, Memory Channels, or Menu selections up and down. Press and hold these keys to continuously change - Kenwood TS-590S | User Manual - Page 18
modes. The transceiver has been configured to the maximum level at the factory. However, you may decrease the RF gain slightly when you have trouble hearing the desired signal due to excessive atmospheric noise or interference from other stations. First, take note of the peak S-meter reading of the - Kenwood TS-590S | User Manual - Page 19
-NAR-DATA mode and while in FM-DATA mode, press and hold [FM/AM (FM-N)] to toggle between FM-DATA and FM-NARDATA mode. Access Menu No. 23 then press [M.IN] to select "on" to turn the Auto Mode selection ON. When it is ON, " " appears. As a default, if you change - Kenwood TS-590S | User Manual - Page 20
3 OPERATING BASICS ADJUSTING THE SQUELCH The purpose of the Squelch is to mute the speaker when no signals are present. With the squelch level correctly set, you will hear sound only while actually receiving signals. The higher the selected squelch level, the stronger the signals must be to receive. - Kenwood TS-590S | User Manual - Page 21
control so that the power meter slightly reflects your voice level. FM: Access Menu No. 47 and select "1" (Normal), "2" (Medium), or "3" (High) . 3 Press [PWR (TX MONI)] or [CLR] to complete the setting. Note: You can access Menu No. 48, and select "on" to change the step size from 5 W to 1 W {page - Kenwood TS-590S | User Manual - Page 22
(SG.SEL)], or Mic [UP]/ [DWN] to change the current setting for the selected Menu No. • When the Menu is registered to the Quick Menu list, " " appears. 5 Press [MENU] to exit Quick Menu mode. Note: If the Quick Menu has not been programmed, Press [QM.IN]/[Q-MR] or turning the MULTI/CH control in - Kenwood TS-590S | User Manual - Page 23
4 MENU SETUP MENU CONFIGURATION Category Operator Interface Volume Voice Guide Tuning Description No. Display* Display brightness 00 Off, 1: minimum, 6: maximum DISPLAY BRIGHTNESS Display backlight color 01 1: amber, 2: green BACKLIGHT COLOR Panel key response for double - Kenwood TS-590S | User Manual - Page 24
4 MENU SETUP Category No. Description Display* Settings** Default** Ref. Page Tuning (continued) Frequency step size for the MULTI/CH control in 5/ 6.25/ 10/ 12.5/ 15/ 20/ - Kenwood TS-590S | User Manual - Page 25
Category CW FSK FM TX Control Transverter 4 MENU SETUP Description No. Display* Electronic keyer mode 32 ELECTRONIC KEYER MODE Keying priority over playback 33 KEYING PRIORITY OVER PLAYBACK CW RX pitch/ TX sidetone - Kenwood TS-590S | User Manual - Page 26
4 MENU SETUP Category Antenna Tuner Linear Amp Message Split/ Transfer TX Inhibit Description No. Display* TX hold when AT completes the tuning 51 ANTENNA TUNER TX - Kenwood TS-590S | User Manual - Page 27
[DOWN] 0 ~ 87, 100 ~ 134, 200 ~ 208, OFF 207 [UP] HELLO/ EDIT KENWOOD * The bolded lettering of the display message is what appears on the display while paused. ** Settings values may be modified. *** After changing this setting via the menu, turn the power OFF and then back ON to implement the - Kenwood TS-590S | User Manual - Page 28
(SG.SEL)] to select your desired character. • You can delete the selected character by pressing [CL]. 3 Repeat steps 1 and 2 to enter the remaining characters. 4 Press [MENU] to set the entry and to exit character entry mode. • Press [CLR] at any time to cancel character entry mode and return to the - Kenwood TS-590S | User Manual - Page 29
and reduce intelligibility at the receiving end. • You can switch the Microphone gain for FM between 1 (Normal), 2 (Medium), and 3 (High) by using Menu No. 47. 1 (Normal) is usually appropriate; however, select 3 (High) if other stations report that your modulation is weak. 5 Release Mic [PTT] to - Kenwood TS-590S | User Manual - Page 30
narrow band filter for FM mode. While "NAR" appears, the TS-590S transceiver transmits signals in narrow band FM but the reception IF filter have the long history of service nor the simplicity that CW provides. This transceiver has a built-in electronic keyer that supports a variety of functions. For - Kenwood TS-590S | User Manual - Page 31
frequency of the sidetone and RX pitch are equal and selectable. Access Menu No. 34 to select the frequency that is most comfortable for you. the setting. POWER ON MESSAGE Each time you switch the transceiver ON, "KENWOOD" (default) appears on the sub display for approximately 2 seconds. You can - Kenwood TS-590S | User Manual - Page 32
ENHANCED COMMUNICATIONS SPLIT-FREQUENCY OPERATION Usually you can communicate with other stations using a single frequency for receiving and transmitting. In this case, you select only one frequency on either VFO A or VFO B. However, there are cases where you must select one frequency for receiving - Kenwood TS-590S | User Manual - Page 33
over considerable distances. HF/ 6 m band repeaters usually operate in the 29 MHz FM sub-band and 51-54 MHz band. This special service combines the advantages of FM operation, good fidelity with noise and interference immunity, with the excitement of HF DX (long distance) communications. Even - Kenwood TS-590S | User Manual - Page 34
. ◆ When 1750 Hz is selected, the transceiver sends a 500 ms tone burst each time transmission starts. You cannot transmit 1750 Hz tone manually. TONE FREQUENCY ID SCAN This function scans through all tone frequencies to identify the incoming tone frequency on a received signal. You may find this - Kenwood TS-590S | User Manual - Page 35
8 Turn the MULTI/CH control to select the appropriate CTCSS frequency. • The selectable CTCSS frequencies are listed in the table below. 9 Press and hold [AGC/T (SEL)] or press [CLR] to complete the setting. No. Freq. (Hz) No. Freq. (Hz) No. Freq. (Hz) No. Freq. (Hz) 00 67.0 11 97.4 22 141 - Kenwood TS-590S | User Manual - Page 36
to change the frequency in steps of 100 kHz or 500 kHz, rather than 1 MHz, access Menu No. 10 and select 100 kHz, 500 kHz, or 1 MHz. Note: Even if 100 of 10 kHz for FM. • If you want to change the default frequency step size, access Menu No. 14 (SSB/CW/FSK), 15 (AM), or 16 (FM). Press [M.IN]/ [SCAN - Kenwood TS-590S | User Manual - Page 37
rate of the Tuning control can be lowered to 250 pulses per revolution or increased to 1000 pulses per revolution. 1 Press [MENU], then press [Q-M.IN]/ [Q-MR] or turn the MULTI/CH control to select Menu No. 11. 2 Press [M.IN]/ [SCAN (SG.SEL)] to select "250", "500", or "1000" (default). 3 Press - Kenwood TS-590S | User Manual - Page 38
necessity of manually switching to the the parameter and exit the setting mode. ■ Anti-VOX Adjustment The TS-590S transceiver has a DSP IC to improve and customize incoming/ outgoing audio Note: While VOX with DATA input is set to ON (Menu No. 69), speaking into the microphone also activates the VOX - Kenwood TS-590S | User Manual - Page 39
IN]/ [SCAN (SG.SEL)] until the transceiver reliably switches to transmit mode each time you send an audio signal to the connector. 3 Press [MENU] to exit Menu mode. SPEECH PROCESSOR The Speech Processor levels out large fluctuations in your voice while you speak. When using SSB, AM, or FM mode, this - Kenwood TS-590S | User Manual - Page 40
1.0 2.0 Audio frequency (kHz) Note: When using the ARCP-590, you can temporarily change each preset value. TRANSMIT INHIBIT Transmit TX Inhibit ON: Transmission is not allowed. Switch this function ON or OFF via Menu No. 60. The default is OFF. BUSY LOCKOUT Busy Lockout prevents the transceiver - Kenwood TS-590S | User Manual - Page 41
to transmit CW without manually switching between transmission and 2} for details regarding this connection. The built-in keyer supports lambic (squeeze) operation. ELECTRONIC KEYER MODE There are 2 To switch this function ON, access Menu No. 43, and select "on" (default is "oFF"). • "VOX - Kenwood TS-590S | User Manual - Page 42
back to check message content or for transmitting. The electronic keyer has a function that allows you to interrupt playback and manually inject your own keying. To switch this function ON, access Menu No. 33 and select "on". The default is OFF. The electronic keyer can also repeatedly play back the - Kenwood TS-590S | User Manual - Page 43
not change the CW sidetone playback volume. To change the CW sidetone volume, access Menu No. 04 and select "oFF", or "1" to "9". The default is "5". ■ Insert Keying If you operate a CW keyer manually while playing back a recorded CW message, the transceiver stops playing back the message. However - Kenwood TS-590S | User Manual - Page 44
changes from USB to CW and LSB to CWR, regardless of the setting for Menu No. 42 (Frequency correction for changing SSB to CW). Therefore, when the dashes in CW mode. 4 To exit Mic UP/ DWN key Paddle mode, access Menu No. 40 and select "PF". SWAP DOT AND DASH PADDLE POSITIONS This function reverses - Kenwood TS-590S | User Manual - Page 45
)] to select FSK mode. • "FSK" appears. • If necessary, access Menu No. 67 to configure the appropriate audio output level for your MCP. The again to return to the lower sideband. "FSK" appears. 7 Follow the instructions provided with your MCP and enter a command from your computer to transmit. • - Kenwood TS-590S | User Manual - Page 46
REJECTING INTERFERENCE DSP FILTERS Kenwood digital signal processing (DSP) technology is adapted to this transceiver. Using DSP filtering (AF), you can control the bandwidth, cancel the multiple jamming beat, and - Kenwood TS-590S | User Manual - Page 47
speed and Level 4 is the fastest. FIX terminates the beat tone tracking. Adjust this parameter manually to remove the beat signal if necessary. 3 Press [MENU] to exit Menu mode. MANUAL NOTCH FILTER (SSB/ CW/ FSK) Use manual notch when you want to vary the width of the notch while verifying the - Kenwood TS-590S | User Manual - Page 48
9 REJECTING INTERFERENCE ■ Setting the NR1 Level Adjustment NR1 uses an adaptive filter to reduce the noise element from the received signals. When the S/N ratio is reasonably good in SSB, using NR1 will improve the S/N further. While NR1 is ON, you can further adjust the noise reduction level by - Kenwood TS-590S | User Manual - Page 49
MEMORY FEATURES MEMORY CHANNELS This transceiver provides you with 110 memory channels, numbered 00 to 99 and P0 to P9, for storing operating frequency data, modes, and other information. Memory channels 00 to 99 are called Conventional Memory Channels. Memory channels P0 to P9 are designed for - Kenwood TS-590S | User Manual - Page 50
using a frequency that you retrieve. You can temporarily change the frequency and associated data without overwriting the contents of the memory channel when Menu No. 18 is ON (default is OFF). 1 Press [M/V] to enter Memory Recall mode. • The memory channel that was last selected appears. 2 Turn the - Kenwood TS-590S | User Manual - Page 51
Channel 00 ~ 99 RX frequency TX frequency Mode for RX Mode for TX Tone frequency CTCSS frequency Tone/ CTCSS ON/ OFF status Memory Name Memory Channel Lockout ON/ OFF ➡ Channel 00 ~ 99 ➡ RX frequency ➡ TX frequency ➡ Mode for RX ➡ Mode for TX ➡ Tone frequency ➡ CTCSS frequency ➡ Tone/ CTCSS ON/ - Kenwood TS-590S | User Manual - Page 52
by pressing [Q-MR]. Press [CL] to erase the character at the cursor. 5 After selecting all the necessary characters for the memory channel name, press [MENU] to store the name. 6 When you recall a memory channel with a name, the name is displayed on the sub-display along with the memory channel - Kenwood TS-590S | User Manual - Page 53
, you can temporarily change the data without overwriting the contents of the channel. You can change the frequency even when you select "oFF" in Menu No. 18. 1 Press [Q-MR]. 2 Turn the MULTI/CH control to select a Quick Memory channel. 3 Change the frequencies and associated data. 4 To store the - Kenwood TS-590S | User Manual - Page 54
SCAN Scan is a useful function for hands-off monitoring of your favorite frequencies. By becoming comfortable with all types of Scan, you will increase your operating efficiency. This transceiver provides the following types of scans: Scan Type Purpose Normal Scan VFO Scan Program Scan Scans - Kenwood TS-590S | User Manual - Page 55
or until the signal drops out (Carrier-Operated mode), depending on which mode you select via Menu No. 22 {page 48}. 7 To stop Scan, press [SCAN (SG.SEL)] or [ (default is 300 Hz). Note: If you select, for example, 500 Hz for Menu No. 20, the Program Scan slows down to a ±500 Hz width, centering the - Kenwood TS-590S | User Manual - Page 56
to the desired frequency by turning the Tuning control or the MULTI/CH control, or by pressing Mic [UP]/ [DWN]. To use this function, access Menu No. 21, and select "on". The default is OFF. MEMORY SCAN Memory Scan monitors all memory channels in which you have stored frequencies (All-channel - Kenwood TS-590S | User Manual - Page 57
and MGROUP-7, the transceiver scans the channels in MGROUP-3 > MGROUP-5 > MGROUP-7 > MGROUP-3 and so on. 1 Select Time-Operated or Carrier-Operated mode via Menu No. 22. 2 Press [M/V] to enter Memory Recall mode. 3 Turn the SQL control to adjust the squelch threshold. 4 Press [SCAN (SG.SEL] to start - Kenwood TS-590S | User Manual - Page 58
time from "oFF", "60", "120", or "180" minutes. 3 Press [MENU] to exit Menu mode. 50 Note: ◆ The APO function works even if the transceiver is the internal antenna tuner. For the external antenna tuner, consult the instruction manual that comes with the tuner. 1 Select the transmit frequency. 2 - Kenwood TS-590S | User Manual - Page 59
Auto Mode frequency configuration. To activate the Auto Mode function: 1 Press [MENU], then press [Q-M.IN]/ [Q-MR] or turn the MULTI/CH control to select Menu No. 23. 2 Press [M.IN] to select "on". 3 Press [MENU] to exit Menu mode. Note: When using Auto Mode Frequency configuration, you cannot use - Kenwood TS-590S | User Manual - Page 60
recommend you leave it ON in order to detect unexpected errors and malfunctions. You can also change the output level of the beeps by accessing Menu No. 03 and selecting "1" to "9". The transceiver generates the following Morse code to tell you which mode is selected when you change operating modes - Kenwood TS-590S | User Manual - Page 61
press [Q-M.IN]/ [Q-MR] or turn the MULTI/CH control to access Menu No. 00. 2 Press [M.IN]/ [SCAN (SG.SEL)] to select "oFF", "1", "2", "3", "4", "5", or "6". 3 Press [MENU] to exit Menu mode. BACKLIGHT COLOR You can manually change the display illumination to suit the lighting conditions where you - Kenwood TS-590S | User Manual - Page 62
and [PF B]. You can assign your own desired functions to these 2 keys by accessing Menu Nos. 79 and 80. 54 MICROPHONE KEYS There are 4 microphone PF (Programmable Function) OFF" assigns no function to the PF key. No. Function 00 ~ 87 Menu No. 00 ~ 87 100 RX ANT 101 ANT1/2 102 VOX LEVEL 103 - Kenwood TS-590S | User Manual - Page 63
"10", "20", or "30" minutes. 3 Press [MENU] to exit Menu mode. TRANSVERTER If you have a transverter that converts the TS-590S operating frequencies to other frequencies, you can use this TS-590S transceiver as a transverter exciter. Consult the instruction manual that came with the transverter for - Kenwood TS-590S | User Manual - Page 64
the MULTI/ CH control. If more precise power adjustment is required, access Menu No. 48 and select "on". When this function is activated, the power addition to a compatible transceiver, to transfer to a TS-590S, TS-480HX/ SAT, TS-2000/X, TS-570S/D, or TS-870S, you must have 1 crosswired cable with - Kenwood TS-590S | User Manual - Page 65
each transceiver. • On the TS-590S, access Menu No. 58 and select "on". For the compatible transceiver, refer to the instruction manual that came with the transceiver. access the Kenwood website and download the TS-590S command reference documents (pdf format) for details: http://www.kenwood.com/i/ - Kenwood TS-590S | User Manual - Page 66
the sidetone, and the Voice guide for an ACC2/USB audio output by accessing Menu No. 68 and selecting "on TS-590S from a PC. Download the free ARCP-590 software from the following URL: http://www.kenwood.com/i/products/info/amateur/software _download.html The detailed remote controlling instructions - Kenwood TS-590S | User Manual - Page 67
want to check. • For example, "AP 1- - -" appears while playing back the message in channel 1. 12 OPERATOR CONVENIENCES • To interrupt playback, press [CLR]. • When Menu No. 56 is "oFF", pres and hold the current playback channel key to repeatedly play back the message saved to that key (A display - Kenwood TS-590S | User Manual - Page 68
reception signal, press [RX/4 (REC)]. To quit, press [CLR]. Note: ◆ While Menu No. 55 is ON, you cannot use channel 4 (RX/4) to record and playback a , such as the VGS-1 is playing back a message or the Voice Guide function is working, the Constant Recording function temporarily pauses. ◆ When you - Kenwood TS-590S | User Manual - Page 69
time AGC setting (FAST) "Fast" + Setting value1 AGC constant time AGC setting (SLOW) "Slow" + Setting value1 While in Menu mode "Menu" + Menu number + Setting value1 1 During continuous operation, only the setting value is announced. Status Settings using VOICE1 Status Announcement Press - Kenwood TS-590S | User Manual - Page 70
Volume Turning the AF control does not change the volume for the Voice Guide announcement. To change the announcement volume , access Menu No. 06 and select the volume level from "1" to "7" or "oFF". ■ Voice Guide Announcement Speed If you feel the Voice Announcement speed is too slow or - Kenwood TS-590S | User Manual - Page 71
frequency. Otherwise, the operating frequency of the TS-590S transceiver remains unchanged. For more detailed information on the DX PacketCluster operation of the TH-D72/ TM-D710/ RC-D710/ TM-D700, refer to their respective instruction manuals. Note: The firmware of the TM-D700(A/E) transceiver - Kenwood TS-590S | User Manual - Page 72
TM-D700A as a "Transporter" and connect all the necessary cables to the TS-590S transceiver. 2 Select a frequency (HF/ 50 MHz band) on the TS-590S transceiver. 3 On the TS-590S, press [MENU], then turn MULTI/ CH control to select Menu No. 61. 4 Press [M.IN]/ [SCAN (SG.SEL] to select the the desired - Kenwood TS-590S | User Manual - Page 73
input level is independent from the microphone gain (set with the [MIC] key). • Audio input level can be changed by adjusting the value in Menu No. 66. The default value of 4 is approximately 10 mVrms, which is a standard modulating signal. The settings of 0 ~ 9 vary from approximately no modulation - Kenwood TS-590S | User Manual - Page 74
(for AT-300) Pin No. Pin Name Function I/O 1 GND Ground - 2 TT AT-300 control input/ output I/O 3 GND Ground - 4 NC No connection - 5 TS AT-300 control input/ output I/O 6 14S Power supply for EXT.AT Switched 13.8V. O MIC CONNECTOR Pin No. Pin Name Function I/O 1 MIC - Kenwood TS-590S | User Manual - Page 75
of the PC. (The virtual COM port driver can also be downloaded from the following URL.) http://www.kenwood.com/i/products/info/amateur/software_download.html To RS-232C serial port (f) TS-590S To USB port (f) Personal computer RS-232C straight cable USB cable • To transmit the signal from the - Kenwood TS-590S | User Manual - Page 76
MCP. If your MCP supports RTTY keying output, connect the Power supply for MCP TS-590S Personal computer MCP HF / 50 MHz LINEAR AMPLIFIER Connect an external transmission power amplifier to the REMOTE connector. Switch ON the linear amplifier control relay via Menu - Kenwood TS-590S | User Manual - Page 77
you connect the external antenna tuner to the ANT 2 connector, it will not function. Note: The AT-300 cannot be used for 50 MHz operation. TS-590S ANT 1 connector AT-300 (The AT-300 Antenna Tuner is a discontinued model. It may no longer be available in your area.) TNC AND MCP Use - Kenwood TS-590S | User Manual - Page 78
connecting to the TH-D72A/E, refer to the TH-D72A/E instruction manual.) RS-232C cross cable TS-590S TM-D710A/E/ RC-D710 + TM-V71A/E (m) (f) TM-D700A/E (f) RC-D710 + PG-5J (f) PG-5G CROSSBAND REPEATER If you have a Kenwood FM transceiver (K type) with a 6 pin mini DIN connector, you can - Kenwood TS-590S | User Manual - Page 79
need a soldering iron (approx. 30 watts) to install the SO-3 TCXO. VGS-1 VOICE GUIDE & STORAGE UNIT 1 Remove the shield cover (4 screws). Switch OFF the transceiver power and unplug After installation, you can adjust the VGS-1 playback and voice guide volume by selecting Menu Nos. 05 and 06. 71 - Kenwood TS-590S | User Manual - Page 80
1 Set the following on the transceiver: • Mode: CW • AF control: Center • Menu No. 34 (CW RX pitch): 800 Hz • SHIFT control: 800 Hz • RIT Δfreference is the shift from the 15.6 MHz reference frequency. 5 TS-590S transceiver without SO-3: Adjust the trimmer (TC501) to minimize the frequency - Kenwood TS-590S | User Manual - Page 81
the transceiver in advance. This is necessary to protect the TS-590S transceiver from scratches. Plastic spacers 14 INSTALLING OPTIONS PRECAUTIONS • loosely screwing in the rear screws. Hook those screws onto the rear guide rail of the mounting bracket then adjust the transceiver to your desired - Kenwood TS-590S | User Manual - Page 82
accessory items unless you feel they are directly related to the service problem. Please do not send subassemblies or printed circuit boards. Send the complete transceiver. You may return your transceiver for service to the authorized Kenwood dealer from whom you purchased it or any authorized - Kenwood TS-590S | User Manual - Page 83
programming. These problems are usually not caused by circuit failure. Please review this table and the appropriate section(s) of this instruction manual before assuming your by turning the power - OFF and then back ON. If the problem persists, consult Kenwood authorized Service Center. 75 - Kenwood TS-590S | User Manual - Page 84
15 TROUBLESHOOTING Problem Probable Cause Corrective Action Page No signals Select the correct voice mode. 11 instead of a voice mode. 4 The DSP TX filter 4 Adjust the settings in Menu Nos. 25, 26. 31 bandwidth was improperly selected. 5 The wrong antenna 5 Press and hold [PRE (ANT - Kenwood TS-590S | User Manual - Page 85
Contact a Kenwood authorized service - output power fans have been congested center to clean the filters. decreases after a with dust. short operating time. 2 The cooling fans cannot 2 Relocate the transceiver so that air can easily - provide enough air flow to flow through the TS-590S to - Kenwood TS-590S | User Manual - Page 86
of Menu No. 63 matches the input terminal for the external equipment. Page 71,78 - 58 MICROPROCESSOR RESET If your transceiver seems to be malfunctioning, resetting the microprocessor to its default settings may resolve the problem. There are 2 levels of resetting the microprocessor of the TS-590S - Kenwood TS-590S | User Manual - Page 87
the RF gain must be greatly reduced when the AGC is turned OFF. 15 TROUBLESHOOTING 60m BAND OPERATION (K-TYPE/ USA ONLY) Effective from July 3, 2003, FCC kHz centered on 5332, 5348, 5368, 5373, and 5405 kHz respectively. The TS-590S transceiver stops at the 60 m band as you scroll up or down the - Kenwood TS-590S | User Manual - Page 88
in FM mode. VGS-1 Voice Guide and Storage unit SP-23 External Speaker SP-50B Mobile Speaker MB-430 Mobile Bracket ARCP-590/ ARHP-590 Remote control software Download the free ARCP-590/ARHP-590 software from the following URL: http://www.kenwood.com/i/products/info/amateur/software_download.html - Kenwood TS-590S | User Manual - Page 89
SPECIFICATIONS Mode Number of memory channels Antenna impedance 160 m ~ 6 m band Supply Voltage Grounding method Current Transmit (max.) Receive (no signal) Usable temperature range Frequency stability without SO-3 Frequency stability with SO-3 -10°C ~ 50°C -10°C ~ 50°C Dimensions (W x H - Kenwood TS-590S | User Manual - Page 90
dB) FM More than 12.0 kHz (-6 dB), Less than 25.0 kHz (-50 dB) Spurious response Image Ratio IF Rejection Auto Notch filter attenuation Manual Beat cancel attenuation (at 1 kHz) Audio output (8 Ω,10% distortion) Audio output impedance (EXT.SP) RIT shift frequency range More than 70 dB More - Kenwood TS-590S | User Manual - Page 91
- Kenwood TS-590S | User Manual - Page 92
Bu ürün 26891sayılı Resmi Gazete'de yayımlanan Elektrikli ve Elektronik Eşyalarda Bazı Zararlı Maddelerin Kullanımının Sınırlandırılmasına Dair Yönetmeliğe uygun olarak üretilmiştir. This product complies with Directive, Number 26891 regarding "REGULATION ON THE RESTRICTION OF THE USE OF CERTAIN
-
 1
1 -
 2
2 -
 3
3 -
 4
4 -
 5
5 -
 6
6 -
 7
7 -
8
-
9
-
10
-
11
-
12
-
13
-
14
-
15
-
16
-
17
-
18
-
19
-
20
-
21
-
22
-
23
-
24
-
25
-
26
-
27
-
28
-
29
-
30
-
31
-
32
-
33
-
34
-
35
-
36
-
37
-
38
-
39
-
40
-
41
-
42
-
43
-
44
-
45
-
46
-
47
-
48
-
49
-
50
-
51
-
52
-
53
-
54
-
55
-
56
-
57
-
58
-
59
-
60
-
61
-
62
-
63
-
64
-
65
-
66
-
67
-
68
-
69
-
70
-
71
-
72
-
73
-
74
-
75
-
76
-
77
-
78
-
79
-
80
-
81
-
82
-
83
-
84
-
85
-
86
-
87
-
88
-
89
-
90
-
91
-
92
 |
 |

© B62-2243-30 (K, E)
09 08 07 06 05 04 03
HF/ 50 MHz ALL MODE TRANSCEIVER
TS-590S
INSTRUCTION MANUAL
NOTIFICATION
This equipment complies with the essential requirements of Directive 1999/5/EC.
The use of the warning symbol
means the equipment is subject to restrictions of use
in certain countries.
This equipment requires a licence and is intended for use in the countries below.
AT
BE
DK
FI
FR
DE
GR
IS
IE
IT
LI
LU
NL
NO
PT
ES
SE
CH
GB
CY
CZ
EE
HU
LV
LT
MT
PL
SK
SI
BG
RO
ISO3166