KitchenAid KHHS179LBL Use and Care Guide - Page 5
Parts And Features - microwave
 |
View all KitchenAid KHHS179LBL manuals
Add to My Manuals
Save this manual to your list of manuals |
Page 5 highlights
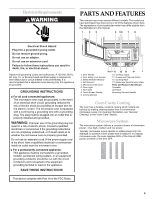
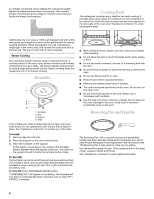
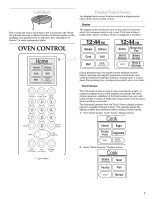
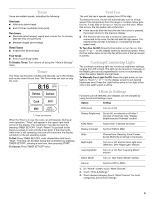
Electrical Requirements WARNING PARTS AND FEATURES This manual may cover several different models. The model you have purchased may have some or all of the features shown here. The appearance of your particular model may differ slightly from the illustrations in this manual. 1 23 4 56 7 8 Electrical Shock Hazard Plug into a grounded 3 prong outlet. Do not remove ground prong. Do not use an adapter. Do not use an extension cord. Failure to follow these instructions can result in death, fire, or electrical shock. Observe all governing codes and ordinances. A 120 Volt, 60 Hz, AC only, 15- or 20-amp fused electrical supply is required. (A time-delay fuse or circuit breaker is recommended.) It is recommended that a separate circuit serving only this appliance be provided. GROUNDING INSTRUCTIONS ■ For all cord connected appliances: The microwave oven must be grounded. In the event of an electrical short circuit, grounding reduces the risk of electric shock by providing an escape wire for the electric current. The microwave oven is equipped with a cord having a grounding wire with a grounding plug. The plug must be plugged into an outlet that is properly installed and grounded. WARNING: Improper use of the grounding plug can result in a risk of electric shock. Consult a qualified electrician or serviceman if the grounding instructions are not completely understood, or if doubt exists as to whether the microwave oven is properly grounded. Do not use an extension cord. If the power supply cord is too short, have a qualified electrician or serviceman install an outlet near the microwave oven. ■ For a permanently connected appliance: This appliance must be connected to a grounded, metallic, permanent wiring system, or an equipment grounding conductor should be run with the circuit conductors and connected to the equipment grounding terminal or lead on the appliance. SAVE THESE INSTRUCTIONS Home Reheat Defrost Cook Grill Melt MORE CHOICES Popcorn Cook Time Add A Minute 1 23 4 56 7 89 Clock 0 Start Timer Set/Off Off / Cancel Light Fan Turntable On/Off Adjust On/Off Adjust On/Off 10 13 11 12 11 10 9 1. Door Handle 10. Cooktop Lights 2. Door Safety Lock System 11. Grease and Charcoal Filters 3. Metal-Shielded Window 12. Cooking Rack 4. Grill Element 13. Model and Serial Number Plate 5. Microwave Inlet Cover Parts and Features Not Shown 6. Oven Light Turntable 7. Vent Grille Grill Rack 8. Touch Screen Display Browning Pan and Handle 9. Control Buttons Oven Cavity Coating The oven has a durable, nonstick coating which resists soil buildup by making cleaning easier than in conventional microwave ovens. For cleaning information, see "General Cleaning" in the "Oven Care" section. Microwave System The microwave system delivers a constant stream of microwave power - true high, medium and low power. Typically, microwave ovens operate on HIGH power only. For example, to achieve a 50% power level ("medium") in a typical microwave oven, the oven operates 50% of the time at HIGH power and 50% of the time OFF. This device complies with Part 18 of the FCC Rules. 5
-
 1
1 -
 2
2 -
 3
3 -
 4
4 -
 5
5 -
 6
6 -
 7
7 -
 8
8 -
 9
9 -
 10
10 -
 11
11 -
12
-
13
-
14
-
15
-
16
-
17
-
18
-
19
-
20
-
21
-
22
-
23
-
24
 |
 |
