KitchenAid KUCS02FRPA Use and Care Guide - Page 4
Location Requirements
 |
View all KitchenAid KUCS02FRPA manuals
Add to My Manuals
Save this manual to your list of manuals |
Page 4 highlights
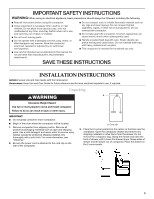
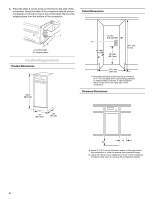
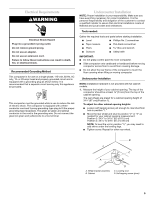
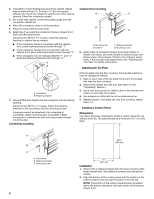
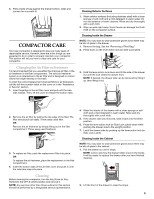
4. Place the other 2 corner posts on the floor to the side of the compactor. Grasp the sides of the compactor cabinet and put compactor on its side on top of the corner posts. Remove the shipping base from the bottom of the compactor. Cutout Dimensions A B A. Leveling legs B. Shipping base Location Requirements Product Dimensions 34¹⁄₈" (86.7 cm) 15" (38.1 cm) 24" (61 cm) 3" min. (7.6 cm) A 24" min. (61 cm) 18" min. (45.7 cm) 34¹⁄₄" min. (87 cm) 15¹⁄₄" min. (38.7 cm) A. Grounded eletrical outlet must be a minimum of 3" (7.6 cm) away from surrounding cabinets or nearby walls as shown. It can be placed either to the left or the right side of the compactor. Clearance Dimensions B A A. Leave 6" (15.2 cm) of clearance space to the right side of the compactor in order to remove the compactor bags. B. Leave 23" (58.4 cm) of clearance in front of the compactor in order to fully open or remove the compactor drawer. 4
-
 1
1 -
 2
2 -
 3
3 -
 4
4 -
 5
5 -
 6
6 -
 7
7 -
 8
8 -
 9
9 -
 10
10 -
11
-
12
 |
 |
