KitchenAid KUDE20FBSS Installation Guide - Page 12
Make Power Supply Cord Connection
 |
View all KitchenAid KUDE20FBSS manuals
Add to My Manuals
Save this manual to your list of manuals |
Page 12 highlights
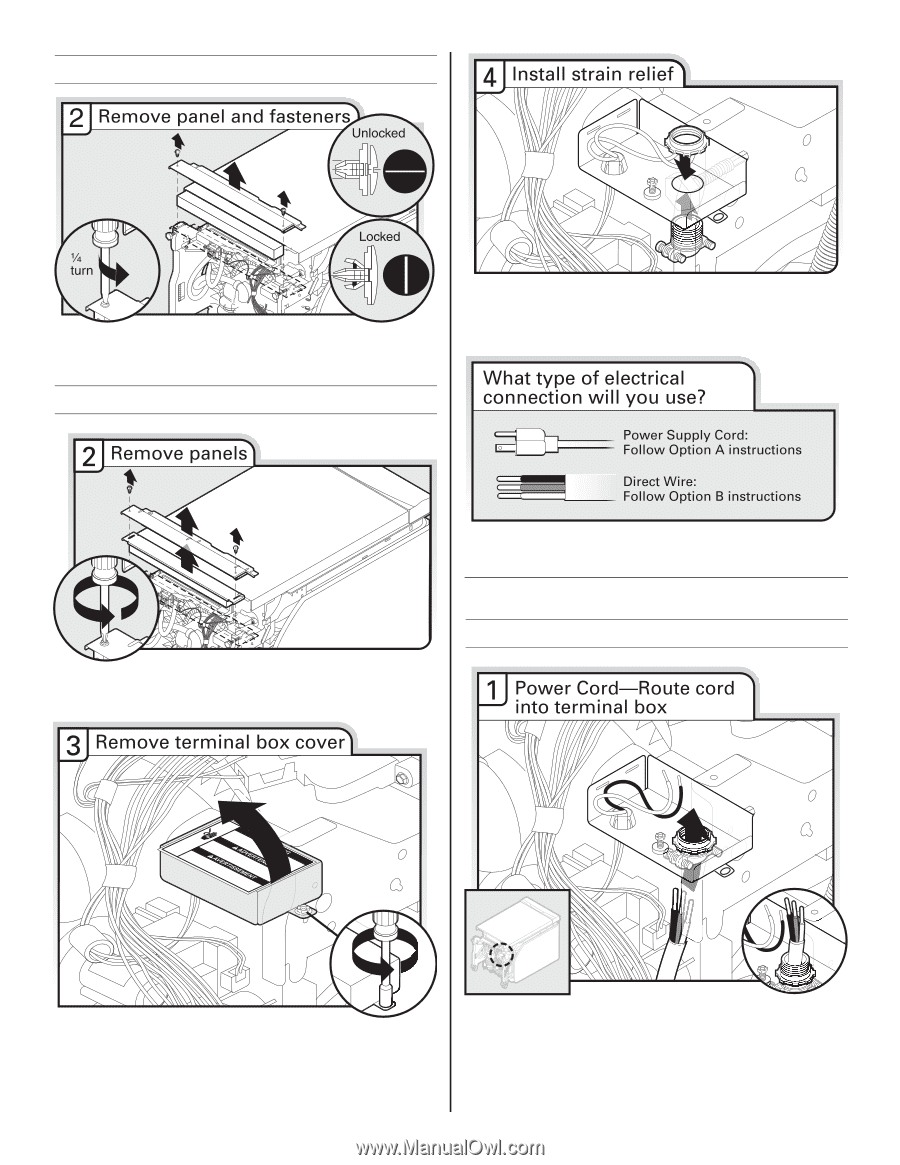
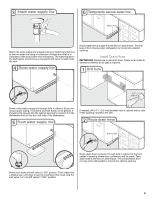
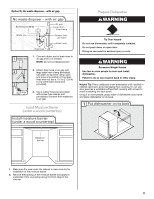
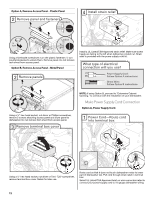
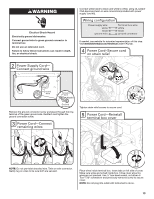
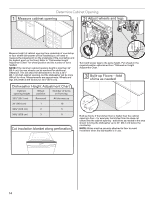
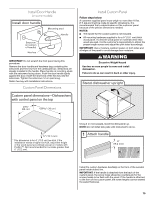
Option A, Remove Access Panel - Plastic Panel Using a flat-blade screwdriver, turn the plastic fasteners ¹⁄₄ turn counterclockwise to unlock them. Remove panel. Do not remove tech sheet from access panel. Option B, Remove Access Panel - Metal Panel Install a UL Listed/CSA Approved strain relief. Make sure screw heads are facing to the left when tightening conduit nut. Strain relief is provided with the power supply cord kit. Using a ¹⁄₄" hex-head socket, nut driver or Phillips screwdriver, remove 2 screws attaching access panel and lower panel to dishwasher. Do not remove tech sheet from access panel. NOTE: If using Option B, proceed to "Determine Cabinet Opening," to continue with the installation of your dishwasher. Make Power Supply Cord Connection Option A, Power Supply Cord: Using a ¹⁄₄" hex-head socket, nut driver or Torx® T20® screwdriver, remove terminal box cover. Retain for later use. Route cord so that it does not touch dishwasher motor to lower part of dishwasher tub. Pull cord through strain relief in terminal box. Select UL Listed/CSA Approved twist-on wire connectors rated to connect your power supply cord to 16-gauge dishwasher wiring. 12
-
 1
1 -
2
-
3
-
4
-
5
-
6
-
 7
7 -
 8
8 -
 9
9 -
 10
10 -
 11
11 -
 12
12 -
 13
13 -
 14
14 -
 15
15 -
 16
16 -
 17
17 -
18
-
19
-
20
-
21
-
22
-
23
-
24
-
25
-
26
-
27
-
28
-
29
-
30
-
31
-
32
-
33
-
34
-
35
-
36
-
37
-
38
-
39
-
40
-
41
-
42
-
43
-
44
-
45
-
46
-
47
-
48
-
49
-
50
-
51
-
52
-
53
-
54
-
55
-
56
 |
 |