KitchenAid KUIC18PNZS Use & Care Guide - Page 5
Installation Requirements
 |
View all KitchenAid KUIC18PNZS manuals
Add to My Manuals
Save this manual to your list of manuals |
Page 5 highlights
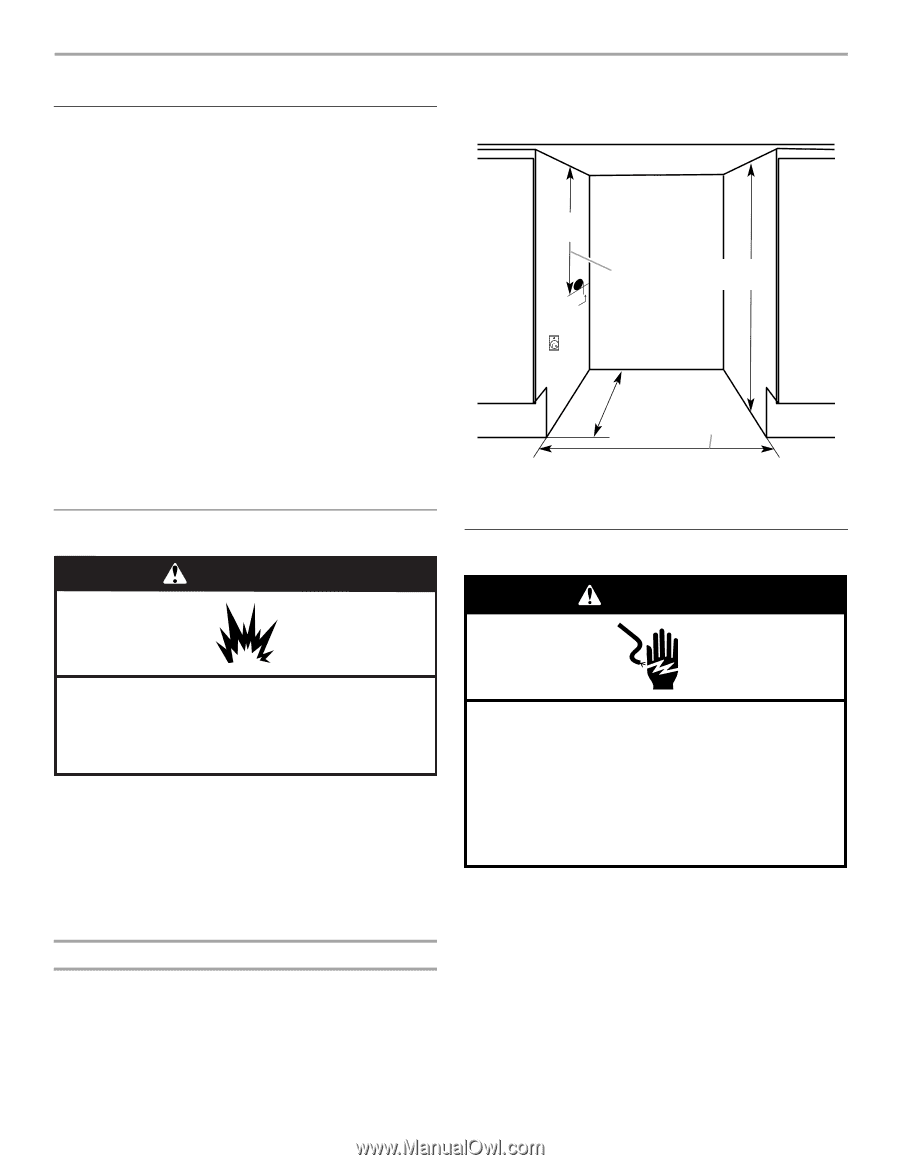
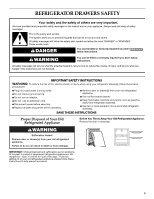
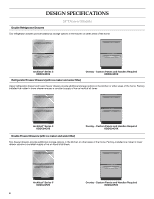
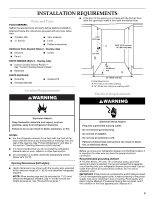
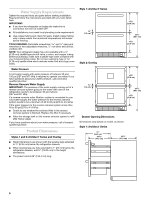
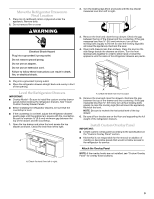
INSTALLATION REQUIREMENTS Tools and Parts TOOLS NEEDED: Gather the required tools and parts before starting installation. Read and follow the instructions provided with any tools listed here. ■ If the floor of the opening is not level with the kitchen floor, shim the opening to make it level with the kitchen floor. ■ Cordless drill Drill bit ■ Tape measure ■ Level 14³⁄₄" (37.5 cm) ■ Phillips screwdriver Additional Tools Needed (Style 2 - Overlay only): ■ Scissors ■ Scribe ■ Pencil A ¹⁄₂" (1.3 cm) 34³⁄₈" (87.3 cm) min. 35" (88.9 cm) max. PARTS NEEDED (Style 2 - Overlay only): ■ Custom Overlay Drawer Panels - See "Custom Overlay Drawer Panels." ■ Hardware PARTS SUPPLIED: ■ Hooks (8) ■ Overlay plates (4) ■ Screws (16) Location Requirements WARNING 24" (60.96 cm) min. B 24" (60.96 cm) min. Critical Dimensions: A. 14³⁄₄" (37.5 cm) utility opening B. 24" (60.96 cm) minimum opening width Electrical Requirements WARNING Explosion Hazard Keep flammable materials and vapors, such as gasoline, away from refrigerator drawer(s). Failure to do so can result in death, explosion, or fire. NOTES: ■ For the refrigerator drawers to be flush with the front of the base cabinets remove any baseboards or moldings from the rear of the opening. See "Product Dimensions" and later in this section "Opening Dimensions (both styles)." ■ It is recommended that you do not install the refrigerator drawers near an oven, radiator, or other heat source. ■ Do not install in a location where the temperature will fall below 55°F (13°C). Opening Dimensions (both styles) ■ Height dimensions are shown with the leveling legs extended to the minimum height of ¹⁄₄" (6.35 mm) below the refrigerator drawers. NOTE: When leveling legs are fully extended to 1" (25 mm) below the refrigerator drawers, add ³⁄₄" (19.05 mm) to the height dimensions. See "Product Dimensions." Electrical Shock Hazard Plug into a grounded 3 prong outlet. Do not remove ground prong. Do not use an adapter. Do not use an extension cord. Failure to follow these instructions can result in death, fire, or electrical shock. Before you move your refrigerator drawers into the final location, it is important to make sure you have the proper electrical connection. Recommended grounding method A 115 Volt, 60 Hz., AC only, 15- or 20-amp fused, grounded electrical supply is required. It is recommended that a separate circuit serving only your refrigerator drawers be provided. Use an outlet that cannot be turned off by a switch. Do not use an extension cord. IMPORTANT: If this product is connected to a GFCI (Ground Fault Circuit Interrupter) equipped outlet, nuisance tripping of the power supply may occur, resulting in loss of cooling. Food quality and flavor may be affected. If nuisance tripping has occurred, and if the condition of the food appears poor, dispose of it. 5
-
 1
1 -
 2
2 -
 3
3 -
 4
4 -
 5
5 -
 6
6 -
 7
7 -
 8
8 -
 9
9 -
 10
10 -
 11
11 -
12
-
13
-
14
-
15
-
16
-
17
-
18
-
19
-
20
-
21
-
22
-
23
-
24
-
25
-
26
-
27
-
28
-
29
-
30
-
31
-
32
-
33
-
34
-
35
-
36
-
37
-
38
-
39
-
40
-
41
-
42
-
43
-
44
-
45
-
46
-
47
-
48
-
49
-
50
-
51
-
52
 |
 |