Konica Minolta Kodak i1840 User Guide
Konica Minolta Kodak i1840 Manual
 |
View all Konica Minolta Kodak i1840 manuals
Add to My Manuals
Save this manual to your list of manuals |
Konica Minolta Kodak i1840 manual content summary:
- Konica Minolta Kodak i1840 | User Guide - Page 1
i1800 Series Scanners User's Guide A-61555 6J7418 - Konica Minolta Kodak i1840 | User Guide - Page 2
or higher 1-2 Scanner features 1-3 System requirements 1-4 Supporting documentation 1-5 Contacting Service and Support 1-6 Safety information 3-7 Output tray options 3-7 Adjusting the output tray 3-7 Adjusting the side guides 3-7 Adjusting the output tray for document lengths up to 43.2 cm ( - Konica Minolta Kodak i1840 | User Guide - Page 3
test 3-38 Scanning 3-39 Using function keys when scanning 3-39 Changing image address levels 3-40 Manually pausing and resuming the scanner 3-41 Automatically pausing and resuming the scanner 3-41 Power Saver mode 3-42 Viewing messages 3-42 4 The Enhanced Printer/Patch Readers 4-1 Enhanced - Konica Minolta Kodak i1840 | User Guide - Page 4
message listing 6-10 Contacting Service 6-11 Problem solving 6-12 Appendix A Accessories A-1 Kodak Black Background Accessory A-1 Kodak Ultralightweight Paper Feed Module A-1 Kodak White Background Accessory A-1 Kodak Manual Feeder A-1 Kodak High Resolution Printer Accessory A-2 Appendix - Konica Minolta Kodak i1840 | User Guide - Page 5
the operator log, a problem solving chart, procedures for clearing a document jam and a listing of error messages. Appendix A, Accessories - provides a description of the optional accessories that can be purchased to support the Kodak i1800 Series Scanners. Instructions for using these accessories - Konica Minolta Kodak i1840 | User Guide - Page 6
Firmware Version 2.1.1 (or higher). • Fast elevator - the elevator speed is twice as fast as the previous versions of the Kodak i1800 Series Scanners. • Quick reload - allows you to quickly reload small stacks of documents before the elevator returns to the original Paper Source position (e.g., 250 - Konica Minolta Kodak i1840 | User Guide - Page 7
are included on a CD that is packed with each scanner. • International language support. • Ergonomic design includes an integrated operator adjustable height, • Automatic and manual feeding. • JPEG compression for color and grayscale images. • Image processing features include Kodak's Perfect Page - Konica Minolta Kodak i1840 | User Guide - Page 8
is the minimum recommended system configuration to run the Kodak i1800 Series Scanners. NOTE: The actual performance of the system depends on the scanning application, choice of scanning parameters, and the host computer configuration. If the scanner is not performing at the optimal speed, a faster - Konica Minolta Kodak i1840 | User Guide - Page 9
the Ultra-Lightweight Feeder Accessory these instructions are included and provide a description of how to use the Ultra-Lightweight Feed Module. • Kodak Manual Feeder for i1800 Series Scanners, A-61559 - when you purchase the manual feeder this document provides instructions on how to install and - Konica Minolta Kodak i1840 | User Guide - Page 10
the Kodak Service Center and have the following information ready: • The K-number of the scanner, which is located on the top cover of the scanner. • A brief description of the question or problem including error code numbers as displayed in the summary log file. See Chapter 6, Troubleshooting, for - Konica Minolta Kodak i1840 | User Guide - Page 11
Gas springs warning Material Safety Data Sheets (MSDS) are available on the Kodak website at: www.kodak.com/go/msds. When accessing the MSDSs from the website, you a part of the job description for operation of the scanner or any mechanical device. Do not attempt to repair the gas springs. These - Konica Minolta Kodak i1840 | User Guide - Page 12
Service Engineer. IMPORTANT: Compliance with regulations governing radio frequency emissions requires that the installation of your Kodak i1800 Series Scanners and used in accordance with the instruction manual, may cause harmful interference to . When such trouble occurs, the user may be required to - Konica Minolta Kodak i1840 | User Guide - Page 13
Taiwan WARNING: This is a Class A product. In a domestic environment this product may cause radio interference in which case the user may be required to take adequate measures. Peoples Republic of China WARNING: This is a Class A product. In a domestic environment this product may cause radio - Konica Minolta Kodak i1840 | User Guide - Page 14
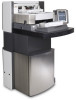
Started Scanner components guides can also be locked into position if desired. 5 Feed module - provides smooth document feeding of various sizes, thicknesses and textures. 6 Paper present sensor - detects the presence of documents in the input elevator. 7 Gap release button - allows you to manually - Konica Minolta Kodak i1840 | User Guide - Page 15
number on this sticker is the number you will be asked to provide when placing a call Kodak Service. 9 POD release latch - push up the POD release latch when you need to access the inside of the scanner. 10 Output tray and end stop - collects the scanned documents. The output tray width and end - Konica Minolta Kodak i1840 | User Guide - Page 16
18 Storage pocket - provides a convenient and easy-access area for storing calibration targets and documentation. A-61555 May 2010 2-3 - Konica Minolta Kodak i1840 | User Guide - Page 17
the ink blotter strips. The ink blotter strips collect residue from the Enhanced Printer. 5 Imaging guides - the scanner has an upper and lower imaging guide. It is important to keep the imaging guides clean to obtain optimum image quality. 6 Rollers - transport the documents through the paper path - Konica Minolta Kodak i1840 | User Guide - Page 18
one document enters the paper path at one time causing a multi-feed. Rear view Sensors 2 1 4 1 Power cord connection - provides power to the scanner. The scanner is packed with multiple power cords. Choose the power cord appropriate for your location and connect it accordingly. Connect the power - Konica Minolta Kodak i1840 | User Guide - Page 19
the input elevator • Adjusting the output tray • Adjusting the height of the scanner • Scanning documents • Automatic, continuous and manual feeding • Using the touchscreen Turning the scanner on The i1800 Series Scanners have two power switches. The main breaker switch is located on the back of - Konica Minolta Kodak i1840 | User Guide - Page 20
, the following screen will be displayed. When the scanner completes the power-up sequence, the Idle screen will be displayed. See the section entitled, Using the Idle screen. IMPORTANT: Always power up the host computer to its ready state before powering up the scanner. 3-2 A-61555 May 2010 - Konica Minolta Kodak i1840 | User Guide - Page 21
four leveling feet on the bottom of the scanner. If you need to move the scanner, these leveling feet must be raised. Contact your Kodak Service Representative before attempting to relocate the scanner. Starting and stopping scanning The scanner is controlled by a capture software application. To - Konica Minolta Kodak i1840 | User Guide - Page 22
damaged, or crushed pages can be transported successfully through the scanner. These documents may require manual feeding. • When scanning mixed-sized documents, in addition to protective sleeve, the input elevator side guides must be adjusted to accommodate the width of the sleeve. 3-4 A-61555 - Konica Minolta Kodak i1840 | User Guide - Page 23
feeding may be required. If your stack of documents contain mixed sizes and has been left- or right-edge aligned, adjust the side guides for offset feeding. Side guides may be locked into position after they are adjusted. This may be helpful when the placement of print strings is important. If you - Konica Minolta Kodak i1840 | User Guide - Page 24
available for scanning documents from 43 cm (17 in.) to 101.6 cm (40 in.). See the section entitled, "Ordering parts" in Chapter 5 or contact your Kodak Field Engineer at 1-800-3KODAK3 (1-800-356-3253). 3-6 A-61555 May 2010 - Konica Minolta Kodak i1840 | User Guide - Page 25
the input elevator and lower the extender into position. Output tray options The scanner is shipped with a standard output tray and a short document tray. Use " for more information. Adjusting the output tray Adjusting the side guides The output tray can be adjusted to a variety of positions to - Konica Minolta Kodak i1840 | User Guide - Page 26
Adjusting the output tray for document lengths up to 43.2 cm (17 in.) Adjusting for document length involves selecting an output tray position and angle, positioning the end stop, or removing the end stop and installing a document extender. Reviewing the following table will help you determine the - Konica Minolta Kodak i1840 | User Guide - Page 27
Adjusting the end stop Adjust the output tray end stop to slightly longer than the longest document being fed. Adjusting the angle of the output tray In addition to adjusting the back of the output tray, you can adjust the front of the tray by swinging the height adjustment wire out from - Konica Minolta Kodak i1840 | User Guide - Page 28
2. Swing the height adjustment wire out from underneath the output tray and insert it into one of the grooves on the printer access cover. 3. When finished using the output tray in this position, tuck the height adjustment wire back into position and lower the output tray. 3-10 A-61555 May 2010 - Konica Minolta Kodak i1840 | User Guide - Page 29
position. Left position Center position Right position NOTE: If you are feeding wider or heavy documents, additional exit deflectors can be used. Contact your Kodak Field Engineer at 1-800-3KODAK3 (1-800-356-3253) to order additional exit deflectors (Part No. 3E9575). A-61555 May 2010 3-11 - Konica Minolta Kodak i1840 | User Guide - Page 30
for scanning documents from 43.2 cm (17 in.) to 101.6 cm (40 in.). See the section entitled, "Ordering parts" in Chapter 5 or contact your Kodak Field Engineer at 1-800-3KODAK3 (1-800-356-3253). 1. Remove the end stop. 2. Insert the ends of the document extender into the holes on the output - Konica Minolta Kodak i1840 | User Guide - Page 31
Adjusting the short document tray 1. Remove the end stop on the output tray. 2. Slide the short document tray on the rail of the output tray and push it up to the desired position to accommodate your documents. 3. Adjust the sides guides as necessary. A-61555 May 2010 3-13 - Konica Minolta Kodak i1840 | User Guide - Page 32
. When you are raising or lowering the workspace table, be sure that there is nothing close to the scanner that would interfere with the upward and downward movement (e.g., chair, table, etc.). • Press the upper portion of the button on the control panel to raise - Konica Minolta Kodak i1840 | User Guide - Page 33
scanner has three multi-feed detection sensors that can be independently enabled or disabled. When multi-feed detection is enabled, adjust the side guides present sensor. NOTE: For Kodak i1800 Series Scanners, Firmware Version 2.1.X (or higher): When the i1800 Series Scanner is powered-on and paper - Konica Minolta Kodak i1840 | User Guide - Page 34
present sensor remains covered at all times. Manual feeding When the scanner is configured for manual feeding, the input elevator is raised to on the touchscreen. NOTE: The Kodak Manual Feeder Accessory is also available provides a larger surface for manual feeding. See Appendix A, Accessories for - Konica Minolta Kodak i1840 | User Guide - Page 35
are badly torn. If you are in doubt about whether a damaged document can be transported through the scanner, use the gap release button and manually feed the document. Using the scanner in continuous feed mode is recommended when handling special documents. 1. Raise the input elevator to the highest - Konica Minolta Kodak i1840 | User Guide - Page 36
Addressing - enabled When the Idle screen is displayed, you can do the following: • View the operator log • Access information about the scanner • Lower elevator • Run the scanner in count only mode • Perform a print test • Perform a patch test • Perform a self test • Clear path A-61555 May 2010 - Konica Minolta Kodak i1840 | User Guide - Page 37
Offset units of measure • Enable Fragile Feed Mode The Settings screen is accessed by touching Settings on the Idle screen. The Settings screen provides scanner settings that will only need to be set infrequently. NOTE: The value displayed under the option is the current setting. A-61555 May 2010 - Konica Minolta Kodak i1840 | User Guide - Page 38
Changing the alarm volume The Volume screen allows you to adjust the volume of the alarm from a Very High volume (loudest) to a Low volume (quietest) or to Off (no sound). The default is Low. 1. Touch Volume on the Settings screen to display the Volume screen. 2. Select the Volume option that you - Konica Minolta Kodak i1840 | User Guide - Page 39
Selecting the tone You can select the tone you want the scanner to make when a particular scanner condition is encountered such as, document jam or multi-feed, etc. 1. Touch Tone Select to display the Tones screen. 2. Select the event (e.g., Warning, Jam, etc.) - Konica Minolta Kodak i1840 | User Guide - Page 40
Selecting a language The Kodak i1800 Series Scanners support several languages. Select the language you want the information on the touchscreen to be displayed in. 1. Touch Language to display the Language screen. 2. Touch the - Konica Minolta Kodak i1840 | User Guide - Page 41
line help file for more information on image addressing or the Scanning Setup Guide PDF located on the installation CD. You can enable or disable image If you change this setting, you will need to power cycle the scanner. 1. From the Idle screen, select Settings to display the Settings screen - Konica Minolta Kodak i1840 | User Guide - Page 42
message will be displayed. 3. Touch Yes to change the image address status and restart the system, otherwise click Close. 4. Restart the scanner. NOTE: Disabling image addressing also disables the Patch Readers and batching. Toggle patch functionality will still be available. 3-24 A-61555 May - Konica Minolta Kodak i1840 | User Guide - Page 43
Calibrating the scanner The Kodak i1800 Series Scanners allow you to perform an Image calibration (black-and-white, color, grayscale) and UDDS calibration (multi-feed detection). Calibration optimizes your scanner to achieve the best image quality and feeding performance. Your scanner is properly - Konica Minolta Kodak i1840 | User Guide - Page 44
UDDS Calibration UDDS calibration is used to calibrate the ultrasonic document detection system for multi-feeds. UDDS calibration is rarely needed. This calibration should only be performed if there is a feeding or multi-feed detection issue. 1. Touch Calibrate. The Calibration screen will be - Konica Minolta Kodak i1840 | User Guide - Page 45
Printer units The Printer Units option is used to select the unit of measurement used in the Print Offset option. Select either English (for inches) or Metric (for millimeters). A-61555 May 2010 3-27 - Konica Minolta Kodak i1840 | User Guide - Page 46
of mixed-size documents NOTES: • Fragile Feed Mode can only be enabled when the scanner is idle. • If you use the Count Only option when Fragile Feed Mode is enabled, Feed Mode has no effect on the Kodak i1840 Scanner. • No changes to the host software or drivers are required. 3-28 A-61555 May 2010 - Konica Minolta Kodak i1840 | User Guide - Page 47
list Message window/Status bar - provides an up-to-date status of scanner activity and/or any operator messages. • Status field: displays the current scanner activity and messages. For example, if the scanner is scanning documents, Scanning, will be displayed in the Status field. • Sequential - Konica Minolta Kodak i1840 | User Guide - Page 48
displayed in the log are only those messages that have been posted since the scanner was powered on. When you turn the power off, the Operator Log have been cleared from the Operator Control Panel touchscreen, see Chapter 6, Troubleshooting. 3-30 • To clear the operator log, touch Clear. • After - Konica Minolta Kodak i1840 | User Guide - Page 49
information This screen provides information about your scanner. If you are using image addressing, the last image address value is displayed on this screen. 1. Touch Information on the Idle screen to display scanner information. 2. After viewing this information, touch Close to return to the - Konica Minolta Kodak i1840 | User Guide - Page 50
Count Only Mode. The Count Only screen will be displayed. 2. Place the documents you want to count in the input elevator. 3. Touch OK. When the scanner has scanned all documents, the total number will be displayed in the Status bar. 3-32 4. Touch End Job when finished to return to the Idle - Konica Minolta Kodak i1840 | User Guide - Page 51
Performing a Print test The print test checks to be sure the ink jets in the Enhanced Printer are working properly. 1. Touch Print Test. The Print Test screen will be displayed. 2. Place a blank sheet(s) of paper in the input elevator. 3. Touch OK. The document(s) in the output tray will display - Konica Minolta Kodak i1840 | User Guide - Page 52
must be enabled. This is done using the capture application software. When the scanner is enabled, the following screen is displayed. Lowering the elevator Enabled - Image Addressing - off Enabled - Image Addressing - on Use the Lower Elevator option whenever you - Konica Minolta Kodak i1840 | User Guide - Page 53
to the Idle state. NOTES: • The Print Offset option is only displayed on the OCP if the printer is enabled. • If your scanner is configured to auto start, it is recommended that you disable autostart if you want to use the Print Offset function for the first document. • - Konica Minolta Kodak i1840 | User Guide - Page 54
a batch. This may be useful if rescanning a stack of documents that have already been printed. The Disable Print function is only available after the scanner is enabled (scanning started from the host PC). If you want to disable printing for the first document in the batch, then your host software - Konica Minolta Kodak i1840 | User Guide - Page 55
Clearing the paper path The Clear Path option is displayed when the scanner is enabled or idle, but not when scanning. When this option is selected, the paper transport will run for a short period of time, ensuring that - Konica Minolta Kodak i1840 | User Guide - Page 56
of the patch test will be displayed on the touchscreen. The results show the number of patches and patch types that were recognized by the scanner. Performing a self test 3-38 Image Addressing - enabled Image Addressing - disabled 4. Touch End Job to return to the Idle screen. The - Konica Minolta Kodak i1840 | User Guide - Page 57
Scanning After enabling the scanner, depending on how your scanner is configured, your scanner will automatically start scanning, or you can touch the Scan button from the enabled screen. The following screen is displayed: Scanning - Image Addressing - off Scanning - - Konica Minolta Kodak i1840 | User Guide - Page 58
Changing image address levels Image address levels may be changed from the screen if image addressing is enabled and/or scanning. The next image address level is highlighted. To change the level: • Touch the level button you want to assign. 3-40 A-61555 May 2010 - Konica Minolta Kodak i1840 | User Guide - Page 59
pausing and resuming the scanner You can manually pause and resume the scanner while scanning documents. • Touch Pause on the touchscreen to stop scanning. The Pause button now becomes the Resume button. Automatically pausing and resuming the scanner • Touch Resume on the touchscreen to restart - Konica Minolta Kodak i1840 | User Guide - Page 60
Power Saver mode The Kodak i1800 Series Scanners are configured from the factory to go into Power Saver mode after 15 minutes of inactivity. This setting can be changed by your capture software application. If Power Saver is enabled, the scanner will begin a one-minute count-down prior to entering - Konica Minolta Kodak i1840 | User Guide - Page 61
Enhanced Printer overview A-61555 May 2010 This chapter provides instructions for using the Enhanced Printer and Patch Readers. The found in the Scanning Setup Guide and Kodak publication, A-61599, Patch Code Information. The Kodak i1800 Series Scanners include a factory-installed, preconfigured - Konica Minolta Kodak i1840 | User Guide - Page 62
Ink cartridge Print side Minimum printing distance from document lead edge Static fields available Dynamic fields available Languages supported Description 1 40 13 front, 8 rear, manually set, Set by capture software application 0, 90, 180 or 270 degrees 2 selectable, Bold or Normal NOTE: Not all - Konica Minolta Kodak i1840 | User Guide - Page 63
Changing print positions Changing the front horizontal print position The horizontal print position can be changed manually. You can change the front or rear print position. 1. Remove the output tray. 2. Open the print access cover. There are 13 horizontal print positions. These - Konica Minolta Kodak i1840 | User Guide - Page 64
3. The printer carrier slides easily along the rail. There is a small arrow on the green printer carrier. Slide the printer carrier to the desired position aligning the arrow with the detent position on the rail. Changing the rear horizontal print position 4. Close the printer access cover. 5. - Konica Minolta Kodak i1840 | User Guide - Page 65
from the front to the rear or vice versa The scanner comes with the printer carrier and ribbon cable installed for cartridge. NOTE: After you move the printer carrier and cable you must restart the scanner. Moving the printer carrier and cable from front position to the rear position NOTE: Remove - Konica Minolta Kodak i1840 | User Guide - Page 66
cover. 6. Install the printer carrier in the desired position. 7. Connect the ribbon cable. 8. Install the ink cartridge. 9. Close the top access cover. 10. Restart the scanner. 11. Run a print test. 4-6 A-61555 May 2010 - Konica Minolta Kodak i1840 | User Guide - Page 67
Replacing the ink cartridge Replace the ink cartridge when: • printed characters appear light or uneven • missing characters are evident • a print test reveals inconsistent character quality • cleaning has not improved the overall print quality Procedures for changing the ink cartridge, whether it - Konica Minolta Kodak i1840 | User Guide - Page 68
6. Press and hold the release tab on the bottom of the printer carrier and rotate the printer carrier back into position. NOTE: If the ribbon cable should become disconnected, snap it back into position. 7. Slide the printer carrier into the desired position matching the arrow on the printer carrier - Konica Minolta Kodak i1840 | User Guide - Page 69
Replacing the front blotter strip Blotter strips collect ink overflow. They should be replaced when there is a build-up of ink. Replacement blotter strips may be purchased through your supplier. 1. Open the pod. 2. Use the green tab to lift and remove the ink blotter strip cover to access the front - Konica Minolta Kodak i1840 | User Guide - Page 70
6. Align the blotter strip in the transport channel. Be sure it is properly aligned before pressing the adhesive side into the channel. 7. Press the blotter strip firmly into the channel. 8. Replace the ink blotter strip cover. 9. Close the pod. 4-10 A-61555 May 2010 - Konica Minolta Kodak i1840 | User Guide - Page 71
Replacing the rear blotter strips Blotter strips collect ink overflow. They should be replaced when there is a build-up of ink. Replacement blotter strips may be purchased through your supplier. 1. Remove the output tray. The rear blotter strips are located in the two drawers underneath the baffle. - Konica Minolta Kodak i1840 | User Guide - Page 72
be read. NOTE: Almost all patch reading problems are related to poor quality patch codes or will ensure the highest possible read rates. See Kodak publication A-61599, Patch Code Information, for Type 4 patch that is used to trigger the scanner to switch from the current image stream (black-andwhite - Konica Minolta Kodak i1840 | User Guide - Page 73
Definition for the current operation is defined as Level 3 and a Transfer Patch is used, the next document will be assigned Level 3. See Kodak publication A-61599, Patch Code Information, for complete information about patch placement and specifications. Patches can be tested using the Patch Test on - Konica Minolta Kodak i1840 | User Guide - Page 74
chart • a list of cleaning tools and materials • a list of supplies, consumables and accessories • cleaning procedures for the scanner • replacement procedures for customer-replaceable parts IMPORTANT: Scanner components marked with a green tab indicate operator-accessible parts. Cleaning your - Konica Minolta Kodak i1840 | User Guide - Page 75
the residue from the feed module, separation roller or drive rollers and cleaning the imaging guides. Use the chart below as a guide to the order and how frequently you should clean your scanner. Procedure Vacuum output tray and input areas (input elevator and transport) Clean all rollers Vacuum - Konica Minolta Kodak i1840 | User Guide - Page 76
Kodak Scanners (qty 144) Kodak Calibration Targets (qty 5) Black Background (for i1800/i700/i600 Series Scanners) Accessories Kodak White Background Accessory Kodak Manual Feeder for the i1800 Series Scanners Kodak following parts can be ordered from Parts Services. Parts Exit deflector 26 in. - Konica Minolta Kodak i1840 | User Guide - Page 77
Follow the cleaning procedure below to ensure the best scanner performance and image quality. Cleaning the OCP touchscreen cloth. Vacuuming the output tray and input elevator 1. Power down the scanner. 2. Remove the output tray. 3. Thoroughly vacuum the output tray area and the input elevator - Konica Minolta Kodak i1840 | User Guide - Page 78
the transport area, the separation roller tires and the feed module tires. 1. Pull up on the pod release lever and open the pod. 2. Manually rotate and wipe the rollers with a roller cleaning pad. IMPORTANT: The roller cleaning pad contains sodium lauryl ether sulfate and sodium silicate which can - Konica Minolta Kodak i1840 | User Guide - Page 79
Cleaning the separation roller tires 4. Pull the separation pad holder forward and remove the separation roller. 5. Manually rotate and wipe the separation roller tires with a roller cleaning pad. For best results wipe parallel to the ribs in order to remove any residue - Konica Minolta Kodak i1840 | User Guide - Page 80
Cleaning the feed module tires 9. Lift up the printer access cover. 10. Push the release lever down (located underneath the printer access cover) to release and remove the feed module. A-61555 May 2010 5-7 - Konica Minolta Kodak i1840 | User Guide - Page 81
11. Manually rotate and wipe the feed module tires with a roller cleaning pad. For best results wipe parallel to the ribs in order to remove any residue - Konica Minolta Kodak i1840 | User Guide - Page 82
Vacuuming the transport area 1. Open the pod. 2. Thoroughly vacuum the entire transport area, paying particular attention to these areas: the edges of the transport the reflective tape near the front of the transport Vacuuming under the background strips the reflective tape near the front of - Konica Minolta Kodak i1840 | User Guide - Page 83
Open the pod. 2. Wipe the upper and lower imaging guides with a Staticide wipe. IMPORTANT: Staticide wipes contain isopropanol which Refer to the MSDS for more information. 3. Wipe the upper and lower imaging guides again with an almost-dry Staticide wipe to remove any streaks. 4. When finished, close - Konica Minolta Kodak i1840 | User Guide - Page 84
1. Open the pod. 2. Turn the screw on each end of the upper imaging guide and remove it from its position. 3. Clean the imaging guide thoroughly with a Staticide wipe. 4. Wipe the imaging guide again with an almost-dry Staticide wipe to remove any streaks. IMPORTANT: There is no cover glass between - Konica Minolta Kodak i1840 | User Guide - Page 85
the areas between the lamps, then use a Staticide wipe to thoroughly clean the glass plate between the lamps. 3. Clean the lower imaging guide thoroughly with a Staticide wipe. 4. Wipe the imaging guide again with an almost-dry Staticide wipe to remove any streaks. 5. Reinstall the lower imaging - Konica Minolta Kodak i1840 | User Guide - Page 86
output tray. Running a transport cleaning sheet 8. Turn on the scanner. The transport should be cleaned with a Transport Cleaning Sheet fed several Remove the wrapping from the Transport Cleaning Sheet. 2. Adjust the side guides to the widest position. 3. Place the transport cleaning sheet in the - Konica Minolta Kodak i1840 | User Guide - Page 87
it and use a new one. When finished running the transport cleaning sheet: 1. Open the pod. 2. Wipe the exposed side of the upper and lower imaging guides with a lint-free cloth. 3. Close the pod and scan a test image to ensure image quality. 5-14 A-61555 May 2010 - Konica Minolta Kodak i1840 | User Guide - Page 88
that you change the preseparation pad at least as often as you change the feed module/ separation roller tires. • Imaging guides - replace when the imaging guides are heavily scratched and defects show in the image. Replacing the feed module 1. Remove the output tray. or feed module tires - Konica Minolta Kodak i1840 | User Guide - Page 89
4. Push down on the release lever (located underneath the printer access cover) to release and remove the feed module. 5. If you are just replacing the feed module, do the following. If you are replacing the tires, go to Step 6. • Insert the new feed module by aligning the pins, fitting it into - Konica Minolta Kodak i1840 | User Guide - Page 90
If you want to replace the tires, proceed as follows: 6. With one hand, press the locking tabs (one on each side) while holding the bottom housing with the other hand, pull the upper housing up and away from the rollers. Locking tab 7. Remove one core assembly. 8. Replace each tire by sliding the - Konica Minolta Kodak i1840 | User Guide - Page 91
12. Align the tabs on the upper housing with the slots on the lower housing. Locking tab 13. Press the upper and lower housings together until they snap into place. 14. Reinstall the feed module by aligning the pins, fitting it into position and pulling up on the release lever to lock it into place. - Konica Minolta Kodak i1840 | User Guide - Page 92
Replacing the separation roller or separation roller tires 1. Open the pod. 2. Pull the separation pad holder forward and remove the separation roller. If you want to replace the separation roller, do Steps 3 and 4. If you want to replace the separation roller tires, go to Step 5. 3. Insert the - Konica Minolta Kodak i1840 | User Guide - Page 93
the pre-separation pad by lifting the pad up and out of position. Replacing the imaging guides 3. Install the new pre-separation pad. Be sure it snaps into place. 4. Close the pod. The imaging guides should be replaced when they are heavily scratched and defects show in the image. NOTE: Handle - Konica Minolta Kodak i1840 | User Guide - Page 94
Troubleshooting This chapter provides: • Information on how to access the Operator Log. • A problem solving chart. • A message listing of possible errors you may encounter while using the scanner messages since the last power-cycle of the scanner, while the Scan Validation Tool can display all - Konica Minolta Kodak i1840 | User Guide - Page 95
Accessing the Operator Log from the Scan Validation tool 1. Select Start>Programs>Kodak>Document Imaging>Scan Validation Tool. 2. From the Driver Types box, select TWAIN. 3. From the Drivers box, select Kodak Scanner: i1800 and click OK. 4. Select the Scanner icon. 6-2 A-61555 May 2010 - Konica Minolta Kodak i1840 | User Guide - Page 96
5. From the main screen, click Settings. The Settings screen will be displayed. 6. Select Device. A-61555 May 2010 6-3 - Konica Minolta Kodak i1840 | User Guide - Page 97
the top of the list. See the following Message Listing for an explanation of error conditions. NOTE: The Kodak Field Engineer may request the error logs be saved and emailed to them as part of remote problem determination. Use the button to create a compressed log package. 6-4 A-61555 May 2010 - Konica Minolta Kodak i1840 | User Guide - Page 98
106, 331 • Clean the imaging guides. See Chapter 5, Maintenance for procedures. • Try to calibrate the scanner again. Be sure you are using • Turn the power off to the scanner, wait a few seconds and power the scanner back on. • If the problem persists, call Service and provide the ID number of the - Konica Minolta Kodak i1840 | User Guide - Page 99
failed. • Clean the imaging guides. See Chapter 5, Maintenance for procedures. • Try to calibrate the scanner again. Be sure you are using the correct calibration target. See Chapter 3, "Calibrating the Scanner". • If the problem persists, call Service. 111 Informational message. The front - Konica Minolta Kodak i1840 | User Guide - Page 100
• If the problem persists, call Service. 4 The image processing values sent by the host are invalid or in conflict with one another. • Check the job settings for illegal combinations. Refer to the Scanning Setup Guide due to inactivity. The scanner was started with an - Konica Minolta Kodak i1840 | User Guide - Page 101
failed. • Clean the imaging guides. See Chapter 5, Maintenance for procedures. • Try to calibrate the scanner again. Be sure you are using the correct calibration target. See Chapter 3, "Calibrating the Scanner". • If the problem persists, call Service. 113 Informational message. The rear - Konica Minolta Kodak i1840 | User Guide - Page 102
using the correct ultrasonics calibration target. See Chapter 3, "Calibrating the scanner". • Clean the sensors and try again. • If the problem persists, call Service. 332 Informational message. The scanner ultrasonics has been successfully calibrated. 21 • Perform an Ultrasonics calibration. See - Konica Minolta Kodak i1840 | User Guide - Page 103
Document too long 36 Document too long 48 Paused waiting for host 63 Scanner paused for rotation or host processing 90 Cannot run with both printers document preparation 143 Document too dark to deskew 149 Check imaging guides and lamps 177 Image outside document area 178 Check document - Konica Minolta Kodak i1840 | User Guide - Page 104
timeout 337 Requested pages scanned 355 Lamps timed out 359 Lamps not ready for scanning 381 Background accessory changed while powered up Many IDs Call Service Refer to the section entitled, "Contacting Support" in Chapter 1 for phone numbers and detailed information. A-61555 May 2010 6-11 - Konica Minolta Kodak i1840 | User Guide - Page 105
chart below as a guide to check possible solutions to problems you may encounter when using the Kodak i1800 Series Scanners. Problem Possible Solution Scanner does not power on Make sure that: • the power cord is plugged securely into the receptacle in the back of the scanner. • the wall outlet - Konica Minolta Kodak i1840 | User Guide - Page 106
extender is pulled out to provide support for long documents. • the scanner. • If you are using iThresholding, reduce the Contrast value. The Enhanced Printer is not printing as If you are having problems Clean the imaging guides. See Chapter 5, Maintenance. • Clean the scanner. See Chapter - Konica Minolta Kodak i1840 | User Guide - Page 107
in the scanner. Instructions for installing the White Background Accessory are included with the kit. CAT No. 894 9000 Kodak Manual Feeder When the need arises to manually feed documents, the Kodak Manual Feeder for the i1800 Series Scanners provides a flat work surface. The Manual Feeder can - Konica Minolta Kodak i1840 | User Guide - Page 108
Kodak High Resolution Printer Accessory The Kodak High Resolution Printer Accessory provides higher resolution printing on your documents - 600 dpi, front side, pre-scan only. When this printer is installed the Enhanced Printer will no longer be accessible. CAT No. 815 0237 A-2 A-61555 May 2010 - Konica Minolta Kodak i1840 | User Guide - Page 109
Ergonomic Height Adjustment Image Address Patch Readers Imprinting Operating Temperature Humidity Environmental Factors Heat Load Altitude Acoustic Noise i1840 Scanner: Duplex color scanner with an automatic document feeder including the enhanced printer, 160 pages per minute (landscape) i1860 - Konica Minolta Kodak i1840 | User Guide - Page 110
Eastman Kodak Company 343 State Street Rochester, NY 14650 U.S.A. © Kodak, 2010. All rights reserved. TM: Kodak
-
 1
1 -
 2
2 -
 3
3 -
 4
4 -
 5
5 -
 6
6 -
 7
7 -
8
-
9
-
10
-
11
-
12
-
13
-
14
-
15
-
16
-
17
-
18
-
19
-
20
-
21
-
22
-
23
-
24
-
25
-
26
-
27
-
28
-
29
-
30
-
31
-
32
-
33
-
34
-
35
-
36
-
37
-
38
-
39
-
40
-
41
-
42
-
43
-
44
-
45
-
46
-
47
-
48
-
49
-
50
-
51
-
52
-
53
-
54
-
55
-
56
-
57
-
58
-
59
-
60
-
61
-
62
-
63
-
64
-
65
-
66
-
67
-
68
-
69
-
70
-
71
-
72
-
73
-
74
-
75
-
76
-
77
-
78
-
79
-
80
-
81
-
82
-
83
-
84
-
85
-
86
-
87
-
88
-
89
-
90
-
91
-
92
-
93
-
94
-
95
-
96
-
97
-
98
-
99
-
100
-
101
-
102
-
103
-
104
-
105
-
106
-
107
-
108
-
109
-
110
 |
 |

User’s Guide
i1800 Series Scanners
A-61555
6J7418