Konica Minolta bizhub C3100P bizhub C3100P Print Functions User Guide - Page 66
Available operations in the [Layout] tab, Skip Blank s]
 |
View all Konica Minolta bizhub C3100P manuals
Add to My Manuals
Save this manual to your list of manuals |
Page 66 highlights
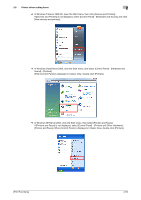
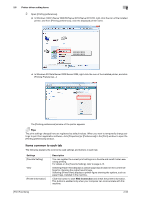
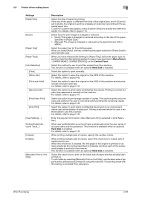
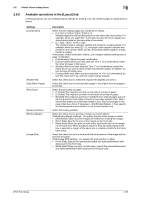
2.6 Printer driver setting items 2 2.6.8 Available operations in the [Layout] tab In the [Layout] tab, you can configure layout settings for printing. You can combine pages or adjust print positions. Settings [Combination] [Rotate 180] [Skip Blank Pages] [Print Type] [Binding Position] [Binding Margin] [Image Shift] Description Select how the original pages are combined on sheets. • [2 in 1]/[4 in 1]/[6 in 1]/[9 in 1]/[16 in 1]: Multiple pages are reduced and printed on the same side of one sheet. For example, when you select [9 in 1], the size of every set of nine pages is reduced and printed on the same side of one sheet. • [2 e 2]/[3 e 3]/[4 e 4] (PCL only): The original image is enlarged, divided and printed on multiple sheets. For example, when you select [2 e 2], one page of the original is divided and printed on four sheets. When you join the printed sheets together, a large poster is created. If necessary, click [Combination Details...] to configure detailed settings about page combination. • [Combination]: Select the page combination. • [Layout Order]: When you have selected "N in 1" in [Combination], select the order of pages in the layout. • [Border]: When you have selected "N in 1" in [Combination], select this check box if you want to draw border lines between pages. In addition, select the type of border lines. • [Overlap width line]: When you have selected "N e N" in [Combination], select this check box if you want to create overlap margins. Select this check box to rotate the original 180 degrees and print it. Select this check box to exclude blank pages in the original from the pages to be printed. Select the print sides of paper. • [1-Sided]: The original is printed on one side of a sheet of paper. • [2-Sided]: The original is printed on both sides of a sheet of paper. • [Booklet]: The original is printed in booklet format. Original pages are sort- ed and printed on both sides of sheets in two-page spread mode. When the printed sheets are collectively folded in two, they are arranged in the page order like a book. If necessary, click [Booklet Details...], then specify the binding position and whether or not to draw border lines. Select the binding position. Select this check box to provide a margin on printed sheets. Click [Binding Margin Settings...] to specify the size of the margin in detail. • [Shift Mode]: Select how the images are shifted for creating the margin. • [Front Side]: Specify the size of the margin on the front side. • [Back Side]: When you print on both sides, specify the size of the margin on the back side. When the [Same value for front and back sides] check box is selected, a margin of the same size is created on both the front and back sides. Select this check box to fine-tune (shift) the print position of the image with respect to the paper. Click [Image Shift Settings...] to specify the print position in detail. • [Front Side]: Specify the upward/downward and rightward/leftward shift distances for the front side. • [Back Side]: When you print on both sides, specify the upward/downward and rightward/leftward shift distances for the back side. [Print Functions] 2-56
-
 1
1 -
2
-
3
-
4
-
5
-
6
-
7
-
8
-
9
-
10
-
11
-
12
-
13
-
14
-
15
-
16
-
17
-
18
-
19
-
20
-
21
-
22
-
23
-
24
-
25
-
26
-
27
-
28
-
29
-
30
-
31
-
32
-
33
-
34
-
35
-
36
-
37
-
38
-
39
-
40
-
41
-
42
-
43
-
44
-
45
-
46
-
47
-
48
-
49
-
50
-
51
-
52
-
53
-
54
-
55
-
56
-
57
-
58
-
59
-
60
-
 61
61 -
 62
62 -
 63
63 -
 64
64 -
 65
65 -
 66
66 -
 67
67 -
 68
68 -
 69
69 -
 70
70 -
 71
71 -
72
-
73
-
74
-
75
-
76
-
77
-
78
-
79
-
80
-
81
-
82
-
83
-
84
-
85
-
86
-
87
-
88
-
89
-
90
-
91
-
92
-
93
-
94
-
95
-
96
-
97
-
98
-
99
-
100
-
101
-
102
-
103
-
104
-
105
-
106
-
107
-
108
-
109
-
110
-
111
-
112
-
113
-
114
 |
 |
