Kyocera FS-C8008DN FS-C8008N/DN Operation Guide Rev-1.0 - Page 167
Paper Jam — Left Cover,
 |
View all Kyocera FS-C8008DN manuals
Add to My Manuals
Save this manual to your list of manuals |
Page 167 highlights
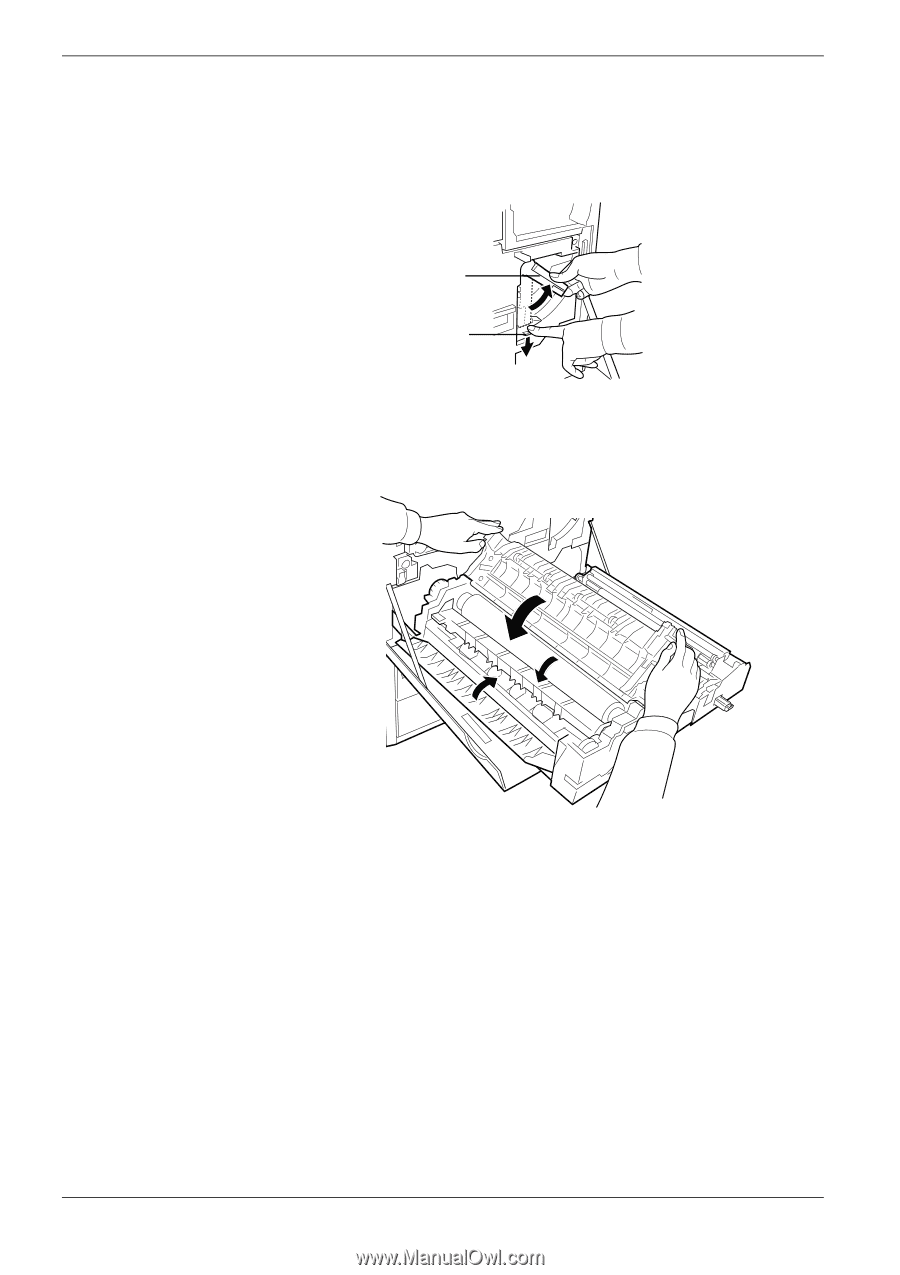
4.4 Clearing Paper Jams 12 Push the primary transfer unit back in. To do this, lower the lock button close to the bottom end of the lever to unlock the lever. Set the lever (in the position of six o'clock) back to the original (four o'clock) position. See the figure below. Green Lever Lock Button Figure 4-18 13 Close the sub-cover, the top cover, and the access cover to the fuser unit, and push the fuser unit back into the printer. Figure 4-19 14 Close the front cover. 4.4.8 Paper Jam - Left Cover The paper jammed in the face-up tray. After checking and clearing the jam in the face-up tray, also check the left cover for the face-up tray. Clear any paper jams in these components. 4-22
-
 1
1 -
2
-
3
-
4
-
5
-
6
-
7
-
8
-
9
-
10
-
11
-
12
-
13
-
14
-
15
-
16
-
17
-
18
-
19
-
20
-
21
-
22
-
23
-
24
-
25
-
26
-
27
-
28
-
29
-
30
-
31
-
32
-
33
-
34
-
35
-
36
-
37
-
38
-
39
-
40
-
41
-
42
-
43
-
44
-
45
-
46
-
47
-
48
-
49
-
50
-
51
-
52
-
53
-
54
-
55
-
56
-
57
-
58
-
59
-
60
-
61
-
62
-
63
-
64
-
65
-
66
-
67
-
68
-
69
-
70
-
71
-
72
-
73
-
74
-
75
-
76
-
77
-
78
-
79
-
80
-
81
-
82
-
83
-
84
-
85
-
86
-
87
-
88
-
89
-
90
-
91
-
92
-
93
-
94
-
95
-
96
-
97
-
98
-
99
-
100
-
101
-
102
-
103
-
104
-
105
-
106
-
107
-
108
-
109
-
110
-
111
-
112
-
113
-
114
-
115
-
116
-
117
-
118
-
119
-
120
-
121
-
122
-
123
-
124
-
125
-
126
-
127
-
128
-
129
-
130
-
131
-
132
-
133
-
134
-
135
-
136
-
137
-
138
-
139
-
140
-
141
-
142
-
143
-
144
-
145
-
146
-
147
-
148
-
149
-
150
-
151
-
152
-
153
-
154
-
155
-
156
-
157
-
158
-
159
-
160
-
161
-
 162
162 -
 163
163 -
 164
164 -
 165
165 -
 166
166 -
 167
167 -
 168
168 -
 169
169 -
 170
170 -
 171
171 -
 172
172 -
173
-
174
-
175
-
176
-
177
-
178
-
179
-
180
-
181
-
182
-
183
-
184
-
185
-
186
-
187
-
188
-
189
-
190
-
191
-
192
-
193
-
194
-
195
-
196
-
197
-
198
-
199
-
200
-
201
-
202
-
203
-
204
-
205
-
206
-
207
-
208
-
209
-
210
-
211
-
212
-
213
-
214
 |
 |
4.4 Clearing Paper Jams
4-22
12
12
12
12
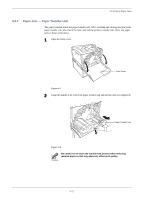
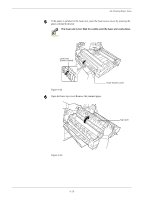
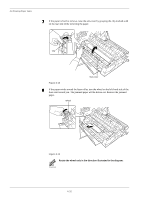
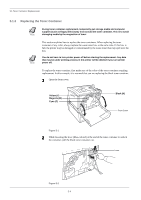
Push the primary transfer unit back in. To do this, lower the lock button close to the
bottom end of the lever to unlock the lever. Set the lever (in the position of six
o’clock) back to the original (four o’clock) position. See the figure below.
Figure 4-18
13
13
13
13
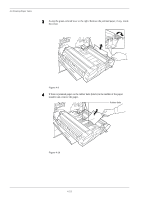
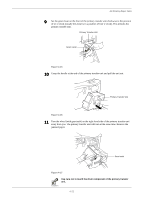
Close the sub-cover, the top cover, and the access cover to the fuser unit, and push
the fuser unit back into the printer.
Figure 4-19
14
14
14
14
Close the front cover.
4.4.8
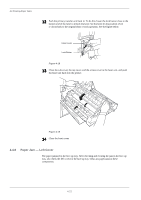
Paper Jam — Left Cover
The paper jammed in the face-up tray. After checking and clearing the jam in the face-up
tray, also check the left cover for the face-up tray. Clear any paper jams in these
components.
Green Lever
Lock Button