Kyocera TASKalfa 4551ci Printing System (11),(12),(13),(14) Release Notes (Fie - Page 3
Windows Vista only: choose File > Run as Administrator.
 |
View all Kyocera TASKalfa 4551ci manuals
Add to My Manuals
Save this manual to your list of manuals |
Page 3 highlights
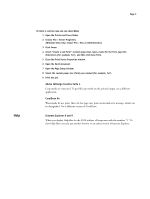
Help Page 3 TO PRINT A CUSTOM PAGE SIZE JOB FROM WORD 1 Open the Printer and Faxes folder. 2 Choose File > Server Properties. (Windows Vista only: choose File > Run as Administrator.) 3 Click Forms. 4 Select "Create a new form" (custom page size), type a name for the form, type the dimensions (for example, 7x7), and then click Save Form. 5 Close the Print Server Properties window. 6 Open the Word document. 7 Open the Page Setup window. 8 Select the custom paper size (form) you created (for example, 7x7). 9 Print the job. Adobe InDesign Creative Suite 4 Crop marks are truncated. To get full crop marks on the printed output, use a different application. CorelDraw X4 Watermarks do not print. Also, the last page may print an internal error message, which can be disregarded. Use a different version of CorelDraw. Internet Explorer 8 and 9 When you display Help files for the E100 utilities, all steps start with the number "1." To view Help files correctly, use another browser or an earlier version of Internet Explorer.
-
 1
1 -
 2
2 -
 3
3
 |
 |