Kyocera TASKalfa 620 TASKalfa 620/820 Print Driver Users Guide Rev 8.1 - Page 64
Temporary, Storing a Temporary Print Job, Permanent
 |
View all Kyocera TASKalfa 620 manuals
Add to My Manuals
Save this manual to your list of manuals |
Page 64 highlights
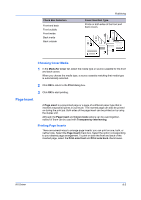
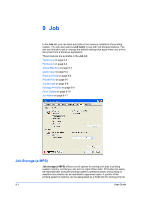
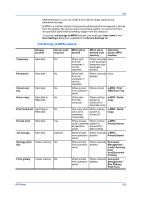
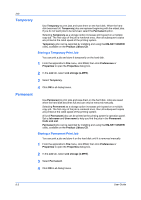
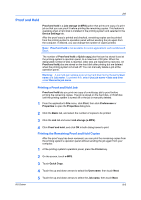
Job Temporary Use Temporary to print jobs and save them on the hard disk. When the hard disk becomes full, Temporary jobs are replaced beginning with the oldest jobs. If you do not want jobs to be removed, select the Permanent option. Selecting Temporary as a storage option increases print speed on a multiple copy job. The first copy of the job is rendered once, then all subsequent copies are printed at the rated speed of the printing system. Temporary jobs can be reprinted by installing and using the KM-NET VIEWER utility, available on the Product Library CD. Storing a Temporary Print Job You can print a job and store it temporarily on the hard disk. 1 From the application's File menu, click Print, then click Preferences or Properties to open the Properties dialog box. 2 In the Job tab, select Job storage (e-MPS). Permanent 3 Select Temporary. 4 Click OK in all dialog boxes. Use Permanent to print jobs and save them on the hard disk. Jobs are saved when the hard disk becomes full and can only be removed manually. Selecting Permanent as a storage option increases print speed on a multiple copy job. The first copy of the job is rendered once, then all subsequent copies are printed at the rated speed of the printing system. A list of Permanent jobs can be printed at the printing system's operation panel. Set a Job name and User name to help you find the jobs in the Permanent Code Job List. Permanent jobs can be reprinted by installing and using the KM-NET VIEWER utility, available on the Product Library CD. Storing a Permanent Print Job You can print a job and store it on the hard disk until it is removed manually. 1 From the application's File menu, click Print, then click Preferences or Properties to open the Properties dialog box. 2 In the Job tab, select Job storage (e-MPS). 3 Select Permanent. 4 Click OK in all dialog boxes. 9-3 User Guide
-
 1
1 -
2
-
3
-
4
-
5
-
6
-
7
-
8
-
9
-
10
-
11
-
12
-
13
-
14
-
15
-
16
-
17
-
18
-
19
-
20
-
21
-
22
-
23
-
24
-
25
-
26
-
27
-
28
-
29
-
30
-
31
-
32
-
33
-
34
-
35
-
36
-
37
-
38
-
39
-
40
-
41
-
42
-
43
-
44
-
45
-
46
-
47
-
48
-
49
-
50
-
51
-
52
-
53
-
54
-
55
-
56
-
57
-
58
-
 59
59 -
 60
60 -
 61
61 -
 62
62 -
 63
63 -
 64
64 -
 65
65 -
 66
66 -
 67
67 -
 68
68 -
 69
69 -
70
-
71
-
72
-
73
-
74
-
75
-
76
-
77
-
78
-
79
-
80
-
81
-
82
-
83
-
84
-
85
-
86
-
87
-
88
-
89
-
90
-
91
-
92
-
93
-
94
-
95
 |
 |
