LG A938KBGS Owners Manual - Page 49
Installing the Charging, Station, Installation
 |
View all LG A938KBGS manuals
Add to My Manuals
Save this manual to your list of manuals |
Page 49 highlights
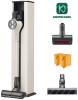
ENGLISH Installing the Charging Station CAUTION • Do not allow children or pets to hang onto the charging station. They could be injured or cause damage to the appliance. • Take care not to drop the product parts while unpacking them to avoid appliance damage or personal injury. NOTE • The cost of a service call to install or reinstall the charging station is not covered under the warranty. Installation Follow the steps below to install the charging station on a hard and level floor. CAUTION • Do not install on carpeted floors or rugs. The product may fall, causing injury or damage. INSTALLATION 11 2 Place the base plate on a flat, hard surface with the long side facing forward. Place the product onto the base plate. • Install the base plate with at least 2" (5cm) of clearance in the rear. If you plan to store the mop nozzle on the station, allow more than 2" (5 cm). • Keep an 8" (20cm) radius in the front clear of obstacles in order to open the doors of the station. 5 cm 20 cm • If the base plate and the product are not properly assembled, the product may fall over, causing product damage or injury. 1 Before installing the product, attach the gaskets a to the four grooves on the rear of the base plate b. • Peel off the paper from the gasket, remove foreign substances from the groove, and then attach the sticky side of the gasket to the base plate. • Attaching the gaskets on the base plate can prevent the base plate from slipping or scratching the floor when installing the product. 3 Place the station on the base plate and press down firmly on all sides to secure it on the base. • When properly assembled, the base plate and station should sit flat on the floor with no wobbling or bulges in the base plate. 4 Using the anti-tip kit, fix the product firmly to the wall.
-
 1
1 -
2
-
3
-
4
-
5
-
6
-
7
-
8
-
9
-
10
-
11
-
12
-
13
-
14
-
15
-
16
-
17
-
18
-
19
-
20
-
21
-
22
-
23
-
24
-
25
-
26
-
27
-
28
-
29
-
30
-
31
-
32
-
33
-
34
-
35
-
36
-
37
-
38
-
39
-
40
-
41
-
42
-
43
-
 44
44 -
 45
45 -
 46
46 -
 47
47 -
 48
48 -
 49
49 -
 50
50 -
 51
51 -
 52
52 -
 53
53 -
 54
54 -
55
-
56
-
57
-
58
-
59
-
60
-
61
-
62
-
63
-
64
-
65
-
66
 |
 |
