LG A938KBGS Owners Manual - Page 53
Before Charging the Battery, Charging the Product Body, Charging the Auxiliary Battery, Power
 |
View all LG A938KBGS manuals
Add to My Manuals
Save this manual to your list of manuals |
Page 53 highlights
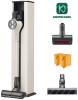
OPERATION Charging the Battery Before Charging the Battery • Make sure that the adapter is connected to both the charging station and the power outlet. • Fully charging a single battery usually takes about 4 hours. It will take twice as long to charge both the main and auxiliary batteries. • The battery will not be charged if the indoor temperature is below 41 °F (5°C). Only charge the battery when indoor temperatures are between 41 °F (5°C) and 100 °F (38 °C). • The battery will eventually need to be replaced. Due to the battery characteristics, runtime is shortened after using the appliance repeatedly for an extended period. • The last bar on the battery indicator begins to blink when the battery needs to be recharged. Use the appliance with a fully charged battery. • If the main battery is charging on the charging station, the auxiliary battery will only start charging once the main battery is fully charged. • To maintain battery life on dual-battery models, swap the positions of the two batteries periodically, between the main body and the auxiliary charging station. Charging the Product Body Storing the appliance on the charging station automatically recharges the battery. 1 Press the Power button to turn the appliance off. 2 Put the product body onto the charging station by aligning it to the hook a of the charging station. • Make the extension pipe its shortest length and insert it into the appliance. • The appliance cannot be loaded onto the charging station if either the combination tool or the crevice tool is inserted. Use the charging station only after removing the combination tool or the crevice tool, if either happens to be fitted. • If you don't hear a beep, reload the appliance on the charging station, making sure the nozzle is horizontal. OPERATION 15 • When charging is complete, the battery level indicator (@) lights up briefly and then turns off to save energy. • To save energy while charging the product body, press the Select Mode button to switch to the manual dust emptying mode. WARNING • Make sure to securely fit the product body onto the charging station. If the appliance falls off the charging station, it could cause injuries, property damage or product damage. Charging the Auxiliary Battery After the vacuum cleaner has finished charging, the auxiliary battery will start charging. One or two batteries are provided. The number of batteries varies depending on the model purchased. 1 Lift the front of the control panel located at the top of the charging station. 2 To insert, align the battery with the outline of the battery charger. ENGLISH
-
 1
1 -
2
-
3
-
4
-
5
-
6
-
7
-
8
-
9
-
10
-
11
-
12
-
13
-
14
-
15
-
16
-
17
-
18
-
19
-
20
-
21
-
22
-
23
-
24
-
25
-
26
-
27
-
28
-
29
-
30
-
31
-
32
-
33
-
34
-
35
-
36
-
37
-
38
-
39
-
40
-
41
-
42
-
43
-
44
-
45
-
46
-
47
-
 48
48 -
 49
49 -
 50
50 -
 51
51 -
 52
52 -
 53
53 -
 54
54 -
 55
55 -
 56
56 -
 57
57 -
 58
58 -
59
-
60
-
61
-
62
-
63
-
64
-
65
-
66
 |
 |
