LG LBC22520TT Owner's Manual (English) - Page 15
LG LBC22520TT - 22.4 cu. ft. Bottom-Freezer Refrigerator Manual
 |
UPC - 048231782593
View all LG LBC22520TT manuals
Add to My Manuals
Save this manual to your list of manuals |
Page 15 highlights
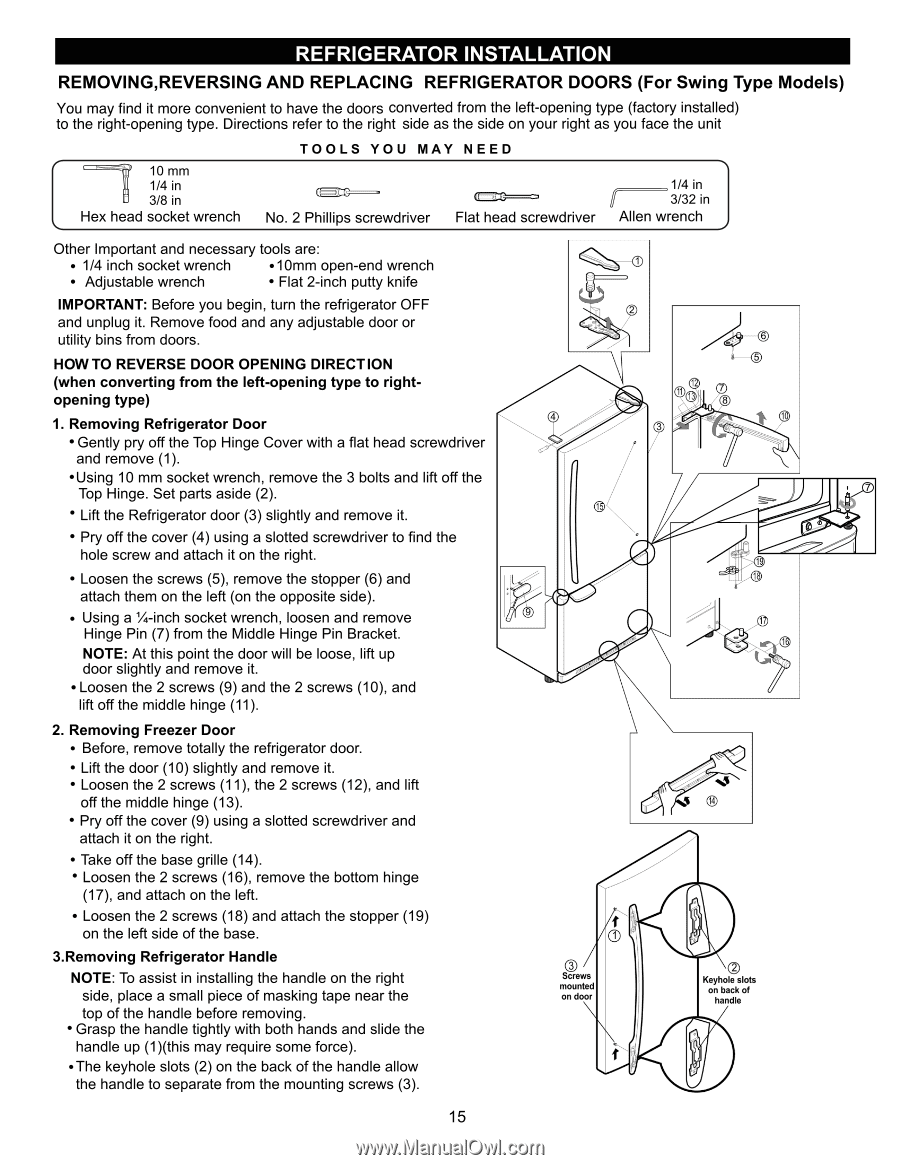
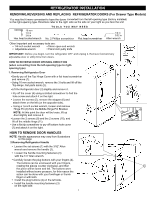
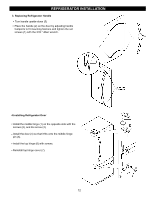
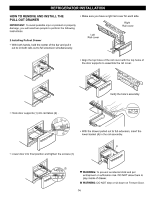
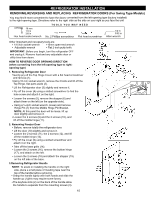
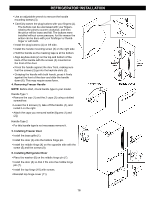
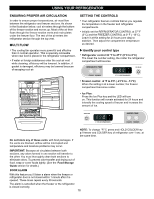
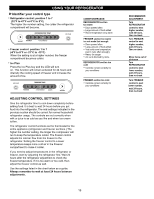
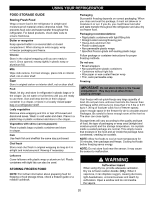
REFRIGERATOR INSTALLATION REMOVING,REVERSING AND REPLACING REFRIGERATOR DOORS (For Swing Type Models) 10 mm 1/4 in 3/8 in Hex head socket wrench TOOLS YOU MAY NEED No. 2 Phillips screwdriver Flat head screwdriver 1/4 in 3/32 in Allen wrench Other Important and necessary tools are: • 1/4 inch socket wrench • 10mm open-end wrench • Adjustable wrench • Flat 2-inch putty knife IMPORTANT: Before you begin, turn the refrigerator OFF and unplug it. Remove food and any adjustable door or utility bins from doors. HOW TO REVERSE DOOR OPENING DIRECT ION (when converting from the left-opening type to rightopening type) 1. Removing Refrigerator Door • Gently pry off the Top Hinge Cover with a flat head screwdriver and remove (1). •Using 10 mm socket wrench, remove the 3 bolts and lift off the Top Hinge. Set parts aside (2). 7 Lift the Refrigerator door (3) slightly and remove it. Pry off the cover (4) using a slotted screwdriver to find the hole screw and attach it on the right. Loosen the screws (5), remove the stopper (6) and attach them on the left (on the opposite side). Using a ¼-inch socket wrench, loosen and remove Hinge Pin (7) from the Middle Hinge Pin Bracket. NOTE: At this point the door will be loose, lift up door slightly and remove it. • Loosen the 2 screws (9) and the 2 screws (10), and lift off the middle hinge (11). 2. Removing Freezer Door Before, remove totally the refrigerator door. Lift the door (10) slightly and remove it. Loosen the 2 screws (11), the 2 screws (12), and lift off the middle hinge (13). Pry off the cover (9) using a slotted screwdriver and attach it on the right. Take off the base grille (14). Loosen the 2 screws (16), remove the bottom hinge (17), and attach on the left. Loosen the 2 screws (18) and attach the stopper (19) on the left side of the base. 3.Removing Refrigerator Handle NOTE: To assist in installing the handle on the right side, place a small piece of masking tape near the top of the handle before removing. Grasp the handle tightly with both hands and slide the handle up (1)(this may require some force). The keyhole slots (2) on the back of the handle allow the handle to separate from the mounting screws (3). 15
-
 1
1 -
2
-
3
-
4
-
5
-
6
-
7
-
8
-
9
-
 10
10 -
 11
11 -
 12
12 -
 13
13 -
 14
14 -
 15
15 -
 16
16 -
 17
17 -
 18
18 -
 19
19 -
 20
20 -
21
-
22
-
23
-
24
-
25
-
26
-
27
-
28
-
29
-
30
-
31
-
32
-
33
-
34
-
35
-
36
 |
 |