LG LMWC23626S Owners Manual - Page 11
Choosing the Proper, Location - lowes
 |
View all LG LMWC23626S manuals
Add to My Manuals
Save this manual to your list of manuals |
Page 11 highlights
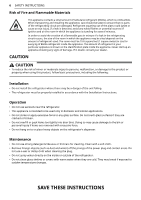
ENGLISH label, or the Tech Sheet that is located under the front of the refrigerator. NOTE • To remove any remaining tape or glue, rub the area briskly with your thumb. Tape or glue residue can also be easily removed by rubbing a small amount of liquid dish soap over the adhesive with your fingers. Wipe with warm water and dry. • Do not use sharp instruments, rubbing alcohol, flammable fluids, or abrasive cleaners to remove tape or glue. These products can damage the surface of your refrigerator. • Reinstall or adjust shelves as needed. Refrigerator shelves are installed in the shipping position. Reinstall shelves according to your individual storage needs. Choosing the Proper Location Water Must be located where a water supply can be connected for the automatic icemaker. NOTE • The water pressure must be 20 - 120 psi or 138 - 827 kPa or 1.4 - 8.4 kgf/cm2. If the refrigerator is installed in an area with low water pressure (below 20 psi or 138 kPa or 1.4 kgf/cm2), you can install a booster pump to compensate for the low pressure. INSTALLATION 11 Electricity Use an individual, grounded outlet:115 Volts, 60 Hz, AC, 15 Amps minimum. WARNING • Do not overload house wiring and cause a fire hazard by plugging in multiple appliances in the same outlet with the refrigerator. • To reduce the risk of electric shock, do not install the refrigerator in a wet or damp area. Flooring To avoid noise and vibration, the unit must be installed and leveled on a solidly constructed floor. If required, adjust the leveling legs to compensate for the unevenness of the floor. NOTE • Installing on carpeting, soft tile surfaces, a platform or weakly supported structure is not recommended. Ambient Temperature Install this appliance in an area where the temperature is between 55 °F (13 °C) and 110 °F (43 °C). If the temperature around the appliance is too low or high, cooling ability may be adversely affected. Dimensions and Clearances • Check the dimensions of the appliance and the installation path to ensure there is sufficient room to move the refrigerator through doors or narrow openings. • If an opening is too narrow to fit the refrigerator through, remove the refrigerator doors. See Removing/ Assembling the Doors and Drawers in this manual. • The installation location chosen for the refrigerator should allow space behind the unit for connections and airflow and space in front to open the doors and drawers.
-
 1
1 -
2
-
3
-
4
-
5
-
 6
6 -
 7
7 -
 8
8 -
 9
9 -
 10
10 -
 11
11 -
 12
12 -
 13
13 -
 14
14 -
 15
15 -
 16
16 -
17
-
18
-
19
-
20
-
21
-
22
-
23
-
24
-
25
-
26
-
27
-
28
-
29
-
30
-
31
-
32
-
33
-
34
-
35
-
36
-
37
-
38
-
39
-
40
-
41
-
42
-
43
-
44
-
45
-
46
-
47
-
48
-
49
-
50
-
51
-
52
-
53
-
54
-
55
-
56
-
57
-
58
-
59
-
60
-
61
-
62
-
63
-
64
-
65
-
66
-
67
-
68
-
69
-
70
-
71
-
72
-
73
-
74
-
75
-
76
-
77
-
78
-
79
-
80
-
81
-
82
-
83
-
84
-
85
-
86
-
87
-
88
-
89
-
90
-
91
-
92
-
93
-
94
-
95
-
96
-
97
-
98
-
99
-
100
-
101
-
102
-
103
-
104
-
105
-
106
-
107
-
108
-
109
-
110
-
111
-
112
-
113
-
114
-
115
-
116
-
117
-
118
-
119
-
120
-
121
-
122
-
123
-
124
-
125
-
126
-
127
-
128
-
129
-
130
-
131
-
132
-
133
-
134
-
135
-
136
-
137
-
138
-
139
-
140
-
141
-
142
-
143
-
144
-
145
-
146
-
147
-
148
-
149
-
150
-
151
-
152
-
153
-
154
-
155
-
156
-
157
-
158
-
159
-
160
-
161
-
162
-
163
-
164
-
165
-
166
-
167
-
168
-
169
-
170
-
171
-
172
-
173
-
174
-
175
-
176
 |
 |
