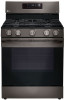
LG LRGL5823D Owners Manual
LG LRGL5823D Manual
 |
View all LG LRGL5823D manuals
Add to My Manuals
Save this manual to your list of manuals |
LG LRGL5823D manual content summary:
- LG LRGL5823D | Owners Manual - Page 1
ENGLISH ESPAÑOL OWNER'S MANUAL GAS RANGE Read this owner's manual thoroughly before operating the appliance and keep it handy for reference at all times. WARNING If the information in this manual is not followed exactly, a fire or explosion may result causing property damage, personal injury or - LG LRGL5823D | Owners Manual - Page 2
Manifold Panel and Knobs 46 Cleaning the Exterior 47 Door Care Instructions 47 EasyClean® 49 Self Clean (Model LRGL5825* / LRGL5823*) 51 Changing the Oven Light 51 Removing and Replacing the Lift-Off Oven Doors and Drawer 53 TROUBLESHOOTING 53 FAQs 55 Before Calling for Service 57 LIMITED WARRANTY - LG LRGL5823D | Owners Manual - Page 3
the size of the cookware. Cooking multiple items at once is possible by using different burners at the same time. Safe and Convenient Gas Range Provides safety and convenience for cooking. Self Clean (For Some Models) & EasyClean® Useful for easy cleaning. InstaView™ Two quick knocks on the sleek - LG LRGL5823D | Owners Manual - Page 4
all instructions when using the range to prevent the risk of fire, electric shock, personal injury, or damage. This guide does not cover all possible conditions that may occur. Always contact your service agent or manufacturer about problems that you do not understand. Download this owner's manual - LG LRGL5823D | Owners Manual - Page 5
leg is fully inserted into the anti-tip bracket. ••Refer to the installation section of the manual for proper anti-tip bracket installation. IMPORTANT SAFETY NOTICE Gas appliances can cause minor exposure to four potentially harmful substances, namely benzene, carbon monoxide, formaldehyde and - LG LRGL5823D | Owners Manual - Page 6
children to climb or play around the range. The weight of a child on an open door may cause the range to tip, resulting in serious burns or other injury. ••Leak testing of the appliance must be conducted according to the manufacturer's instructions. ••Gas leaks may occur in the system and result - LG LRGL5823D | Owners Manual - Page 7
installer, according to the installation instructions. Any adjustment and service should be performed only by qualified gas range installers or service technicians. ••Make sure your range is properly adjusted by a qualified service technician or installer for the type of gas (natural or LP) that is - LG LRGL5823D | Owners Manual - Page 8
8 IMPORTANT SAFETY INSTRUCTIONS WARNING ••To shut off the gas supply to the range, close the range gas shutoff valve by turning it clockwise. Lever open (in use) Pressure regulator Remove this label Adapter(1/2"-14 NPT) Range gas shut-off valve 1/2" Adapter Gas Flow into Range Installer: - LG LRGL5823D | Owners Manual - Page 9
INSTRUCTIONS 9 CAUTION ••Be sure that all surface controls are set in the Off position prior to supplying gas to the range that is placed over the burner grate to support the wok. This ring acts as a heat If you smell gas, turn off the gas to the range and call a qualified service technician. Never - LG LRGL5823D | Owners Manual - Page 10
INSTRUCTIONS the self clean cycle. ••Only clean the parts listed in this manual. ••Do not clean the door gasket. The door gasket is necessary the self cleaning mode malfunctions, turn the range off and disconnect the power supply. Have the range serviced by a qualified technician. ••It is normal - LG LRGL5823D | Owners Manual - Page 11
that is recommended for use in gas ovens. ••Always remove the broiler pan from the range after you finish broiling. Grease left oven. ••For optimal performance and energy savings, follow the guides on page 32 for proper rack and pan placements. •• instructions before using the appliance. SAVE THESE - LG LRGL5823D | Owners Manual - Page 12
manual (1ea) Anti-tip (1ea) LP nozzle conversion kit Screws (4ea) Anchors (4ea) Template (1ea) Optional Accessories Cooktop Nozzles (5ea) Oven Nozzles (2ea) Grid Air fry tray Broiler pan NOTE •• Contact LG Customer Service at (LG U.S.) 1-800-243-0000 or (LG in this guide may be different - LG LRGL5823D | Owners Manual - Page 13
installation instructions. Any adjustment and service should be performed only by qualified gas range installers or service technicians ruler Open-end or adjustable wrench Pipe wrench (2) (one for support) Materials You May Need •• Gas line shut-off valve •• Pipe joint sealant that resists action - LG LRGL5823D | Owners Manual - Page 14
. This appliance must not be installed with a ventilation system that blows air downward toward the range. This type of ventilation system may cause ignition and combustion problems with the gas cooking appliance resulting in personal injury or unintended operation. When the floor covering ends at - LG LRGL5823D | Owners Manual - Page 15
surfaces. These dimensions must be met for safe use of your range. The location of the electrical outlet and pipe opening (see Gas Pipe and Electrical Outlet Locations, page 14) may be adjusted to meet specific requirements. The range may be placed with 0" clearance (flush) at the back wall - LG LRGL5823D | Owners Manual - Page 16
-tip device is reengaged when the range is moved by following the guide of the Anti tip bracket template. •• Re-engage the anti-tip device if the range is moved. Do not operate the range without the anti-tip device in place and engaged. •• See installation instructions for details. •• Failure to do - LG LRGL5823D | Owners Manual - Page 17
. Install and use in accordance with the installation instructions. WARNING •• Do not use a flame to check for gas leaks. •• Isolate the range from the gas supply system by closing its individual shut-off valve during any pressure testing of the gas supply system at test pressures equal to or less - LG LRGL5823D | Owners Manual - Page 18
's - GFCI's are not required or recommended for gas range receptacles. Ground Fault Circuit Interrupters (GFCI's) are devices manually reset by the consumer. The National Electrical Code requires the use of GFCI's in kitchen receptacles installed to serve countertop surfaces. Performance of the range - LG LRGL5823D | Owners Manual - Page 19
Small burner head and cap Large burner head and cap Front of range Extra large burner head and cap Hole Electrode Hole Electrode Make sure Call for service. B Yellow tips on outer cones - This is normal for LP gas. C Soft blue flames - This is normal for natural gas. NOTE •• With LP gas, some - LG LRGL5823D | Owners Manual - Page 20
rack, adjust the leveling legs. 2 1 Adjusting Air Shutters (for LP Conversions) The range comes from the factory with the air shutters adjusted for proper air flow for natural gas. If converted to LP, follow the instructions provided in the conversion kit to properly adjust the air shutters. LP - LG LRGL5823D | Owners Manual - Page 21
Before Use Read all instructions before using. Make sure that all burners are properly placed. OPERATION 21 Burner Locations Your gas range cooktop has four or five sealed gas burners, depending on the model. These can be assembled and separated. Follow the guide below. 4 1 2 3 Make sure that - LG LRGL5823D | Owners Manual - Page 22
normal when you put a pot on the surface burner. In Case of Power Failure In case of a power failure, you can light the gas surface burners on the range with a match. Surface burners in use when an electrical power failure occurs will continue to operate normally. 1 Hold a lit match to the burner - LG LRGL5823D | Owners Manual - Page 23
as shown below. Front Use flat-bottomed wok CAUTION Do not use a wok support ring. Placing the ring over the burner or grate may cause the burner to work or removing the griddle plate. Preheat the griddle according to the guide below and adjust for the desired setting. Type of Food Warming - LG LRGL5823D | Owners Manual - Page 24
24 OPERATION The Oven Before Use Read all instructions before using. Make sure the electrical power cord and the gas valve are properly connected. Confirm the correct use of the range for the type of food you will cook. Make sure you know how to use the oven (temperature setting, time setting and - LG LRGL5823D | Owners Manual - Page 25
ENGLISH Control Panel Overview Model LRGL5825* 2 1 OPERATION 25 3 4 Model LRGL5823* 2 1 56 4 Model LRGL5821* 2 1 3 56 4 3 56 NOTE For best results, press buttons in the center, even when activating a button's secondary function. The buttons may not work properly if pressed - LG LRGL5823D | Owners Manual - Page 26
and closed. Press Light or knock on the door glass twice to manually turn the oven light on/off. NOTE •• The oven light cannot Hr. / min. 0:00 Hr. / min. Timer (LRGL5825*) 0:01 min. / sec. Timer (LRGL5823*/ LRGL5821*) 0:10 min. / sec. Cook Time 0:01 min. *Conv. Bake 300 °F / 150 °C *Conv. - LG LRGL5823D | Owners Manual - Page 27
twice to set the time in minutes and seconds. TIMER flashes in the display. 2 Set the time. Model LRGL5825* Use the number buttons. Model LRGL5823* / LRGL5821* Use the +/- buttons. 3 Press Timer On/Off to start the Timer. The remaining time countdown appears in the display. NOTE If Timer On/Off is - LG LRGL5823D | Owners Manual - Page 28
1 Press Settings repeatedly until PrE appears in the display. 2 Press 1 to turn the light on/off. 3 Press Start to accept the change. Model LRGL5823* / LRGL5821* 1 Model LRGL5823* Press and hold the Start Time button for 3 seconds. Press Start Time repeatedly until PrE appears in the display. Model - LG LRGL5823D | Owners Manual - Page 29
repeatedly until Beep appears in the display. 2 Press 1 repeatedly to select Hi, Lo or Off. 3 Press Start to accept the change. Model LRGL5823* / LRGL5821* 1 Model LRGL5823* Press and hold the Start Time button for 3 seconds. Press Start Time repeatedly until Beep appears in the display. Model - LG LRGL5823D | Owners Manual - Page 30
short beep sounds, Timed Delay and the start time appear in the display. The oven begins baking at the set start time. Model LRGL5823* / LRGL5821* 1 Press Bake. 350 °F appears in the display. 2 Set the temperature: Press or press and hold the +/- buttons until the desired temperature appears in the - LG LRGL5823D | Owners Manual - Page 31
wear oven mitts if adjusting racks while the oven is on. Replacing Racks 1 While wearing oven mitts, place the end of the rack on the support* 2 Tilt the front end of the rack up. 3 Push the rack in. 4 Check that the rack is properly in place. *When possible, adjust oven racks - LG LRGL5823D | Owners Manual - Page 32
32 OPERATION Recommended Baking and Roasting Guide •• Center pans on racks for best baking results Model LRGL5825* Press the number buttons to enter the desired oven temperature. Model LRGL5823* / LRGL5821* Press or press and hold the +/- buttons until the desired temperature appears in the display. - LG LRGL5823D | Owners Manual - Page 33
, bundt or pound cakes 3 Biscuits, muffins, brownies, cookies, cupcakes, layer cakes, pies 4 Casseroles 4 Roasting 1 or 2 Fresh/frozen pizza 3 Roasting rack guide Beef Pork Poultry Food Rare Rib Medium Well done Boneless rib, top sirloin Rare Medium Well done Beef tenderloin Rare - LG LRGL5823D | Owners Manual - Page 34
the intense radiant heat from the upper gas burner. The Broil function works best Grid Broiler pan When broiling refer to the broiling guide for placing the rack. Setting the Oven to Broil •• Broiling beyond recommended cooking times. NOTE This range is designed for closed-door broiling. Close the - LG LRGL5823D | Owners Manual - Page 35
-16 Do not Cut through back of shell. Spread open. turn over. Brush with melted butter before broiling and after half of broiling time. •• This guide is only for reference. Adjust cook time according to preference. NOTE The USDA advises that consuming raw or undercooked fish, meat, or poultry can - LG LRGL5823D | Owners Manual - Page 36
will not change.) 2 Set the Bake temperature Model LRGL5825* Use the number buttons. Model LRGL5823*, LRGL5821* Use the +/- buttons. 3 Press the START button. NOTE •• There is a 15 second hold Remote Start until the icon blinks. 2 Follow the instructions in the LG ThinQ app to connect the appliance. - LG LRGL5823D | Owners Manual - Page 37
enable the function. 3 Start the preheat function on the oven from the LG ThinQ app. Frozen Meal (Model LRGL5825*) The Frozen Meal function is *) Setting the Warm Function (Model LRGL5823*/ LRGL5821*) 1 Press Warm or Air fry/Warm once for Model LRGL5821* and twice for Model LRGL5823*. 2 Press - LG LRGL5823D | Owners Manual - Page 38
evenly in a single layer. •• Use either the optional Air Fry Tray available from LG or a dark baking tray with no sides or short sides that does not cover the . 400 °F appears in the display. 2 Set the oven temperature (Range:300°F~550°F) Model LRGL5825* Press the number buttons to enter the desired - LG LRGL5823D | Owners Manual - Page 39
OPERATION 39 ENGLISH Air Fry Cook Guide - Air Fry Tray •• Arrange food evenly in a single layer. •• Put a foil-lined 450 450 450 450 450 450 450 450 450 425 425 400 425 425 425 425 Rack Position Time (min) Guide 4 15-25 4 2030 4 15-30 4 15-25 4 23-33 4 30-40 Cut the potatoes and - LG LRGL5823D | Owners Manual - Page 40
40 OPERATION Air Fry Cook Guide - Dark Nonstick Baking Pan •• Arrange food evenly in a single layer. •• Use a * - 2.5 oz 90 425 4 each, 3/4" diam. (70 g each, 2 cm diam.) Time (min) 1st Side 2nd Side Guide 19-26 19-25 - 5-11 19-26 13-19 14-20 5-11 5-11 4-10 16-22 16-22 8-14 8-14 Cut - LG LRGL5823D | Owners Manual - Page 41
the control panel is lit. •• The appliance supports 2.4 GHz Wi-Fi networks only. To check your network frequency, contact your Internet service provider or refer to your wireless router manual. •• LG ThinQ is not responsible for any network connection problems or any faults, malfunctions, or errors - LG LRGL5823D | Owners Manual - Page 42
LG ThinQ Application Search for the LG ThinQ application from the Google Play Store or Apple App Store on a smartphone. Follow instructions you purchased the product. Wireless LAN Module Specifications Model LCW-004 Frequency Range 2412 MHz - 2462 MHz Output Power(max) < 30 dBm FCC Notice - LG LRGL5823D | Owners Manual - Page 43
If you experience a problem with your Wi-Fi equipped appliance, it can transmit troubleshooting data to a smartphone using the LG ThinQ application. •• Launch the LG ThinQ application and select the Smart Diagnosis feature in the menu. Follow the instructions provided in the LG ThinQ application - LG LRGL5823D | Owners Manual - Page 44
•• Always wear gloves when cleaning the cooktop. Removing and Replacing the Gas Surface Burners Grates and burner heads/caps can be removed for care . Lifting the cooktop surface can lead to damage and improper operation of the range. Foods with high acid or sugar content may cause a dull spot if - LG LRGL5823D | Owners Manual - Page 45
Air openings are located at the rear of the cooktop, at the top and bottom of the oven door, and at the bottom of the range. Cleaning the Burner Grates CAUTION •• Do not lift the grates out until they have cooled. •• Grates should be washed regularly and after spillovers. •• Wash the - LG LRGL5823D | Owners Manual - Page 46
clean the manifold panel after each use of the range. For cleaning, use a damp cloth and mild or other objects on them. This can damage the gas valve shaft. •• The control knobs may be removed customer service number: 1-800-243-0000 (USA), 1-888-542-2623(CANADA) or visit our website at: www.lg.com - LG LRGL5823D | Owners Manual - Page 47
ENGLISH Door Care Instructions Most oven doors contain glass that can break. CAUTION •• water and dry. MAINTENANCE 47 EasyClean® LG's EasyClean® enamel technology provides two cleaning options for the inside of the range. The EasyClean® feature takes advantage of LG's new enamel to help lift soils - LG LRGL5823D | Owners Manual - Page 48
48 MAINTENANCE EasyClean® Instruction Guide 1 Remove oven racks and accessories from the oven. 2 Scrape off oven with water before starting EasyClean®, press Clear/ Off to end the cycle. Wait for the range to cool to room temperature and then spray or pour water into the oven and start another - LG LRGL5823D | Owners Manual - Page 49
unattended near the appliance. During the Self Clean cycle, the outside of the range can become very hot to the touch. •• If you have pet birds, has cycle times of 3, 4, or 5 hours. Self Clean Soil Guide Soil Level Lightly Soiled Oven Cavity Moderately Soiled Oven Cavity Heavily Soiled Oven - LG LRGL5823D | Owners Manual - Page 50
time of day you would like the Self Clean to start. Model LRGL5823* / LRGL5821* Press the +/- buttons until the display shows the time of day you would do not slide smoothly after a self-clean cycle, wipe racks and rack supports with a small amount of vegetable oil to make them glide more easily. - LG LRGL5823D | Owners Manual - Page 51
3 Pull the bulb out of the socket. 4 Insert a new bulb into the socket. 5 Insert the glass bulb cover and turn it clockwise. 6 Plug in the range or reconnect the power. MAINTENANCE 51 Removing and Replacing the Lift-Off Oven Doors and Drawer CAUTION •• Be careful when removing and lifting the door - LG LRGL5823D | Owners Manual - Page 52
Hinge lock 4 Remove the drawer. Replacing the Drawer 1 Place the drawer rails on the guides. 2 Push the drawer back until it stops. 5 Close the oven door. Removing the Drawer CAUTION Disconnect the electrical power to the range at the main fuse or circuit breaker panel. Failure to do so can result - LG LRGL5823D | Owners Manual - Page 53
Adjustment section in this manual for easy instructions on how to adjust your thermostat. Is it normal to hear a clicking noise coming from the back of my oven when I am using it? Your new range and reset the clock if needed. TROUBLESHOOTING 53 Can I use aluminum foil - LG LRGL5823D | Owners Manual - Page 54
and small drops of cheese. Please refer to the EasyClean® section in your owner's manual for more information. What is required for EasyClean®? A spray bottle filled with water, spillage into the oven bottom vents (gas range) is okay. However, it is recommended to try avoid spilling too much water into - LG LRGL5823D | Owners Manual - Page 55
TROUBLESHOOTING 55 ENGLISH Before Calling for Service Before you call for service, review this list. It may save If the range is connected to LP gas, contact the technician who installed your range or made the conversion. Make sure that the oven gas shut-off valve, located behind the range, is - LG LRGL5823D | Owners Manual - Page 56
56 TROUBLESHOOTING Symptoms "Crackling" or "popping" sound. Too much smoke during the closed. - Close the oven door. •• Check the main gas shut-off valve or the oven gas shut-off valve and call for service. •• Remove the power from the range for five minutes and then reconnect the power. If the - LG LRGL5823D | Owners Manual - Page 57
PROCEDURE FOR RESOLVING DISPUTES" BELOW. Should your LG Gas Range ("Product") fail due to a defect in to state. THIS LIMITED WARRANTY DOES NOT COVER: •• Service trips to deliver, pick up, or install, educate how contrary to the instructions outlined in the Product's owner's manual. •• Costs - LG LRGL5823D | Owners Manual - Page 58
LIMITED WARRANTY Not Covered by this Limited Warranty Problem •• Cooktop enamel chipping off Improper usage Cause not allow the burner to operate properly Must be cleaned •• Check and clean the gas electrode. •• Uneven flame OK Not working 1. Improper burner cap installation Burner cap - LG LRGL5823D | Owners Manual - Page 59
ENGLISH Problem •• Knobs melt Improper usage Cause LIMITED WARRANTY 59 Prevention •• Do affect the performance of the oven. •• Check with gas supplier first 1. Range not leveled 2. Anti-tip device not installed correctly Level both sides of range Approximately 0.65" (16.5 mm) Anti-tip bracket - LG LRGL5823D | Owners Manual - Page 60
shut-off valve Gas Flow into Range 1/2" Adapter 1/2" or 3/4" Gas pipe The cost of repair or replacement under the above excluded circumstances shall be borne by the consumer. TO OBTAIN WARRANTY SERVICE AND ADDITIONAL INFORMATION Call 1-800-243-0000 and select the appropriate option from the menu - LG LRGL5823D | Owners Manual - Page 61
a copy of this provision, to the AAA in the manner described in the AAA Rules. You must also send a copy of your written demand to LG at LG Electronics, USA, Inc. Attn: Legal Department- Arbitration 111 Sylvan Avenue, Englewood Cliffs, NJ 07632. If there is a conflict between the AAA Rules and the - LG LRGL5823D | Owners Manual - Page 62
number; and (d) the serial number (the serial number can be found (i) on the product; or (ii) online by accessing https://www.lg.com/us/support/repair-service/schedule-repaircontinued and clicking on "Find My Model & Serial Number"). You may only opt out of the dispute resolution procedure in the - LG LRGL5823D | Owners Manual - Page 63
GAS Lea detenidamente el manual del usuario antes de poner el aparato en funcionamiento y consérvelo a mano en todo momento para su referencia. ADVERTENCIA Si no sigue con exactitud la información de este manual LRGL5821* MFL33029630 www.lg.com Copyright © 2020 LG Electronics Inc. Todos los Derechos - LG LRGL5823D | Owners Manual - Page 64
ír con aire) (Modelo LRGL5825*/ LRGL5823*) 41 FUNCIONES INTELIGENTES 41 Aplicación LG ThinQ 42 Aviso de la FCC 42 Declaración sobre exposición a la de la FCC 43 Función Smart Diagnosis™ 44 MANTENIMIENTO 44 Hornallas de Gas 45 Parrilla de los quemadores 45 Limpieza de la superficie de la placa - LG LRGL5823D | Owners Manual - Page 65
con el tamaño de su batería de cocina. Es posible cocinar varias cosas a la vez si utiliza más de un quemador. Estufa de gas segura y confiable Brinda seguridad y confiabilidad para cocinar. Sistema de auto limpieza (Self Clean) (Solo algunos modelos) & EasyClean® Útil para una limpieza sencilla - LG LRGL5823D | Owners Manual - Page 66
. Siempre comuníquese con su agente de servicio técnico o con el fabricante cuando haya problemas que no comprenda. Descargue este manual del propietario en: http://www.lg.com Este es el símbolo de alerta de seguridad. Este símbolo le advierte sobre posibles riesgos que pueden ocasionar daños - LG LRGL5823D | Owners Manual - Page 67
nivelación trasera esté insertada por completo en el soporte antivuelco. •• Consulte el manual de instalación para ver la instalación adecuada del soporte antivuelco. AVISO IMPORTANTE DE SEGURIDAD Los aparatos de gas causan exposición mínima a cuatro de estas sustancias: benceno, monóxido de carbono - LG LRGL5823D | Owners Manual - Page 68
no detectarse solo con el sentido del olfato. Los proveedores de gas recomiendan que compre e instale un detector de gas aprobado por UL. Instale el detector y úselo según las instrucciones del fabricante del detector de gas. •• No use limpiadores comerciales para horno sobre el acabado del horno - LG LRGL5823D | Owners Manual - Page 69
que el instalador le muestre el lugar de la válvula que corta el gas de la estufa y cómo apagarla si fuera necesario. ADVERTENCIA •• Haga que ni reemplazar ninguna pieza de su estufa, excepto en caso de que este manual lo mencione específicamente. Un técnico calificado debe estar a cargo de todas - LG LRGL5823D | Owners Manual - Page 70
cocina. QUEMADORES DE SUPERFICIE ADVERTENCIA •• Incluso si la llama del quemador superior se apaga, el gas sigue saliendo hacia el quemador hasta que la perilla se coloque en la posición Off. Si huele a gas, abra la ventana de inmediato y ventile el área durante cinco minutos antes de volver a usar - LG LRGL5823D | Owners Manual - Page 71
controles de superficie estén en la posición Off antes de suministrar gas a la estufa. •• Nunca deje los quemadores de superficie sin las rejillas estén frías antes de tratar de quitarlas. •• Si huele a gas, apague el gas de la estufa y llame a un técnico calificado. Nunca use una llama viva - LG LRGL5823D | Owners Manual - Page 72
horno y cualquier otro elemento de los hornos superior e inferior antes de iniciar el ciclo de auto limpieza. •• Sólo limpie las piezas enumeradas en este manual. •• No limpie la junta de la puerta. La junta de la puerta resulta necesaria para lograr un buen sellado. Tenga cuidado de no frotar, da - LG LRGL5823D | Owners Manual - Page 73
horno. •• Al usar bolsas para hornear o asar en el horno, siga las instrucciones del fabricante. •• Use solo recipientes de vidrio recomendados para hornos de gas. •• Siempre quite la bandeja del asador del horno apenas termine de asar. La grasa dejada en la bandeja se puede encender si se usa el - LG LRGL5823D | Owners Manual - Page 74
LRGL5825* (3 c/u) - LRGL5823*/LRGL5821* (2 c/u) Kit antivuelco Comal (1 c/u) - LRGL5825*/LRGL5823* Manual del usuario (1 c/u) Soporte antivuelco •• Comuníquese con el Servicio de atención al cliente de LG al (LG U.S.) 1-800-243-0000 o (LG Canadá) 1-888-542-2623 si falta algún accesorio. •• Para - LG LRGL5823D | Owners Manual - Page 75
use un conector viejo cuando instale una estufa nueva. •• Adaptador de unión abocardada para conexión a línea de suministro de gas (3/4" o 1/2" NPT x 1/2" D. I.) •• Adaptador de unión abocardada para conexión al regulador de presión de la estufa (1/2" NPT x 1/2" D. I.) •• Detector líquido de fugas - LG LRGL5823D | Owners Manual - Page 76
calor de hasta 194 °F (90 °C) generado por la estufa. Consulte las Instrucciones de seguridad de instalación incluidas en este manual. Ubicaciones de la tubería de gas y el tomacorriente eléctrico 30" (76,2 cm) 5" (12,6 cm) 7 1/2" (19 cm) 2" (5,1 cm) 3" (7,6 cm) 23 1/2" (60 cm) 11 1/2" (30 cm - LG LRGL5823D | Owners Manual - Page 77
dejando un espacio de 0" (al ras) de la pared posterior. Espacios libres de instalación Mínimo a los armarios situados en ambos lados de la estufa de gas 18" (45,72 cm) 5" Espacio mínimo a la pared izquierda 30" (76,2 cm) 30" (76,2 cm) Mínimo Profundidad máxima para gabinetes ubicados sobre la - LG LRGL5823D | Owners Manual - Page 78
columna de agua a LP. Asegúrese de suministrar a su estufa el tipo de gas para el cual está configurada. Esta estufa es convertible para uso con gas natural o LP. Al usar la estufa con gas LP, un instalador de gas LP calificado debe realizar la conversión antes de intentar hacer funcionar la estufa - LG LRGL5823D | Owners Manual - Page 79
los códigos locales requieran una conexión de tubería rígida. Se debe instalar una válvula manual en una ubicación accesible en la tubería de gas externa a la estufa con el fin de abrir o cerrar el suministro de gas a la estufa. Nunca reutilice un conector viejo cuando instale una estufa nueva. Para - LG LRGL5823D | Owners Manual - Page 80
CAN/CSA Z240/MH. Sellado de aberturas Selle todas las aberturas en la pared y el piso después de completar los suministros eléctrico y de gas. Asegúrese de contar con una buena conexión a tierra antes de usar la estufa PRECAUCIÓN El cliente debe solicitar que un electricista calificado verifique - LG LRGL5823D | Owners Manual - Page 81
de los quemadores. A Llamas amarillas- Solicite mantenimiento. B Puntas amarillas en conos externosEsto es normal para el gas LP. C Llamas azul claro- Esto es normal para gas natural. NOTA •• Con gas LP, es normal detectar algunas puntas amarillentas en los conos externos. Ajuste del quemador de - LG LRGL5823D | Owners Manual - Page 82
, siga las instrucciones del kit de conversión para ajustar los obturadores de aire adecuadamente. Un técnico calificado debe realizar la conversión a gas LP. Colocación del dispositivo antivuelco Soporte antivuelco Pata de nivelación 1 Deslice la estufa contra la pared y asegúrese de que la pata - LG LRGL5823D | Owners Manual - Page 83
un paño de limpieza u otros materiales sobre ellos. Tocar las parrilla antes de que se enfríen puede causar quemaduras. PRECAUCIÓN QUÉ HACER SI HUELE A GAS •• Abra las ventanas. •• No intente encender ningún aparato. •• No toque ningún interruptor eléctrico. •• No use ningún teléfono en su edificio - LG LRGL5823D | Owners Manual - Page 84
volverse amarillas si hay un alto grado de humedad, por ejemplo si el día es lluvioso o si hay un humidificador cerca. •• Despues de la conversión a gas LP, las llamas pueden ser más grandes de lo normal cuando coloque una olla en la superficie del quemador. Batería de cocina para la superficie de - LG LRGL5823D | Owners Manual - Page 85
Uso de un wok Si utiliza un wok, use uno de 14 pulgadas o menos con fondo plano. Asegúrese de que la base del wok quede nivelada sobre la parrilla. FUNCIONAMIENTO 23 Cómo colocar el comal: El comal solo puede usarse con el quemador central. El comal se debe ubicar correctamente en la parrilla - LG LRGL5823D | Owners Manual - Page 86
usar. Asegúrese de que el cable de alimentación y la válvula de gas estén bien conectados. Confirme el uso correcto de la estufa para el tipo ón de tiempo y receta) para mejores resultados. PRECAUCIÓN QUÉ HACER SI HUELE GAS •• Abra las ventanas. •• No intente encender ningún aparato. •• No toque - LG LRGL5823D | Owners Manual - Page 87
ESPAÑOL Descripción general del panel de control Modelo LRGL5825* 2 1 FUNCIONAMIENTO 25 3 4 Modelo LRGL5823* 2 1 56 4 Modelo LRGL5821* 2 1 3 56 4 3 56 NOTA Para obtener mejores resultados, pulse los botones en el centro, incluso al activar la función secundaria de un botón. Es - LG LRGL5823D | Owners Manual - Page 88
ón mínima o por encima de la máxima para esa función, suenan dos tonos cortos. Función Reloj Temporizador (LRGL5825*) Temporizador (LRGL5823*/ LRGL5821*) Tiempo de cocción *Hornear por conv. *Rostizar por conv. Asar Hornear Favorite ① - Pan Favorite ② - Carne Favorite ③ - Pollo Comida congelada - LG LRGL5823D | Owners Manual - Page 89
en minutos y segundos. TIMER empezara a parpadear en la pantalla. 2 Establecer la hora. Modelo LRGL5825* Use los botones Number. Modelo LRGL5823* / LRGL5821* Use los botones +/-. 3 Presione Timer On/Off para iniciar el temporizador. La cuenta regresiva del tiempo restante aparece en pantalla. NOTA - LG LRGL5823D | Owners Manual - Page 90
. Presione Settings nuevamente para agregar un signo de menos si la temperatura baja. 3 Presione el Start para aceptar el cambio. Modelo LRGL5823* / LRGL5821* 1 Modelo LRGL5823* Mantenga presionado el botón Start Time durante 3 segundos. Presione el Start Time varias veces hasta que AdJU aparezca en - LG LRGL5823D | Owners Manual - Page 91
que Beep aparezca en la pantalla. 2 Presione el 1 para seleccionar Hi, Lo u Off. 3 Presione el Start para aceptar el cambio. Modelo LRGL5823* / LRGL5821* 1 Modelo LRGL5823* Mantenga presionado el botón Start Time durante 3 segundos. Presione el Start Time varias veces hasta que Beep aparezca en la - LG LRGL5823D | Owners Manual - Page 92
en la pantalla aparecerá Timed Delay y la hora de inicio. El horno comenzará a hornear a la hora de inicio configurada. Modelo LRGL5823* / LRGL5821* 1 Presione Bake. 350 °F aparece en la pantalla. 2 Ajuste la temperatura: Presione o mantenga presionados los botones +/- hasta que aparezca en pantalla - LG LRGL5823D | Owners Manual - Page 93
ESPAÑOL •• Cuando se configura Warm, se activa la función de calentamiento después de que termina el tiempo de cocción. PRECAUCIÓN •• Utilice el temporizador automático al cocinar carnes curadas o congeladas, y la mayoría de las frutas y los vegetales. Los alimentos que pueden echarse a perder fá - LG LRGL5823D | Owners Manual - Page 94
durante la Cocción 1 Presione el botón Bake. 2 Modelo LRGL5825* Presione los botones numéricos para ingresar la temperatura deseada. Modelo LRGL5823* / LRGL5821* Utilice los botones +/- para configurar la temperatura deseada. 3 Presione el botón Start. NOTA Si la puerta está abierta durante la cocci - LG LRGL5823D | Owners Manual - Page 95
FUNCIONAMIENTO 33 ESPAÑOL 2 Establecer la hora del día. Modelo LRGL5825* Presione 3, 7 y 5. Modelo LRGL5823* Utilice los botones +/- para configurar la temperatura deseada. 3 Presione START. La pantalla despliega el mensaje Conv. Bake o Conv. Roast, y la temperatura del horno comenzara en los 100 - LG LRGL5823D | Owners Manual - Page 96
(Asar) Su horno está diseñado para asar con la puerta cerrada. Al asar, usa una radiación de calor intensa desde el quemador de gas superior. La función Broil funciona mejor cuando se asan cortes de carne tiernos y finos (1" o menos), aves o pescado. PRECAUCIÓN •• No utilice una asadera sin rejilla - LG LRGL5823D | Owners Manual - Page 97
FUNCIONAMIENTO 35 ESPAÑOL Guía de recomendaciones para asar El tamaño, el peso, el espesor, la temperatura inicial y su preferencia de cocción afectarán el tiempo de asado. Esta guía se basa en carnes a temperatura de refrigerador. Para obtener mejores resultados al asar, use una bandeja especial - LG LRGL5823D | Owners Manual - Page 98
2 Configure la temperatura para hornear. Modelo LRGL5825* Utilice los botones numéricos. Modelo LRGL5823*, LRGL5821* Utilice los botones +/-. 3 Presione el botón START. NOTA •• Hay una demora de 15 icono parpadee. 2 Siga las instrucciones en la aplicación LG ThinQ de LG para conectar el dispositivo. - LG LRGL5823D | Owners Manual - Page 99
3 Inicie la función de precalentamiento en el horno desde la aplicación LG ThinQ Frozen Meal (Comida congelada) (Modelo LRGL5825*) La función Frozen de la función Calentar (Modelo LRGL5823*/ LRGL5821*) 1 Presione Warm o Air fry/Warm una vez para el modelo LRGL5821* y dos veces para el modelo LRGL5823 - LG LRGL5823D | Owners Manual - Page 100
en una sola capa. •• Use la Bandeja para freír opcional disponible en LG o una bandeja para hornear oscura sin lados o lados cortos que no cubra mejores resultados, utilice la bandeja Air Fry que se vende por separado www.lg.com y use una bandeja para hornear forrada de papel de aluminio debajo de - LG LRGL5823D | Owners Manual - Page 101
FUNCIONAMIENTO 39 ESPAÑOL Guía de cocina para freir - Bandeja de freir •• Organice los alimentos uniformemente en una sola capa. •• Coloque una bandeja para hornear forrada con papel de aluminio en una posición de estante 2 para atrapar goteos. Si es necesario, agregue papel pergamino para - LG LRGL5823D | Owners Manual - Page 102
delgada* - 2.5 oz 90 425 cada uno, 3/4' diametro. (70 g cada uno, 2 cm diametro.) Posición del estante 4 4 4 4 4 4 4 4 4 4 4 4 4 4 4 4 4 3 4 4 Tiempo de cocción (min) 1er lado 2do lado Guide 19-26 19-25 19-26 13-19 14-20 - 5-11 5-11 5-11 4-10 16-22 16-22 8-14 8-14 Corta las papas - LG LRGL5823D | Owners Manual - Page 103
en su teléfono inteligente. ESPAÑOL Funciones de la aplicación LG ThinQ Smart Diagnosis™ Esta función brinda información útil para diagnosticar de servicios de internet o verifique el manual del enrutador inalámbrico para revisar la frecuencia de su red. •• LG ThinQ no es responsable por ningún - LG LRGL5823D | Owners Manual - Page 104
. Cambie el protocolo de seguridad por otro (es recomendado el WPA2) y registre el producto de nuevo. Instalación de la aplicación LG ThinQ Busque la aplicación LG ThinQ en la tienda Google Play o App Store desde su teléfono inteligente. Siga las instrucciones para descargar e instalar la aplicaci - LG LRGL5823D | Owners Manual - Page 105
seleccione la función Smart Diagnosis en el menú. Siga las instrucciones para el diagnóstico audible provistas en la aplicación LG ThinQ. 1 Abra la aplicación LG ThinQ en el teléfono inteligente. 2 En la aplicación, seleccione el dispositivo de su lista de dispositivos conectados y después presione - LG LRGL5823D | Owners Manual - Page 106
haya enfriado antes de tocarla. •• Siempre utilice guantes para limpiar la placa de cocción. Retiro y colocación de los quemadores de superficie de gas Es posible retirar las parrilla y las tapas y los cabezales de los quemadores para limpiarlos y brindarles mantenimiento. La tapa del quemador est - LG LRGL5823D | Owners Manual - Page 107
ESPAÑOL Parrilla de los quemadores La estufa incluye tres parrilla profesionales independientes. Para lograr la estabilidad máxima, estas parrilla solo se deben usar en la posición correcta. Las dos parrilla laterales se pueden intercambiar de izquierda a derecha y del frente a la parte posterior. - LG LRGL5823D | Owners Manual - Page 108
ni otros objetos de ellas. Puede dañar el eje de la válvula de gas. •• Las perillas de control se pueden quitar para limpiarlas fácilmente. •• Para . UU.) 1-888-542-2623 (Canadá) o visite nuestro sitio web en: www.lg.com Puerta del horno •• Use agua jabonosa para limpiar bien la puerta del horno - LG LRGL5823D | Owners Manual - Page 109
minutos a baja temperatura para aflojar la suciedad LEVE antes de la limpieza manual. Si bien la función EasyClean® es rápida y eficaz para la para ventilar. En comparación con el proceso más intenso de Autolimpieza, el horno LG le brinda la opción de limpiar con MENOS CALOR, en MENOS TIEMPO y, pr - LG LRGL5823D | Owners Manual - Page 110
. Agregue agua si fuera necesario. Coloque una toalla en el piso frente al horno para absorber el agua que pueda derramarse durante la limpieza manual. 9 Limpie la cavidad del horno inmediatamente después del ciclo EasyClean®. Para ello, friegue con una esponja o un paño de limpieza húmedos que no - LG LRGL5823D | Owners Manual - Page 111
Self Clean (Autolimpieza) (Modelo LRGL5825* / LRGL5823*) El ciclo de Autolimpieza usa temperaturas sumamente altas para limpiar la cavidad del horno. Mientras se ejecute el ciclo de Autolimpieza, es posible que perciba humo u olor. Esto es normal, especialmente si el horno está muy sucio. Durante el - LG LRGL5823D | Owners Manual - Page 112
Use los botones Number para ajustar el tiempo que aparezca en pantalla de forma que coincida con su tiempo de inicio deseado. Modelo LRGL5823* / LRGL5821* Use los botones +/- para ajustar el tiempo que aparezca en pantalla de forma que coincida con su tiempo de inicio deseado. 5 Presione Start. NOTA - LG LRGL5823D | Owners Manual - Page 113
ESPAÑOL Cambio de la luz del horno La luz del horno es una bombilla estándar para electrodomésticos de 40 vatios. Se enciende cuando se abre la puerta del horno. Cuando la puerta del horno está cerrada, presione el botón Light para encenderla o apagarla. ADVERTENCIA •• Asegúrese de que el horno y - LG LRGL5823D | Owners Manual - Page 114
52 MANTENIMIENTO Colocación de la puerta 1 Tome firmemente ambos lados de la puerta desde la parte superior. 2 Con la puerta en el mismo ángulo que la posición de removido, apoye la hendidura de los brazos de las bisagras en el borde inferior de las ranuras de las bisagras. Las muescas de los brazos - LG LRGL5823D | Owners Manual - Page 115
la temperatura del horno para adecuarla a sus necesidades específicas de cocción. Consulte la sección de Ajuste de temperatura del horno de este manual para obtener instrucciones fáciles sobre cómo ajustar el termostato. ¿Es normal que se escuche un chasquido que proviene de la parte trasera del - LG LRGL5823D | Owners Manual - Page 116
solo ayuda a aflojar la suciedad leve de la estufa con horno para ayudar en la limpieza manual del horno. No quita automáticamente toda la suciedad después del ciclo. Es posible que del horno (estufa de gas). Sin embargo, se recomienda intentar evitar derramar demasiada agua en las ventilaciones. - LG LRGL5823D | Owners Manual - Page 117
LP, comuníquese con el técnico que instaló la cocina o que realizó la conversión. Asegúrese de que la válvula de corte de gas del horno, ubicada detrás de la cocina, este totalmente abierta. •• Los controles del horno están mal configurados. Consulte Descripción general del panel de control en - LG LRGL5823D | Owners Manual - Page 118
ciclo de autolimpieza, pero la puerta no está cerrada. - Cierre la puerta del horno. •• Revise la válvula de corte de gas principal o la válvula de corte de gas del horno y solicite servicio. •• Desconecte la cocina durante cinco minutos y vuelva a conectarla. Si el código de error de función se - LG LRGL5823D | Owners Manual - Page 119
"PROCEDIMIENTO PARA RESOLVER CONFLICTOS". En caso de que su cocina a gas LG ("Producto") presente alguna falla por defectos de materiales o de fabricaci una atmósfera corrosiva o contraria a las instrucciones detalladas en el manual del propietario del producto. •• Daños o fallos del producto - LG LRGL5823D | Owners Manual - Page 120
del quemador que estén sucios u obstruidos impedirán el funcionamiento correcto del quemador. Debe limpiarse •• Revise y limpie el electrodo de gas. •• Llama desigual OK No funciona 1. Instalación incorrecta de la tapa del quemador La cabeza del quemador está asentada adecuadamente. La - LG LRGL5823D | Owners Manual - Page 121
La superficie es dispareja. •• El horno está inclinado. La presión de gas puede ser baja. 1. La estufa no está nivelada. 2. El dispositivo o el cemento Placa de pared. •• Consulte primero con su proveedor de gas. •• Verifique primero con el instalador. Use un nivel de burbuja para comprobar - LG LRGL5823D | Owners Manual - Page 122
•• Consulte primero con el instalador. •• Consulte el manual de instalación. •• La llama es demasiado pequeña Válvula de corte de gas Flujo de gas a la estufa 1/2" Adaptador Tubería de gas de 1/2" o 3/4" www.lg.com O por correo: LG Electronics Customer Service P.O. Box 240007 Huntsville, AL 35813 ATTN - LG LRGL5823D | Owners Manual - Page 123
el número del serial (el número del serial pueden ser hallado (i) en el producto, o (ii) en la dirección de https:// www.lg.com/us/support/repair-service/schedule-repair-continued al hacer clic en "Find My Model & Serial Number"). Sólo pueden excluirse del procedimiento de resolución de conflictos - LG LRGL5823D | Owners Manual - Page 124
LG Customer Information Center 1-800-243-0000 USA 1-888-542-2623 CANADA Register your product Online! www.lg.com Printed in Mexico
-
 1
1 -
 2
2 -
 3
3 -
 4
4 -
 5
5 -
 6
6 -
 7
7 -
8
-
9
-
10
-
11
-
12
-
13
-
14
-
15
-
16
-
17
-
18
-
19
-
20
-
21
-
22
-
23
-
24
-
25
-
26
-
27
-
28
-
29
-
30
-
31
-
32
-
33
-
34
-
35
-
36
-
37
-
38
-
39
-
40
-
41
-
42
-
43
-
44
-
45
-
46
-
47
-
48
-
49
-
50
-
51
-
52
-
53
-
54
-
55
-
56
-
57
-
58
-
59
-
60
-
61
-
62
-
63
-
64
-
65
-
66
-
67
-
68
-
69
-
70
-
71
-
72
-
73
-
74
-
75
-
76
-
77
-
78
-
79
-
80
-
81
-
82
-
83
-
84
-
85
-
86
-
87
-
88
-
89
-
90
-
91
-
92
-
93
-
94
-
95
-
96
-
97
-
98
-
99
-
100
-
101
-
102
-
103
-
104
-
105
-
106
-
107
-
108
-
109
-
110
-
111
-
112
-
113
-
114
-
115
-
116
-
117
-
118
-
119
-
120
-
121
-
122
-
123
-
124
 |
 |

ENGLISH
ESPAÑOL
www.lg.com
MFL33029630
(REV.01 200602)
LRGL5825*
LRGL5823*
LRGL5821*
OWNER’S MANUAL
GAS RANGE
Read this owner’s manual thoroughly before operating the appliance
and keep it handy for reference at all times.
•
Do not store or use gasoline or other flammable vapors and liquids in the
vicinity of this or any other appliance.
•
WHAT TO DO IF YOU SMELL GAS
- Do not try to light any appliance.
- Do not touch any electrical switch.
- Do not use any phone in your building.
- Immediately call your gas supplier from a neighbor's phone. Follow the
gas supplier's instructions.
- If you cannot reach your gas supplier, call the fire department.
•
Installation and service must be performed by a qualified installer, service
agency, or the gas supplier.
If the information in this manual is not followed exactly, a fire or
explosion may result causing property damage, personal injury or death.
WARNING
Copyright © 2020 LG Electronics Inc. All Rights Reserved.
Never Operate the Top Surface Cooking Section of this Appliance
Unattended
•
Failure to follow this warning statement could result in fire, explosion, or
burn hazard that could cause property damage, personal injury, or death.
•
If a fire should occur, keep away from the appliance and immediately call
your fire department.
•
DO NOT ATTEMPT TO EXTINGUISH AN OIL/GREASE FIRE WITH WATER.
WARNING