LG LT1230HR Owners Manual - Page 13
Procedure - sleeve
 |
View all LG LT1230HR manuals
Add to My Manuals
Save this manual to your list of manuals |
Page 13 highlights
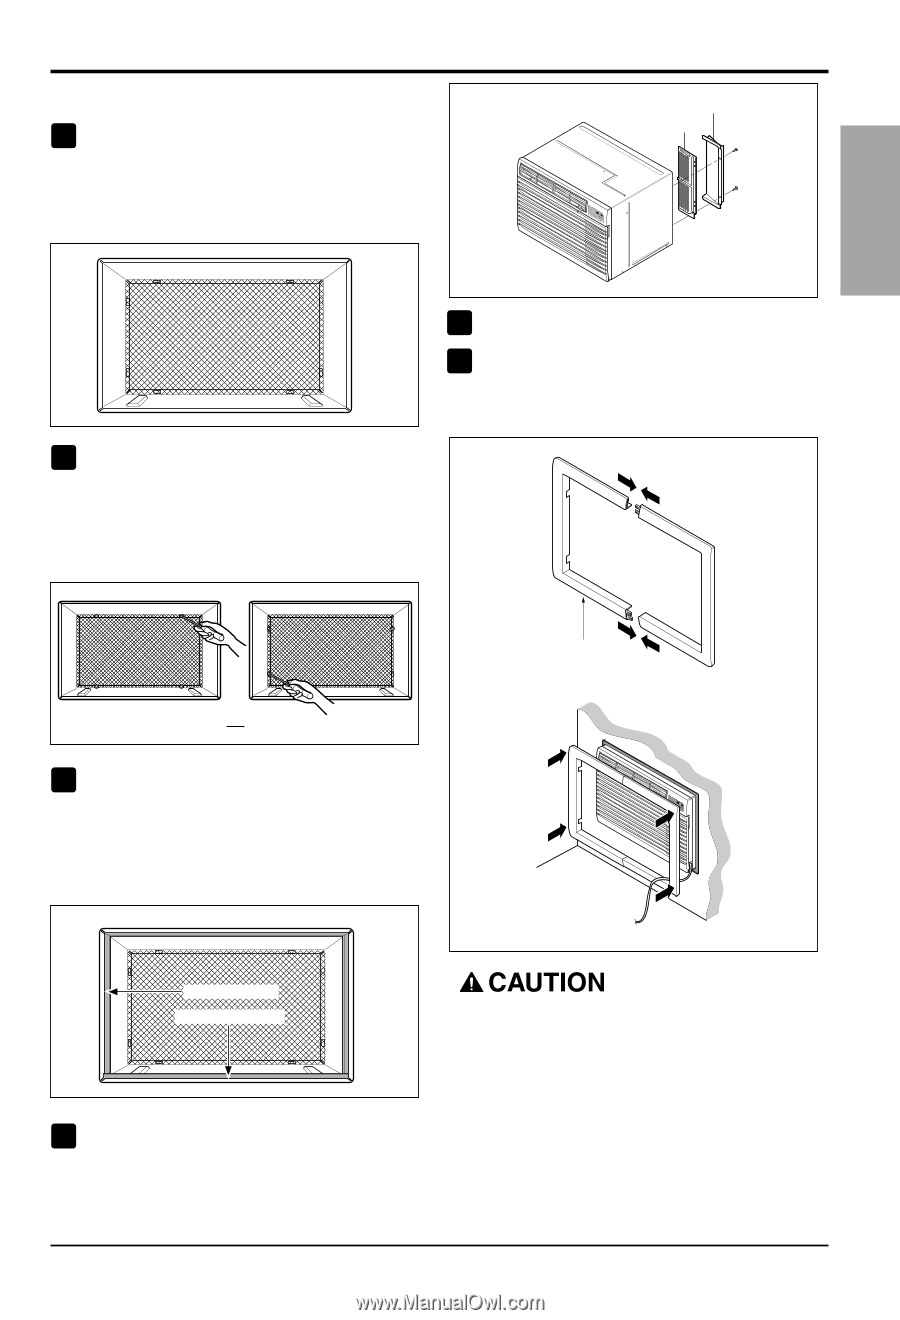
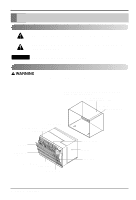
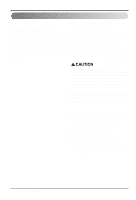
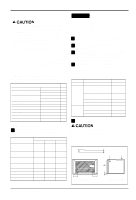
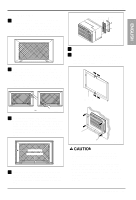
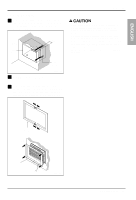
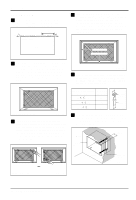
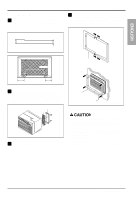
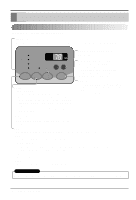
ENGLISH PROCEDURE A 1 If you are using the new sleeve (optionally supplied with your unit),skip to step 3. Otherwise, install the plastic grille from the kit. Cut the plastic grille to 25-1/2" wide and 151/4" high. Place the plastic grille to the inside of the wall sleeve at the rear flange. Installation Plastic rear grille Steel rear grille ESnCeaorvgoeyrl Fan Heat MODE Timer TIMER FF12 LHOIGWH TEMP SPFAENED 'F POWER FIG. 4 2 Fasten the 4 washer screws to secure the grille to the wall sleeve. If you need plastic nuts to mount plastic grille to the inside of the wall sleeve, there are plastic nuts in the installation kit. The nuts are installed from the inside of the sleeve and are pressed into the square holes of the rear flanges. FIG. 7 5 Install the new unit into the wall sleeve. 6 To assemble trim, snap the tab of each piece into the slot of the other piece as shown below. Slide trim over the front of the air conditioner until trim is flush with sleeve as shown below. Trim (2 ea) or FIG. 5 3 Remove the backing from the Horizontal Insulation strip 13/8 x 3/8 x 273/16 and attach that to the inside bottom of the sleeve as shown below. Remove the backing from the Around Insulation strip 13/8 x 3/4 x 611/2 and attach that to the inside front of the sleeve as shown below. Around Insulation Horizontal Insulation FIG. 6 4 Remove the metal rear grille and replace it with the plastic rear grille to improve unit energy efficiency. The plastic grille reduces the amount of hot air discharge that recirculates through the unit. Wall ESnCeaorvgoeyrl Fan Heat MODE Timer TIMER FF12 LHOIGWH TEMP SPFAENED 'F POWER FIG. 8 • Air conditioners covered in this manual pose an excessive weight hazard. Two or more people are needed to move and install the unit. To prevent injury or strain, use proper lifting and carrying techniques when moving unit. • When handling the air conditioner, be careful to avoid cuts from sharp metal fins on front and rear coils. • Make sure air conditioner does not fall during removal. Owner's Manual 13
-
 1
1 -
2
-
3
-
4
-
5
-
6
-
7
-
 8
8 -
 9
9 -
 10
10 -
 11
11 -
 12
12 -
 13
13 -
 14
14 -
 15
15 -
 16
16 -
 17
17 -
 18
18 -
19
-
20
-
21
-
22
-
23
-
24
-
25
-
26
-
27
-
28
-
29
-
30
-
31
-
32
-
33
-
34
-
35
-
36
-
37
-
38
-
39
-
40
-
41
-
42
-
43
-
44
-
45
-
46
-
47
-
48
 |
 |