LG LWHD7000HR Owners Manual - Page 12
Sgrewtyp}
 |
View all LG LWHD7000HR manuals
Add to My Manuals
Save this manual to your list of manuals |
Page 12 highlights
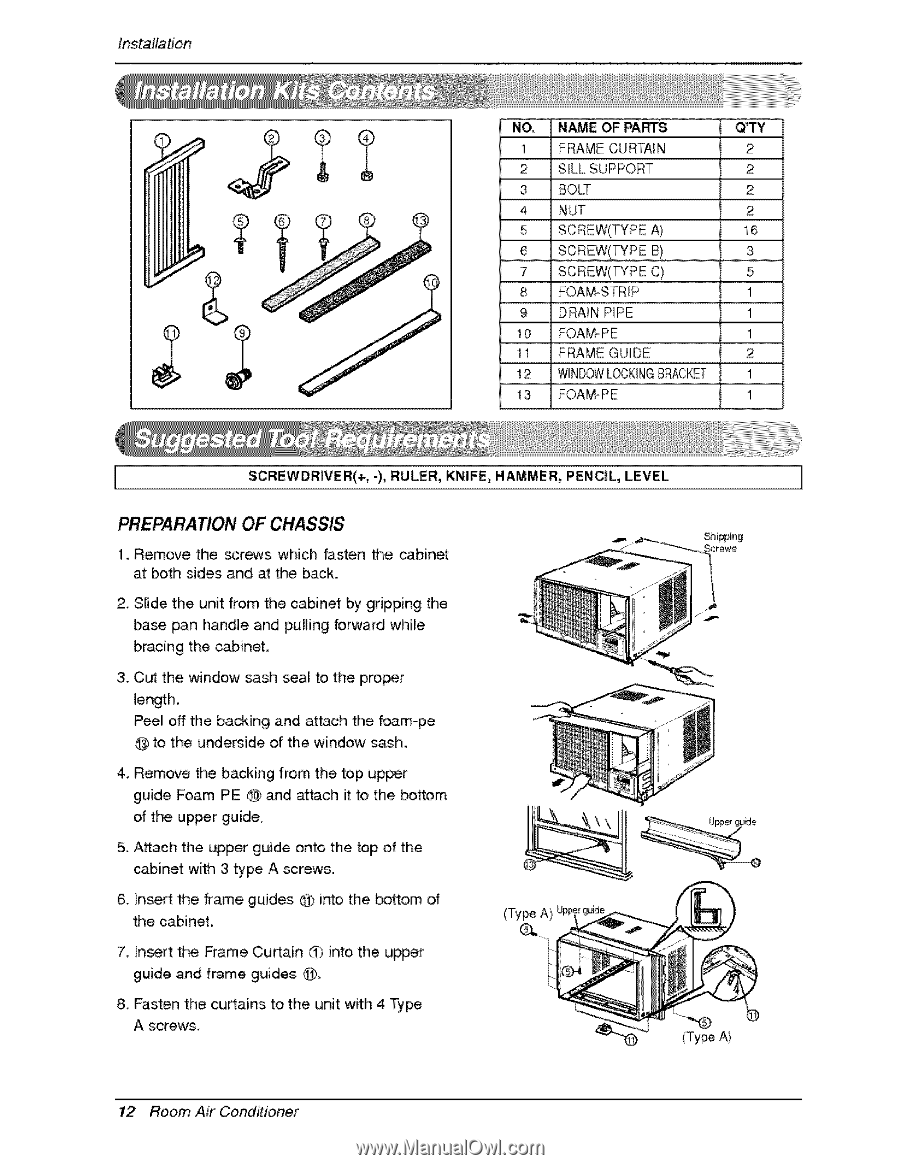
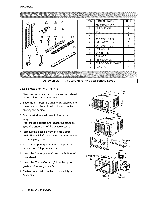
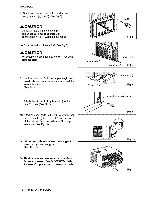
Installation NO', NAME OF PA_S Q_ 1 FRAME CURTA_N 2 2 SILL SUPPORT 2 3 BOLT 2 4 NUT 2 5 SCREW_..TYp E A} 16 ....6........S..g..R...E..W....(.T..Y..P 7 SCREW(TYPE C} 5 8 FOAMoSTR_P 1 9 DRAIN PIPE: 1 10 1 11 FRAME GUIDE 2 12 WINDO'WIL_K!INGBRACKET 1 13 FOAMopE 1 I SCREWDRIVER(+,-), RULER:, KN|FE, HAMMER, PENC|L, LEVEL ] PREPARATION OF CHASSIS 1. Remove the screws which fasten the cabinet at both sides and at the back., 2, Slide the unit from th,e cabinet by gripping the _s.e pan h.and_e and pulling forward 'while bracing the _bin.e't. 3. Cut the window _sh seal to the proper length. Peel off _e. ba_ing and attach the foam-pe @ to the unde_ide of the window _sh. 4, Remove the backing from the top upper guide Foam PE @ and attach it to the _ttom of the. up_r guide. 5. A_ach the upper guide onto the top of the cabinet with 3 type, A screws. 6. [Insert the frame, guides @ "_nto the _ttom of the cabinet, 7, Insert the Frame Cu_ain d) into the upper guide and frame guides. @ 8. Fasten the curtains to the unit with 4 Type A screws. (TypeA), (Tyr_ A] 12 Room Air CoinditJoRef
-
 1
1 -
2
-
3
-
4
-
5
-
6
-
 7
7 -
 8
8 -
 9
9 -
 10
10 -
 11
11 -
 12
12 -
 13
13 -
 14
14 -
 15
15 -
 16
16 -
 17
17 -
18
-
19
-
20
-
21
 |
 |