LG RCS511A Service Manual
LG RCS511A Manual
 |
View all LG RCS511A manuals
Add to My Manuals
Save this manual to your list of manuals |
LG RCS511A manual content summary:
- LG RCS511A | Service Manual - Page 1
Microwave Oven Service Manual RS511P RRSC5S1110MMPBA RRCS1501M1APSA RRFS1521M1GPSA URRFSS1521G1MB URS511P URCS511A RFS511SW2A CAUTION BEFORE SERVICING THE UNIT, READ THE SAFETY PRECAUTIONS IN THIS MANUAL. - LG RCS511A | Service Manual - Page 2
is to be serviced only by properly qualified service personnel. Consult the service manual for proper service procedures to assure on microwave power for any service test or inspection within the microwave generating compartments, check the magnetron, wave guide or transmission line, and cavity - LG RCS511A | Service Manual - Page 3
front cover SPECIFICATIONS 1-1 CAUTIONS 2-1 INSTALLATIONS 3-1 OPERATING INSTRUCTIONS 4-1 COOKING DISPLAYS 4-6 PROGRAMMING DISPLAYS 4-6 OPERATION 4-7 PROGRAMMING 4-8 SCHEMATIC DIAGRAM 4-10 CIRCUIT DESCRIPTION 4-11 SERVICE INFORMATION 5-1 TOOLS AND MEASURING INSTRUMENTS 5-1 MICROWAVE - LG RCS511A | Service Manual - Page 4
Power Output Microwave Frequency Magnetron Timer Outside Dimensions Cavity Dimensions Net Weight Shipping weight Control Complement DESCRIPTION RS511P / RS511MB RCS511A / RFS511G URS511MB / URS511P URCS511A / RFS511SW2A 230 Volts AC 50 Hz 1,600 Watts 240 Volts AC 50 Hz 1,700 Watts Single phase - LG RCS511A | Service Manual - Page 5
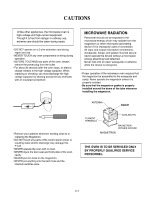
CAUTIONS Unlike other appliances, the microwave oven is high and use. ¥ NEVER TOUCH any oven components or wiring during operation. ¥ BEFORE TOUCHING any parts of the oven, always remove the power plug from the outlet. ¥ For about 30 seconds after OVEN IS TO BE SERVICED ONLY BY PROPERLY QUALIFIED - LG RCS511A | Service Manual - Page 6
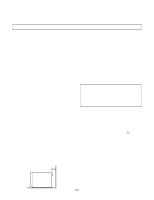
generated, because they may damage the electronic or mechanical parts of the unit. Do not install the oven next INSTRUCTIONS This microwave oven is designed to be used in a fully earthed condition. It is imperative, therefore, to make sure it is properly earthed before servicing WARNINGTHIS APPLIANCE - LG RCS511A | Service Manual - Page 7
If no power level is selected, oven operates at 100% power. Use to exit programming mode and stop cooking during cooking cycle. Use to start "Manual Time Entry" program or restart interrupted cooking cycle. Use to advance to next user option. Use to save times and power levels when programming pads - LG RCS511A | Service Manual - Page 8
Some items in display can be seen but will not glow. RCS511A / URCS511A Pads TIME ENTRY Pads 1-0 POWER LEVEL STOP/RESET START QTY2x to exit programming mode and stop cooking during cooking cycle. Use to start "Manual Time Entry" program or restart interrupted cooking cycle. Use to advance to next - LG RCS511A | Service Manual - Page 9
to begin heating with preprogrammed times and power levels. Use to select power level. Oven can heat at full or reduced power. Use to start "Manual Time Entry" program or restart interrupted cooking cycle. Use to advance to next user option. Use to save times and power levels when programming pads - LG RCS511A | Service Manual - Page 10
If no power level is selected, oven operates at 100% power. Use to exit programming mode and stop cooking during cooking cycle. Use to start "Manual Time Entry" program or restart interrupted cooking cycle. Use to advance to next user option. Use to save times and power levels when programming pads - LG RCS511A | Service Manual - Page 11
OPERATING INSTRUCTIONS FEATURES Window Door Screen Electronic Control CONTROL PANEL TIME POWER QTY 100% power. Use to exit programming mode and stop cooking during cooking cycle. Use to start "Manual Time Entry" program or restart interrupted cooking cycle. Use to advance to next user option. Use - LG RCS511A | Service Manual - Page 12
indicates the microwave power level used. If power level does not show, oven is heating at 100% power. Indicates programming mode. See "Programming" section of manual for programming procedure. Indicates programming user options mode. See "User Options" section of - LG RCS511A | Service Manual - Page 13
Pads Oven has 10 ~ 20 preprogrammed number pads. Instructions are written for factory programmed ovens. Ovens that 18 6 min. 09 4 min. 19 8 min. 10 5 min. 20 10 min. Manual Time Entry Manual Time Entry feature allows the operator to enter time and power levels, and heat without changing the - LG RCS511A | Service Manual - Page 14
¥ Repeat step 3-6 to program additional pads. 7. Press STOP/RESET pad or close oven door to exit programming mode. Multiple Heating Stages Follow instructions below to program oven to perform 3 consecutive heating cycles without interruption. 1. Open oven door. ¥ If door is closed or STOP/RESET pad - LG RCS511A | Service Manual - Page 15
User Options Follow the instructions below to customized the microwave ovenÕs Keyboard Enable Window 5 Add Time During Heating 6 Reset Door Open 7 (some models) Maximum Heating Time 8 Manual Operation 9 (some models) Double Digit Operation 0 Clean Filter Message Display OP:10 OP:11 OP:12 OP:20 - LG RCS511A | Service Manual - Page 16
SCHEMATIC DIAGRAM 4-10 - LG RCS511A | Service Manual - Page 17
CIRCUIT DESCRIPTION GENERAL DETAILS • The low voltage transformer supplies the necessary voltage to the micom controller when power cord is plugged in. • When the door is closed, the primary switch is ON, the secondary switch is ON, and the monitor switch opens (contact COM and NO). WHEN SELECTING - LG RCS511A | Service Manual - Page 18
any unit found to have excessive emission levels at no cost to the owner and should ascertain the cause of the excessive leakage. The service personnel should instruct the owner not to use the unit until the oven has been brought into compliance. ¥ If the oven operates with the door open, the - LG RCS511A | Service Manual - Page 19
reference. Also enter the information on the service invoice. ¥ The microwave energy leakage should not be more than 4 mW/cm.sq. after determining that all parts are in good condition, functioning properly and genuine replacement parts which are listed in this manual have been used. ¥ At least once - LG RCS511A | Service Manual - Page 20
(CN1) of the PCB SUB ASS'Y. 5) Lift up and pull out control panel assembly carefully from the cavity. CAUTION: DISCHARGE THE HIGH VOLTAGE CAPACITOR BEFORE SERVICING (refer to page 2-1) Remove the screw securing screw Lift up and pull out control panel 5-3 - LG RCS511A | Service Manual - Page 21
D. PCB ASSEMBLY REMOVAL 1) Remove the control panel assembly from the cavity. (Refer to control panel assembly removal on previous page.) 2) Remove screws which hold the PCB SUB ASSÕY to the control panel. 3) Disconnect the flat cable from the PCB SUB ASSÕY and take off the PCB SUB ASSÕY Control - LG RCS511A | Service Manual - Page 22
the magnetron ASS'Y until the tube is clear from the waveguide. NOTE: 1. When removing the magnetron, make sure its dome does not hit any adjacent parts, or it may be damaged. 2. When replacing the magnetron, be sure to install the magnetron gasket in the correct position and be sure that the - LG RCS511A | Service Manual - Page 23
H. HIGH VOLTAGE TRANSFORMER REMOVAL 1) Discharge the high voltage capacitor. 2) Disconnect the leadwire from magnetron, high voltage transformer, and capacitor. 3) Remove the screw holding the high voltage transformer to the bottom plate. I. BLOWER MOTOR ASSEMBLY REMOVAL 1) Disconnect the leadwire - LG RCS511A | Service Manual - Page 24
INTERLOCK CONTINUITY TEST WARNING : FOR CONTINUED PROTECTION AGAINST EXCESSIVE RADIATION EMISSION, REPLACE ONLY WITH IDENTICAL REPLACEMENT PARTS. TYPE NO. SZM-V 21-FC-93 FOR PRIMARY SWITCH TYPE NO. SZM-V 16-FD-62 OR V-16-2C 25 FOR MONITOR SWITCH TYPE NO. SZM-V - LG RCS511A | Service Manual - Page 25
COMPONENT TEST PROCEDURE CAUTIONS 1. DISCONNECT THE POWER SUPPLY CORD FROM THE OUTLET WHENEVER REMOVING THE OUTER CASE FROM THE UNIT. PROCEED WITH THE TEST ONLY AFTER DISCHARGING THE HIGH VOLTAGE CAPACITOR AND REMOVING THE WIRE LEADS FROM THE PRIMARY WINDING OF THE HIGH VOLTAGE TRANSFORMER. (SEE - LG RCS511A | Service Manual - Page 26
COMPONENTS HIGH VOLTAGE CAPACITOR TEST PROCEDURE Chassis Antenna Gasket Filament RESULTS NOTE: When testing the magnetron, be sure to install the magnetron gasket in the correct position and be sure that the gasket is in good condition. Measure the resistance. (Ohm-meter scale: Rx1000) ¥ - LG RCS511A | Service Manual - Page 27
-meter scale: R x 1000) Normal: Approx. 12.8~13.5 kohm Abnormal: Infinite or several ohm. NOTE : • A MICROWAVE LEAKAGE TEST MUST ALWAYS BE PERFORMED WHEN THE UNIT IS SERVICED FOR ANY REASON. • MAKE SURE THE WIRE LEADS ARE IN THE CORRECT POSITION. • WHEN REMOVING THE WIRE LEADS FROM THE - LG RCS511A | Service Manual - Page 28
trouble. 1.2C. Bheecckagrerofuulnodfitnhgebheigfohrevoclthaegcekcinirgcufoitr. trouble part REMEDY Avoid using other electrical appliances when you use the by their characteristics. Display "CALL SERVICE" This may not be a defect cooking except that noted in the cooking guide. Do not use any type of - LG RCS511A | Service Manual - Page 29
PCB assembly. Replace key membrane assembly and check operation. RESULT Continuity No continuity Everything works as specified. Still have trouble. CAUSE Defective PCB assembly. Loose connection. Defective key membrane assembly. Defective PCB assembly. REMEDY Replace PCB assembly. Connect them - LG RCS511A | Service Manual - Page 30
(TROUBLE 2) Oven does not operate at all, Display window does not display any figures, and no input is accepted. CONDITION CONDITION 1. Fuse blows. CHECK Check continuity - LG RCS511A | Service Manual - Page 31
assembly. Loose connection. Replace PCB assembly. Connect them tightly. Defective blower motor. Defective oven lamp. Replace blower motor. Replace oven lamp. (TROUBLE 4) Oven seems to be operating but little heat is produced in oven load. CONDITION CHECK RESULT CAUSE REMEDY Output is low - LG RCS511A | Service Manual - Page 32
(TROUBLE 5) No microwave oscillation even though oven lamp and blower motor run. (Display operates . NOTE : • Make sure the wire leads correct position. • When Removing the wire leads from the parts, be sure to grasp the connector, not the wires. • When removing the magnetron, be sure to install - LG RCS511A | Service Manual - Page 33
EXPLODED VIEW INTRODUCTION MODEL : RS511MB RFS511G URS511MB OVEN CAVITY PARTS DOOR PARTS INTERIOR PARTS BASE PLATE PARTS LATCH BOARD PARTS CONTROL PANEL PARTS 6-1 - LG RCS511A | Service Manual - Page 34
#EV# EXPLODED VIEW INTRODUCTION MODEL : RCS511A RS511P RFS511SW2A URS511P URCS511A OVEN CAVITY PARTS INTERIOR PARTS DOOR PARTS BASE PLATE PARTS LATCH BOARD PARTS CONTROL PANEL PARTS 6-2 - LG RCS511A | Service Manual - Page 35
#EV# DOOR PARTS MODEL : RS511MB RFS511G URS511MB RCS511A RS511P RFS511SW2A URS511P URCS511A 1004 1385 1002 1000 1013 1005 W136 1009 W206 W207 1007 W108 1006 W105 1384 1386 6-3 - LG RCS511A | Service Manual - Page 36
#EV# CONTROL PANEL PARTS MODEL : RFS511G 2012 2381 2000 2005 2400 W102 2006 W130 6-4 - LG RCS511A | Service Manual - Page 37
#EV# CONTROL PANEL PARTS MODEL : RS511MB URS511MB 2012 2381 2002 W102 2006 2000 W130 2005 2400 6-5 - LG RCS511A | Service Manual - Page 38
#EV# CONTROL PANEL PARTS MODEL : RS511P URS511P 2004 2381 2000 W102 2006 W130 2002 6-6 - LG RCS511A | Service Manual - Page 39
#EV# CONTROL PANEL PARTS MODEL : RCS511A RFS511SW2A URCS511A 2004 2381 2000 W102 2006 W130 6-7 - LG RCS511A | Service Manual - Page 40
#EV# OVEN CAVITY PARTS MODEL : RS511MB RFS511G URS511MB RCS511A RS511P RFS511SW2A URS511P URCS511A 5045 3001 W109 W158 W121 W109 W105 3009 5024 3004 7037 W109 W108 6-8 W109 W121 9000 - LG RCS511A | Service Manual - Page 41
#EV# LATCH BOARD PARTS MODEL : RS511MB RFS511G URS511MB RCS511A RS511P RFS511SW2A URS511P URCS511A 4001 4000 W102 4003 4009 W117 4008 W160 4002 4004 6-9 - LG RCS511A | Service Manual - Page 42
MODEL : RS511MB RFS511G URS511MB RCS511A RS511P RFS511SW2A URS511P URCS511A 3381 9000 3028 5104 5016 W136 5014 W109 5201 W101 Before 4810WRC002A 5010 Discord original for parts supplied. Change pieces simultaneously. After 5000 5203 0CZZW1H009A W108 5102 W109 W101 3006 6021W3B001L - LG RCS511A | Service Manual - Page 43
#EV# BASE PLATE PARTS MODEL : RS511MB RFS511G URS511MB RCS511A RS511P RFS511SW2A URS511P URCS511A 6001 W121 W162 3901 3026 6000 3902 W121 6013 W108 6-11 - LG RCS511A | Service Manual - Page 44
SCHEMATIC DIAGRAM OF P.C.B 7-1 - LG RCS511A | Service Manual - Page 45
PRINTED CIRCUIT BOARD 7-2
-
 1
1 -
 2
2 -
 3
3 -
 4
4 -
 5
5 -
 6
6 -
 7
7 -
8
-
9
-
10
-
11
-
12
-
13
-
14
-
15
-
16
-
17
-
18
-
19
-
20
-
21
-
22
-
23
-
24
-
25
-
26
-
27
-
28
-
29
-
30
-
31
-
32
-
33
-
34
-
35
-
36
-
37
-
38
-
39
-
40
-
41
-
42
-
43
-
44
-
45
 |
 |

Microwave Oven
Service Manual
RCS10MPA
CAUTION
BEFORE SERVICING THE UNIT, READ THE
SAFETY PRECAUTIONS IN THIS MANUAL.
RCS10MPSA
RFS12MPSA
RFS12G