LG WM2032HS Service Manual
LG WM2032HS Manual
 |
View all LG WM2032HS manuals
Add to My Manuals
Save this manual to your list of manuals |
LG WM2032HS manual content summary:
- LG WM2032HS | Service Manual - Page 1
.com E-mail:http://www.LGEservice.com/techsup.html WASHING MACHINE SERVICE MANUAL ! CAUTION READ THIS MANUAL CAREFULLY TO DIAGNOSE PROBLEMS CORRECTLY BEFORE SERVICING THE UNIT. MODEL : WM2411HW/WM2011H*/WM1811CW WM2432HW/WM2032H*/WM1832CW WM0532HW/WD-10210BD/WD-12210(5)BD WM2444H*M/WM2442H*/WM2042CW - LG WM2032HS | Service Manual - Page 2
DEC. 2002 PRINTED IN KOREA P/No.:3828ER3013T 101 - LG WM2032HS | Service Manual - Page 3
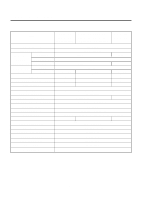
3. PARTS IDENTIFICATION ...7 4. INSTALLATION ...8 5. OPERATION ...11 6. WIRING DIAGRAM / PROGRAM CHART 15 7. TROUBLESHOOTING...19 7-1. BEFORE PERFORMING SERVICE 19 7-2. QC TEST MODE...19 7-3. HOW TO CHECK THE WATER LEVEL FREQUENCY 19 7-4. ERROR DISPLAY ...20 8. ERROR DIAGNOSIS AND CHECK LIST 22 - LG WM2032HS | Service Manual - Page 4
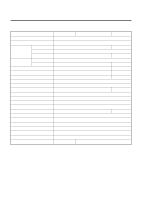
WASHING DRAIN MOTOR WASH HEATER REVOLUTION SPEED WASH SPIN CYCLES WASH / RINSE TEMPERATURES SPIN SPEEDS OPTIONS CUSTOM PROGRAM WATER CIRCULATION OPERATIONAL WATER PRESSURE CONTROL TYPE WASH CAPACITY DIMENSIONS DELAY WASH DOOR SWITCH TYPE WATER LEVEL LAUNDRY LOAD SENSING ERROR - LG WM2032HS | Service Manual - Page 5
WASHING DRAIN MOTOR WASH HEATER REVOLUTION SPEED WASH SPIN CYCLES WASH / RINSE TEMPERATURES SPIN SPEEDS OPTIONS CUSTOM PROGRAM WATER CIRCULATION OPERATIONAL WATER PRESSURE CONTROL TYPE WASH CAPACITY DIMENSIONS DELAY WASH DOOR SWITCH TYPE WATER LEVEL LAUNDRY LOAD SENSING ERROR - LG WM2032HS | Service Manual - Page 6
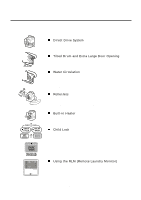
System The advanced Brushless DC motor directly drives the drum without belt and pulley. Tilted Drum and Extra Large Door Opening The tilted drum and extra large door opening make it possible to load and unload easily. Water Circulation Spray detergent solution and water onto the load repeatedly - LG WM2032HS | Service Manual - Page 7
CONTROL This model incorporates a pressure sensor which can sense the water level in the tub. The water supply is stopped when the water level reaches the preset level, the washing program then proceeds. Spinning does not proceed until the water in the tub drains to a certain level. 2-4.DOOR CONTROL - LG WM2032HS | Service Manual - Page 8
3. PARTS IDENTIFICATION • If the supply cord is damaged, it must be replaced by the manufacturer or its authorized service technician in order to avoid a hazard. (PLC Modem) ACCESSORIES 7 - LG WM2032HS | Service Manual - Page 9
, ask the customer what the trouble is. Check the setup (power supply is 120V AC, remove the transit bolts....). Check with the troubleshooting guide. Plan your service method by referring to the disassembly instructions. Service the unit. After servicing, operate the appliance to see whether - LG WM2032HS | Service Manual - Page 10
washer is inside of the valve connector. Connect the inlet hose firmly to prevent leaks. CONNECT THE DRAIN HOSE Make sure that the hose is not twisted. Avoid submerging the end of the hose. The end of the drain hose should be placed less than 96" from the floor. CONNECT POWER PLUG Connect - LG WM2032HS | Service Manual - Page 11
/Pause button. Connect the power plug to the outlet. Connect the inlet hose. Check the water heating function. Check the automatic reversing rotation of the drum. Listen for clicking sounds to determine if the door has locked. Check the water supply. Press the WASH / RINSE button and the present - LG WM2032HS | Service Manual - Page 12
door can be unlocked by pressing the Start / Pause button to stop the washer. • Choose High / Low • Rotate the Cycle selector knob to select the cycle designed for different types of fabric and soil levels. • Allows you to store a customized wash a water temperature based o load you are washing. • - LG WM2032HS | Service Manual - Page 13
b) an error code when an error has been detected. • Use this button to Start / Stop the washer. on the type of e setting is Soil Level splayed. • Use this option to prevent unwanted use of the washer. Press and hold Quick Cycle and Delay Wash button for 3 seconds to lock / unlock control. • When - LG WM2032HS | Service Manual - Page 14
WM2411HW WM2011HS / WM2011HW WM1811CW WM2432HW / WD-12210(5)BD WM2032HS / WM2032HW / WM0532HW / WD-10210BD WM1832CW 13 - LG WM2032HS | Service Manual - Page 15
WM2444H*M/WM2442H* WM2042CW WM0642H* CONFORTOR 14 - LG WM2032HS | Service Manual - Page 16
6. WIRING DIAGRAM / PROGRAM CHART WM2411HW / WM2011HS / WM2011HW / WM2432HW / WM2032HS / WM2032HW / WM0532HW / WD-10210BD / WD-12210(5)BD WM1811CW / WM1832CW 15 - LG WM2032HS | Service Manual - Page 17
WM2444H*M WM2442H*M/WM0642H* 16 - LG WM2032HS | Service Manual - Page 18
WM2042CW 17 - LG WM2032HS | Service Manual - Page 19
18 - LG WM2032HS | Service Manual - Page 20
valve for main wash turns on. 6 times Inlet valve for hot water turns on. 7 times Inlet valve for softener turns on. 8 times Inlet valve for bleach turns on. 9 times Tumble counterclockwise. 10 times Heater turns on for 3 sec. 11 times Circulation pump turns on. 12 times Drain pump - LG WM2032HS | Service Manual - Page 21
put into the drum. • Not fully drained within 10 minutes. 4 OVER FLOW ERROR PRESSURE 5 SENSOR ERROR 6 DOOR OPEN ERROR 7 HEATING ERROR • Water is overflowing (over 8 level). ¡ If is displayed, the drain pump will operate to the drain water automatically. • The SENSOR SWITCH ASSEMBLY is - LG WM2032HS | Service Manual - Page 22
, female, white connector in the MAIN PWB ASSEMBLY is bad or unstable. • The MOTOR HARNESS between the STATOR ASSEMBLY and MAIN PWB ASSEMBLY is cut (open circuited). • The hall sensor is out of order/defective. • Loose Ball Sensor Connector. • Ball Sensor is out of order. ¡ Displayed only when the - LG WM2032HS | Service Manual - Page 23
8. ERROR DIAGNOSIS AND CHECK LIST 8-1.DIAGNOSIS AND SOLUTION FOR ABNORMAL OPERATION SYMPTOM No power Water inlet trouble GUIDE FOR SERVICE CALL Is the power plug connected firmly to 120V AC outlet? YES Power failure? or Breaker opened? Is the outlet controlled by a switch? NO Visit to service. Is - LG WM2032HS | Service Manual - Page 24
SYMPTOM Door error GUIDE FOR SERVICE CALL Was the load too large? Drain trouble Visit to service. Visit to service. 23 - LG WM2032HS | Service Manual - Page 25
as drain, water input, pause will operate, without rotating the drum. No softening effect Is softener put in the correct compartment of the dispenser? ;-5 Is the softener cap clogged? ;-5 Explain proper use of softener. Clean the softener compartment Compartment for softener Visit to service - LG WM2032HS | Service Manual - Page 26
parts while troubleshooting. 2. First of all, check the connection of each electrical terminal with the wiring diagram. 3. If you replace 2 FILTER ASSEMBLY connectors 120V AC? NO Replace the FILTER ASSEMBLY (CIRC). YES Is the LED(1) on? YES NO Replace MAIN PWB ASSEMBLY. Are the connectors(2) - LG WM2032HS | Service Manual - Page 27
CHAMBER and the tube (clogged). Clean the filter. Replace the INLET VALVE ASSEMBLY. Verify the voltage of the inlet valve connector is 120V AC. (Refer to 7-2 QC TEST MODE) Check electrical connection. NO Replace the MAIN PWB ASSEMBLY. DETERGENT DOES NOT FLOW IN Is water supplied? YES NO Refer - LG WM2032HS | Service Manual - Page 28
Refer to NO WATER SUPPLY Check the wiring on the dispenser. Put it in the correct compartment. Is the softener / bleach cap clogged? Clean the Cap and Container. ABNORMAL SOUND Is the motor bolt loosened? Is there friction noise coming from the motor? Secure the bolt. Replace the STATOR ASSEMBLY - LG WM2032HS | Service Manual - Page 29
of the drain pump clogged? NO Is the connector disconnected, disassembled? NO Is the coil of the drain pump too high or low? (resistance of coil is 10-20)Ω NO YES YES YES YES Repair the DRAIN HOSE ASSEMBLY. Remove foreign material. Reconnect or repair the connector Replace the DRAIN PUMP ASSEMBLY - LG WM2032HS | Service Manual - Page 30
WASH HEATER TROUBLE HEATING CONTINUOUSLY ABOVE THE SETTING WATER TEMPERATURE When checking the THERMISTOR on the tub, is the THERMISTOR loose? 29 Push the THERMISTOR tightly to the rubber. - LG WM2032HS | Service Manual - Page 31
and/or Hose clogged? YES Remove foreign material. Connector NO Is the connector disconnected, disassembled? YES Reconnect or repair the connector. Connector NO Is the coil of the right side of drain pump open or short circuited? (Coil R is 18-30Ω) YES Replace PUMP MOTOR ASSEMBLY. NO - LG WM2032HS | Service Manual - Page 32
of the water level is 248 or more. Press the START /PAUSE button 2 times in QC Test mode, is the drum spinning at low speed? Check the SENSOR SWITCH ASSEMBLY or HOSE (Pressure). If the problem is on the SENSOR SWITCH ASSEMBLY or the HOSE, replace the SENSOR SWITCH ASSEMBLY or the HOSE. Normal Is - LG WM2032HS | Service Manual - Page 33
9. DISASSEMBLY INSTRUCTIONS ƒR Disassemble and repair the unit only after pulling out power plug from the outlet. 1. Unscrew 7 screws on the Rear Frame. 2. Disassemble the Rear Frame. 3. Pull the Control panel forward. 4. Disconnect connectors. 5. Unscrew 5 screws. 6. Disassemble the controller - LG WM2032HS | Service Manual - Page 34
1. Disassemble the 5 hose clamps. 2. Release the 5 hoses. 3. Unscrew the nut at the lower part of the dispenser. 4. Unscrew the 4 screws on the holder. 5. Disassemble the 5 connectors from the valves. ¡ Wire color : ¥L WH-BK ¥M OR-BK ¥N WH-BK ¥O GY-BK ¥P BL-BK 1. Unscrew the screw from the top plate - LG WM2032HS | Service Manual - Page 35
1. Unscrew the 2 screws from upper side of the cabinet cover. 2. Unscrew the screw from filter cover. 3. Put a flat (-) screwdriver into the both sides of the filter cover, and pull it out. 4. Unscrew the 2 screws from the lower side of the cabinet cover. 34 - LG WM2032HS | Service Manual - Page 36
the clamp assembly using a flat (-) screwdriver. 7. Separate the clamp assembly from cabinet cover. 8. Tilt the cabinet cover. 9. Disconnect the door switch connector. 10. Lift and separate the cabinet cover. 11. Disassemble the clamp assembly using a flat (-) screwdriver. 12. Disasemble the - LG WM2032HS | Service Manual - Page 37
a flat (-) screwdriver into the opening of the hinge, and pull out the hinge cover. 4. Unscrew the screws from the door. 5. Disassemble the door upward / downward. ¡ Be careful ! The door is heavy. 1. Open the door. 2. Disassemble the clamp assembly. 3. Unscrew the 2 screws from cabinet cover. 36 - LG WM2032HS | Service Manual - Page 38
1. Disassemble the cabinet cover. 2. Separate the pump hose, the bellows and the circulation hose assembly from the pump assembly. 3. Disassemble the pump assembly in arrow direction. 1. Disassemble the cabinet cover. 2. Separate 2 connectors from the heater. 3. Loose the nut and pull out the heater - LG WM2032HS | Service Manual - Page 39
1. Disassemble the cabinet cover. 2. Separate the heater from the tub. 3. Remove any foreign objects (wire, coin, etc.) by inserting a long bar in the opening. 1. Unscrew the 4 screws from the back cover. 2. Unscrew the single screw from the lower-right side of the cabinet. 3. Disconnect the - LG WM2032HS | Service Manual - Page 40
6 bolts on the stator. 6. Unplug the 2 connectors from the stator. 1. Disassemble the damper hinges from the tub and base. 2. Separate the dampers. NOTE • Once removed, replace the damper pin with new one. 39 - LG WM2032HS | Service Manual - Page 41
10. EXPLODED VIEW 10-1. CABINET & CONTROL PANEL ASSEMBLY A160 A495 F215 A490 A125 A105 A154 A136 A303 40 - LG WM2032HS | Service Manual - Page 42
10-2. DRUM & TUB ASSEMBLY K123 K111 K340 K115 F464 F463 K122 K125 K121 K101 K343 F315 F463 K344 K345 F141 41 K105 - LG WM2032HS | Service Manual - Page 43
10-3. DISPENSER ASSEMBLY F302 F300 HOT (BLUE) A275 COLD (RED) A276 F120 F301 F170 F160 F436 F440 F322 F321 F323 F325 F324 F441 F431 F430 F435 F432 42
-
 1
1 -
 2
2 -
 3
3 -
 4
4 -
 5
5 -
 6
6 -
 7
7 -
8
-
9
-
10
-
11
-
12
-
13
-
14
-
15
-
16
-
17
-
18
-
19
-
20
-
21
-
22
-
23
-
24
-
25
-
26
-
27
-
28
-
29
-
30
-
31
-
32
-
33
-
34
-
35
-
36
-
37
-
38
-
39
-
40
-
41
-
42
-
43
 |
 |

100
WASHING MACHINE
SERVICE MANUAL
READ THIS MANUAL CAREFULLY TO DIAGNOSE
PROBLEMS CORRECTLY BEFORE SERVICING THE UNIT.
MODEL : WM2411HW/WM2011H*/WM1811CW
WM2432HW/WM2032H*/WM1832CW
WM0532HW/WD-10210BD/WD-12210(5)BD
WM2444H*M/WM2442H*/WM2042CW
WM0642H*
CAUTION
Website:http://www.LGEservice.com
!