LG WM2032HS Service Manual - Page 33
Disassembly Instructions
 |
View all LG WM2032HS manuals
Add to My Manuals
Save this manual to your list of manuals |
Page 33 highlights
9. DISASSEMBLY INSTRUCTIONS ƒR Disassemble and repair the unit only after pulling out power plug from the outlet. 1. Unscrew 7 screws on the Rear Frame. 2. Disassemble the Rear Frame. 3. Pull the Control panel forward. 4. Disconnect connectors. 5. Unscrew 5 screws. 6. Disassemble the controller assembly. 1. Open the Lid. 2. Unscrew 4 screws. LID 3. Disassemble the Lid Assembly. 4. Pull down the Dispenser by pushing hooks. 5. Put a hand into the dispenser hole and hold the top plate. 6. Push backward using an opener and lift the top plate. ¡ Do first left side (¥L). 32
-
 1
1 -
2
-
3
-
4
-
5
-
6
-
7
-
8
-
9
-
10
-
11
-
12
-
13
-
14
-
15
-
16
-
17
-
18
-
19
-
20
-
21
-
22
-
23
-
24
-
25
-
26
-
27
-
 28
28 -
 29
29 -
 30
30 -
 31
31 -
 32
32 -
 33
33 -
 34
34 -
 35
35 -
 36
36 -
 37
37 -
 38
38 -
39
-
40
-
41
-
42
-
43
 |
 |
32
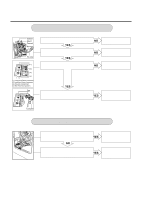
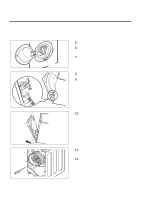
1.
Unscrew 7 screws on the Rear Frame.
2.
Disassemble the Rear Frame.
3.
Pull the Control panel forward.
4.
Disconnect connectors.
5.
Unscrew 5 screws.
6.
Disassemble the controller assembly.
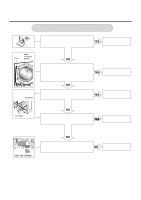
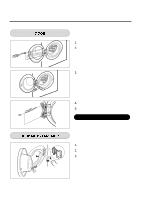
1.
Open the Lid.
2.
Unscrew 4 screws.
3.
Disassemble the Lid Assembly.
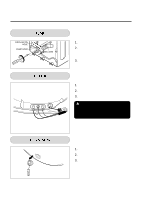
4.
Pull down the Dispenser by pushing hooks.
5.
Put a hand into the dispenser hole
and hold the top plate.
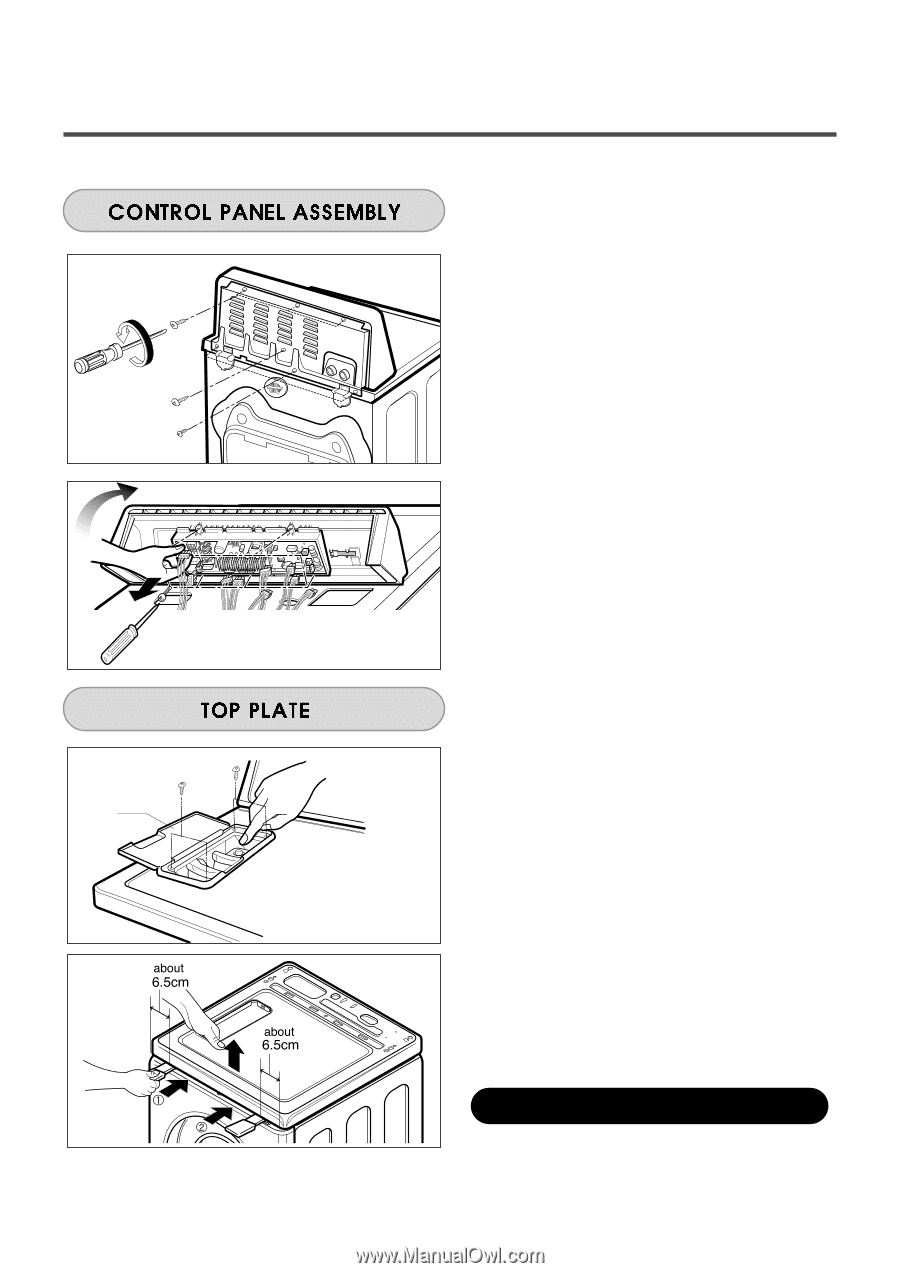
6.
Push backward using an opener
and lift the top plate.
9. DISASSEMBLY INSTRUCTIONS
ƒR
Disassemble and repair the unit only after pulling out power plug from the outlet.
LID
¡
Do first left side (
¥L
).