LG WM2277HW Service Manual - Page 9
Installation & Test - troubleshooting
 |
View all LG WM2277HW manuals
Add to My Manuals
Save this manual to your list of manuals |
Page 9 highlights
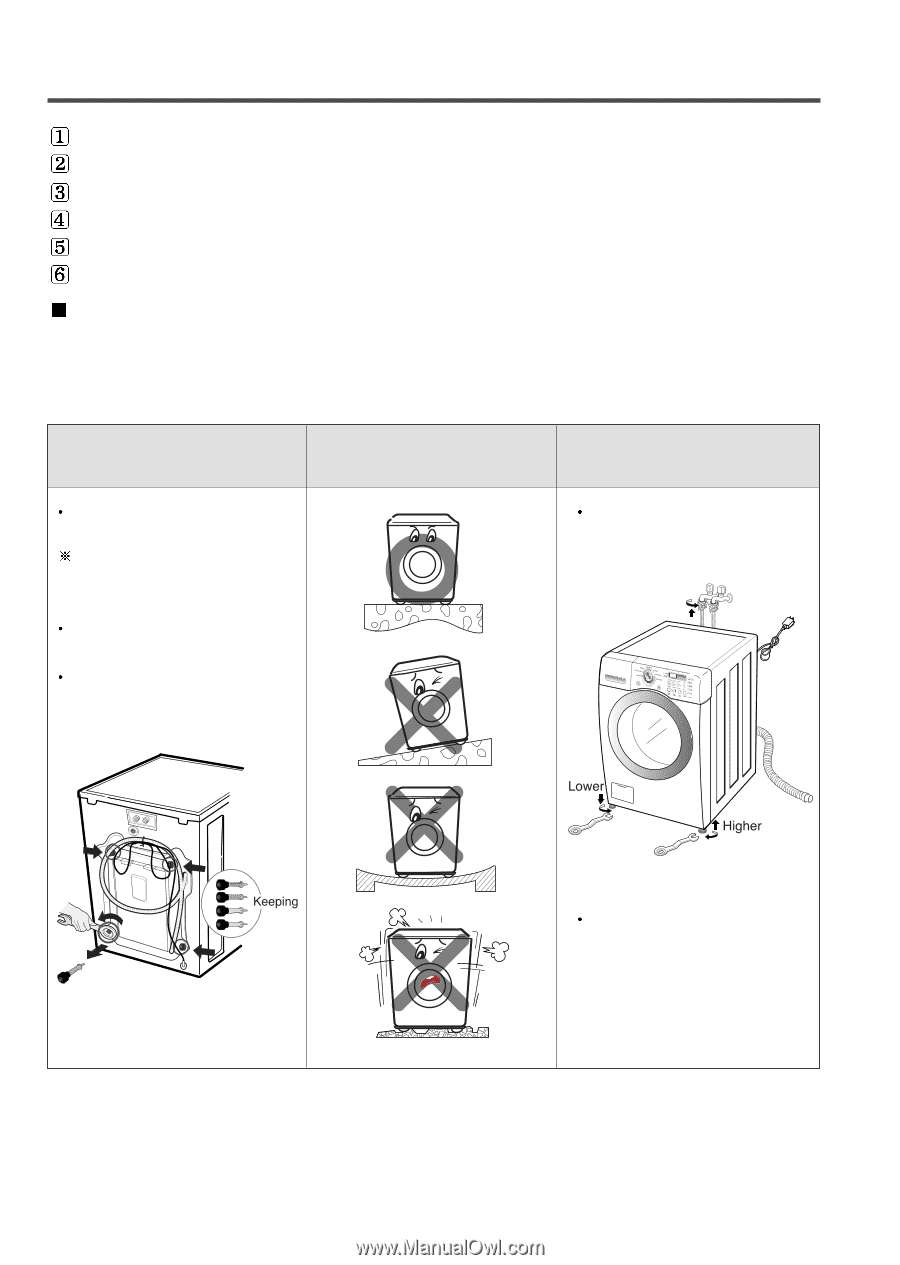
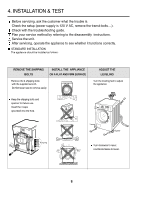
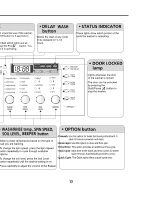
4. INSTALLATION & TEST Before servicing, ask the customer what the trouble is. Check the setup (power supply is 120 V AC, remove the transit bolts....). Check with the troubleshooting guide. Plan your service method by referring to the disassembly instructions. Service the unit. After servicing, operate the appliance to see whether it functions correctly. STANDARD INSTALLATION The appliance should be installed as follows: REMOVE THE SHIPPING BOLTS INSTALL THE APPLIANCE ON A FLAT AND FIRM SURFACE Remove the 4 shipping bolts with the supplied wrench. Do first lower side to remove easily. ADJUST THE LEVELING Turn the leveling feet to adjust the appliance. Keep the shipping bolts and spanner for future use. Insert the 4 caps (provided) into the hole. Turn clockwise to raise; counterclockwise to lower. 8
-
 1
1 -
2
-
3
-
 4
4 -
 5
5 -
 6
6 -
 7
7 -
 8
8 -
 9
9 -
 10
10 -
 11
11 -
 12
12 -
 13
13 -
 14
14 -
15
-
16
-
17
-
18
-
19
-
20
-
21
-
22
-
23
-
24
-
25
-
26
-
27
-
28
-
29
-
30
-
31
-
32
-
33
-
34
-
35
-
36
-
37
-
38
-
39
-
40
-
41
-
42
-
43
-
44
 |
 |