Lenovo IdeaCentre B310 Lenovo IdeaCentre B3 Hardware Maintenance Manual - Page 36
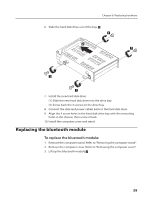
Replacing the optical disk drive
 |
View all Lenovo IdeaCentre B310 manuals
Add to My Manuals
Save this manual to your list of manuals |
Page 36 highlights
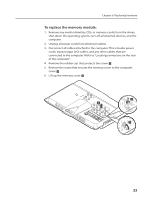
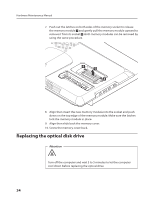
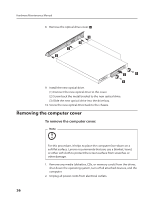
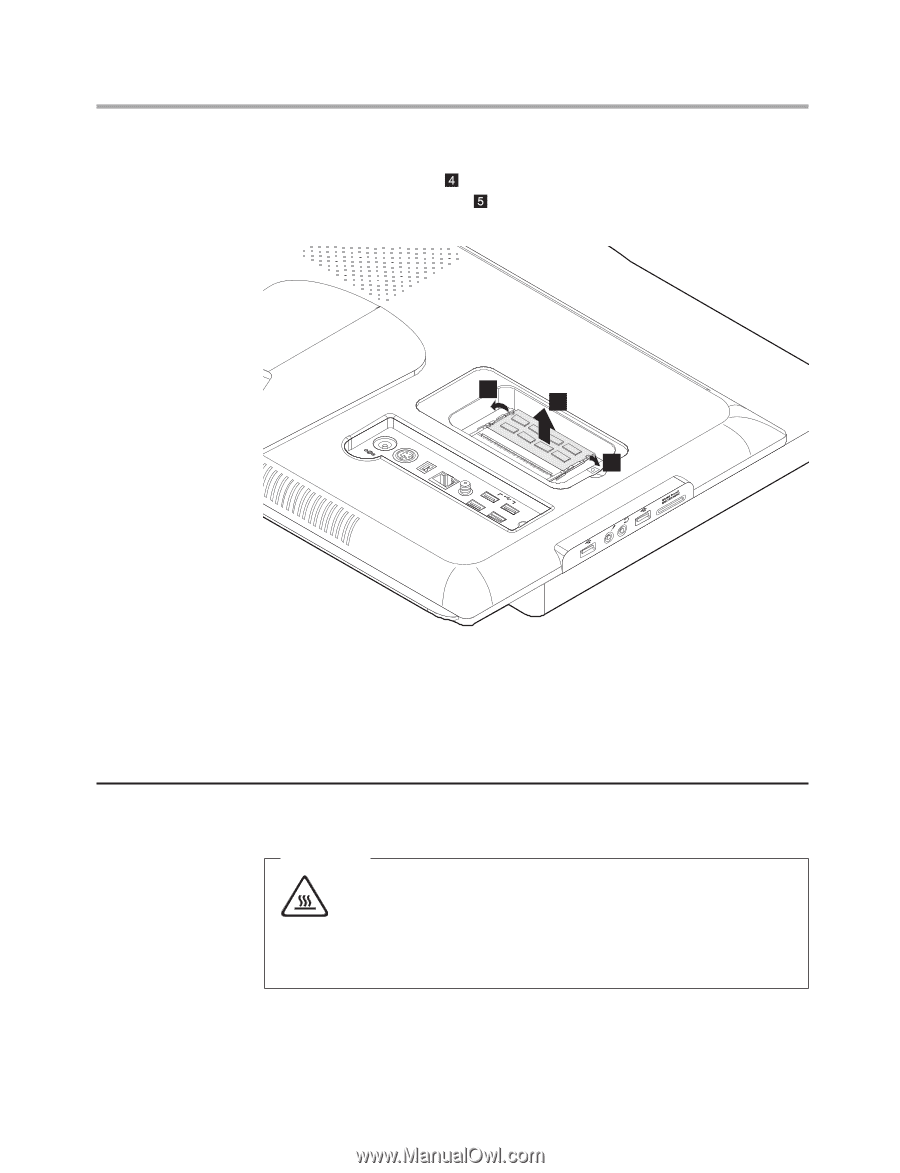
Hardware Maintenance Manual 7. Push out the latches on both sides of the memory socket to release the memory module and gently pull the memory module upward to remove it from its socket . Both memory modules can be removed by using the same procedure. 4 5 4 8. Align then insert the new memory module into the socket and push down on the top edge of the memory module. Make sure the latches lock the memory module in place. 9. Align then slide back the memory cover. 10. Screw the memory cover back. Replacing the optical disk drive Attention Turn off the computer and wait 3 to 5 minutes to let the computer cool down before replacing the optical drive. 34
-
 1
1 -
2
-
3
-
4
-
5
-
6
-
7
-
8
-
9
-
10
-
11
-
12
-
13
-
14
-
15
-
16
-
17
-
18
-
19
-
20
-
21
-
22
-
23
-
24
-
25
-
26
-
27
-
28
-
29
-
30
-
 31
31 -
 32
32 -
 33
33 -
 34
34 -
 35
35 -
 36
36 -
 37
37 -
 38
38 -
 39
39 -
 40
40 -
 41
41 -
42
-
43
-
44
-
45
-
46
-
47
-
48
-
49
-
50
-
51
-
52
-
53
-
54
-
55
-
56
-
57
-
58
-
59
-
60
-
61
-
62
-
63
-
64
 |
 |
Hardware Maintenance Manual
34
7.
Push out the latches on both sides of the memory socket to release
the memory module
and gently pull the memory module upward to
remove it from its socket
. Both memory modules can be removed by
using the same procedure.
4
5
4
8.
Align then insert the new memory module into the socket and push
down on the top edge of the memory module. Make sure the latches
lock the memory module in place.
9.
Align then slide back the memory cover.
10. Screw the memory cover back.
Replacing the optical disk drive
Attention
Turn off the computer and wait 3 to 5 minutes to let the computer
cool down before replacing the optical drive.