Lenovo IdeaCentre B320 Lenovo IdeaCentre B3 Hardware Maintenance Manual - Page 57
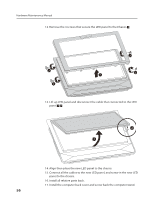
Pull the pins to release the chassis from the front bezel.
 |
View all Lenovo IdeaCentre B320 manuals
Add to My Manuals
Save this manual to your list of manuals |
Page 57 highlights
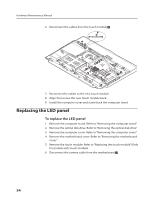
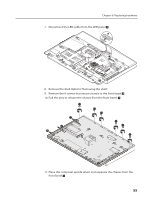
Chapter 8. Replacing hardware 7. Disconnect the LED cable from the LED panel. 8. Remove the shell. Refer to "Removing the shell". 9. Remove the 6 screws that secure chassis to the front bezel. 10. Pull the pins to release the chassis from the front bezel. 11. Place the computer upside down and separate the chassis from the front bezel. 55
-
 1
1 -
2
-
3
-
4
-
5
-
6
-
7
-
8
-
9
-
10
-
11
-
12
-
13
-
14
-
15
-
16
-
17
-
18
-
19
-
20
-
21
-
22
-
23
-
24
-
25
-
26
-
27
-
28
-
29
-
30
-
31
-
32
-
33
-
34
-
35
-
36
-
37
-
38
-
39
-
40
-
41
-
42
-
43
-
44
-
45
-
46
-
47
-
48
-
49
-
50
-
51
-
 52
52 -
 53
53 -
 54
54 -
 55
55 -
 56
56 -
 57
57 -
 58
58 -
 59
59 -
 60
60 -
 61
61 -
 62
62 -
63
-
64
 |
 |
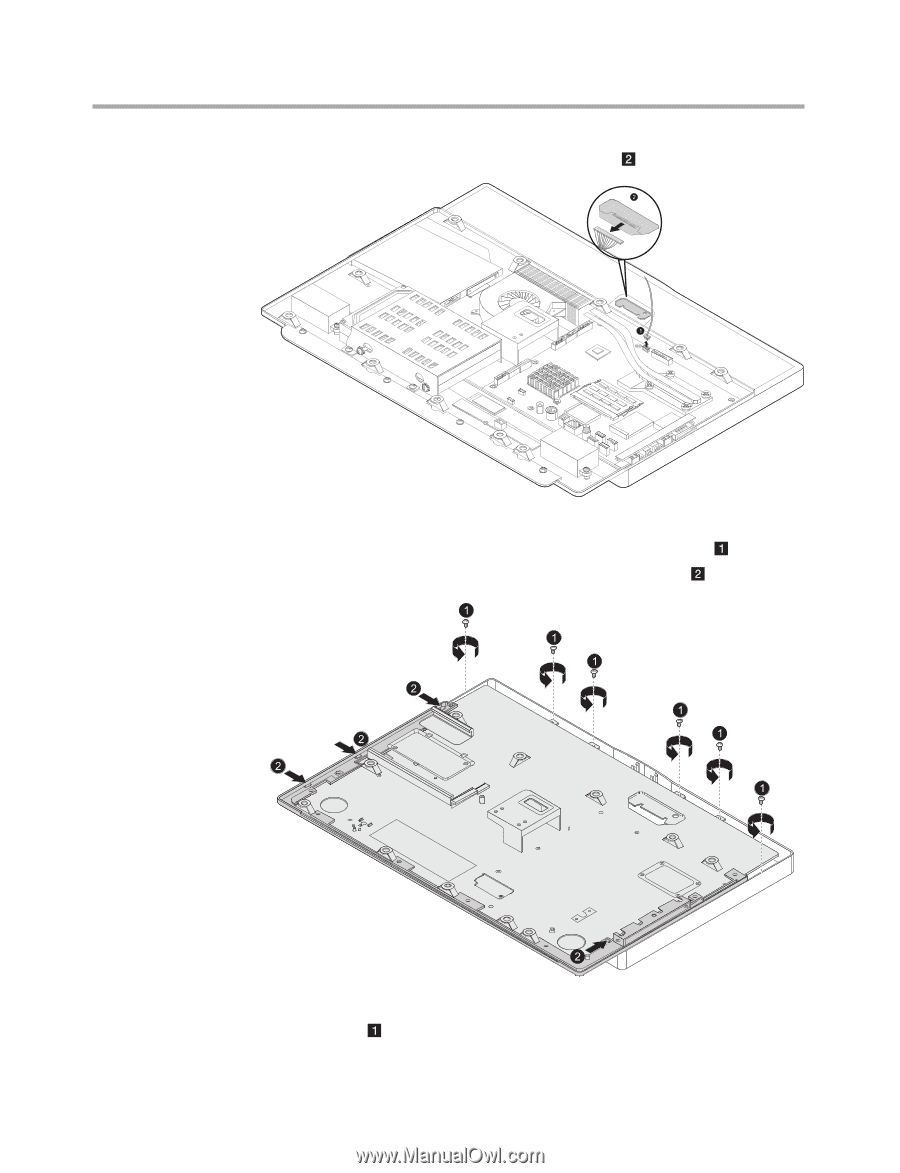
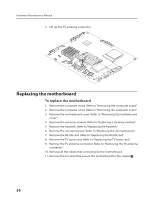
Chapter 8. Replacing hardware
55
7.
Disconnect the LED cable from the LED panel.
8.
Remove the shell. Refer to “Removing the shell”.
9.
Remove the 6 screws that secure chassis to the front bezel.
10. Pull the pins to release the chassis from the front bezel.
11. Place the computer upside down and separate the chassis from the
front bezel.