Lenovo IdeaCentre K430 Lenovo K4 Series User Guide V1.0 - Page 47
Replacing an optical drive
 |
View all Lenovo IdeaCentre K430 manuals
Add to My Manuals
Save this manual to your list of manuals |
Page 47 highlights
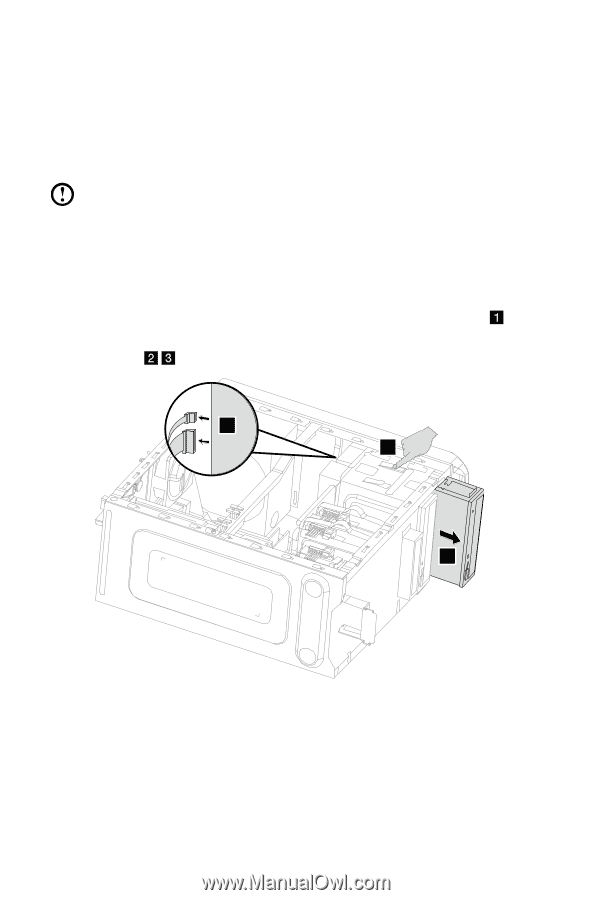
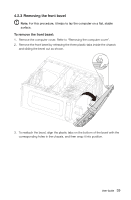
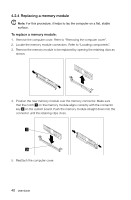
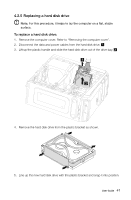
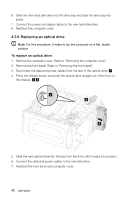
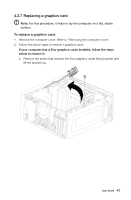
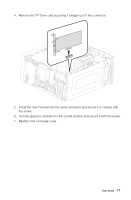
6. Slide the new hard disk drive into the drive bay and slide the drive bay into place. 7. Connect the power and signal cables to the new hard disk drive. 8. Reattach the computer cover. 4.2.6 Replacing an optical drive Note: For this procedure, it helps to lay the computer on a flat, stable surface. To replace an optical drive: 1. Remove the computer cover. Refer to "Removing the computer cover". 2. Remove the front bezel. Refer to "Removing the front bezel". 3. Disconnect the data and power cables from the rear of the optical drive. 4. Press the release button and push the optical drive straight out of the front of the chassis. 1 2 3 5. Slide the new optical drive into the bay from the front until it snaps into position. 6. Connect the data and power cables to the new disk drive. 7. Reattach the front bezel and computer cover. 42 User Guide
-
 1
1 -
2
-
3
-
4
-
5
-
6
-
7
-
8
-
9
-
10
-
11
-
12
-
13
-
14
-
15
-
16
-
17
-
18
-
19
-
20
-
21
-
22
-
23
-
24
-
25
-
26
-
27
-
28
-
29
-
30
-
31
-
32
-
33
-
34
-
35
-
36
-
37
-
38
-
39
-
40
-
41
-
 42
42 -
 43
43 -
 44
44 -
 45
45 -
 46
46 -
 47
47 -
 48
48 -
 49
49 -
 50
50 -
 51
51 -
 52
52 -
53
-
54
-
55
-
56
-
57
 |
 |