Lexmark 13B0500 User Manual - Page 94
Setting the date and time, Turning daylight saving time on or off, Sending a fax
 |
View all Lexmark 13B0500 manuals
Add to My Manuals
Save this manual to your list of manuals |
Page 94 highlights
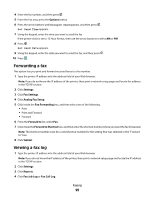
Setting the date and time If the date or time that is printed on a fax job is incorrect, then you can reset the date and time. Then the correct date and time will be printed on every fax job. To set the date and time: 1 Type the printer IP address into the address field of your Web browser. Note: If you do not know the IP address of the printer, then print a network setup page and locate the address in the TCP/IP section. 2 Click Settings. 3 Click Security. 4 Click Set Date and Time. 5 In the Network Time Protocol section, select Enable NTP. Note: If you prefer to set the date and time manually, click inside the Manually Set Date & Time box, and then enter the current date and time. 6 Verify that the time zone is correct. 7 Click Submit. Turning daylight saving time on or off The printer can be set to automatically adjust for daylight saving time for certain time zones: 1 Type the printer IP address into the address field of your Web browser. Note: If you do not know the IP address of the printer, then print a network setup page and locate the address in the TCP/IP section. 2 Click Settings. 3 Click Security. 4 Click Set Date and Time. 5 Select Automatically Observe DST. 6 Click Submit. Sending a fax Sending a fax using the printer control panel 1 Load an original document faceup, short edge first into the ADF or facedown on the scanner glass. Note: Do not load postcards, photos, small items, transparencies, photo paper, or thin media (such as magazine clippings) into the ADF. Place these items on the scanner glass. 2 If you are loading a document into the ADF, then adjust the paper guides. 3 From the printer control panel, press the Fax button. 4 Enter the fax number, and then press . Faxing 94
-
 1
1 -
2
-
3
-
4
-
5
-
6
-
7
-
8
-
9
-
10
-
11
-
12
-
13
-
14
-
15
-
16
-
17
-
18
-
19
-
20
-
21
-
22
-
23
-
24
-
25
-
26
-
27
-
28
-
29
-
30
-
31
-
32
-
33
-
34
-
35
-
36
-
37
-
38
-
39
-
40
-
41
-
42
-
43
-
44
-
45
-
46
-
47
-
48
-
49
-
50
-
51
-
52
-
53
-
54
-
55
-
56
-
57
-
58
-
59
-
60
-
61
-
62
-
63
-
64
-
65
-
66
-
67
-
68
-
69
-
70
-
71
-
72
-
73
-
74
-
75
-
76
-
77
-
78
-
79
-
80
-
81
-
82
-
83
-
84
-
85
-
86
-
87
-
88
-
 89
89 -
 90
90 -
 91
91 -
 92
92 -
 93
93 -
 94
94 -
 95
95 -
 96
96 -
 97
97 -
 98
98 -
 99
99 -
100
-
101
-
102
-
103
-
104
-
105
-
106
-
107
-
108
-
109
-
110
-
111
-
112
-
113
-
114
-
115
-
116
-
117
-
118
-
119
-
120
-
121
-
122
-
123
-
124
-
125
-
126
-
127
-
128
-
129
-
130
-
131
-
132
-
133
-
134
-
135
-
136
-
137
-
138
-
139
-
140
-
141
-
142
-
143
-
144
-
145
-
146
-
147
-
148
-
149
-
150
-
151
-
152
-
153
-
154
-
155
-
156
-
157
-
158
-
159
-
160
-
161
-
162
-
163
-
164
-
165
-
166
-
167
-
168
-
169
-
170
-
171
-
172
-
173
-
174
-
175
-
176
-
177
-
178
-
179
-
180
-
181
-
182
-
183
-
184
-
185
-
186
-
187
-
188
-
189
-
190
-
191
-
192
-
193
-
194
-
195
-
196
-
197
-
198
-
199
-
200
-
201
-
202
-
203
-
204
-
205
-
206
-
207
-
208
-
209
-
210
-
211
-
212
-
213
-
214
-
215
-
216
-
217
-
218
-
219
-
220
-
221
-
222
-
223
-
224
-
225
-
226
-
227
-
228
-
229
-
230
-
231
-
232
 |
 |
