Lexmark 13H0027 Getting Started - Page 17
Troubleshooting - printer cartridges
 |
UPC - 734646370134
View all Lexmark 13H0027 manuals
Add to My Manuals
Save this manual to your list of manuals |
Page 17 highlights
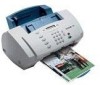
Troubleshooting Checking first things first When your All-In-One has a problem, first make sure: • The power cord is plugged into your All-In-One and into a properly grounded electrical outlet. • Your telephone cord is securely attached to the line jack on your All-In-One and to the wall jack. • Your telephone has a dial tone. • The operator panel and the cartridge access door are completely closed. • READY appears on the display. • The sticker and transparent tape covering the bottom of the cartridges are removed. Clearing paper jams Your All-In-One may have a paper jam in either the document path or the printer paper path. To clear a paper jam: 1 Open the operator panel and remove any paper from the document path. 2 If paper is still jammed in the All-In-One, open the cartridge access door and remove any paper from the printer paper path. 3 Close the cartridge access door, and then close the operator panel firmly until it snaps into place. 4 Press Stop/Clear. 15
-
 1
1 -
2
-
3
-
4
-
5
-
6
-
7
-
8
-
9
-
10
-
11
-
 12
12 -
 13
13 -
 14
14 -
 15
15 -
 16
16 -
 17
17 -
 18
18 -
 19
19 -
 20
20
 |
 |
