Lexmark 4079 Service Manual
Lexmark 4079 - Plus Color Jetprinter Inkjet Printer Manual
 |
UPC - 734646106450
View all Lexmark 4079 manuals
Add to My Manuals
Save this manual to your list of manuals |
Lexmark 4079 manual content summary:
- Lexmark 4079 | Service Manual - Page 1
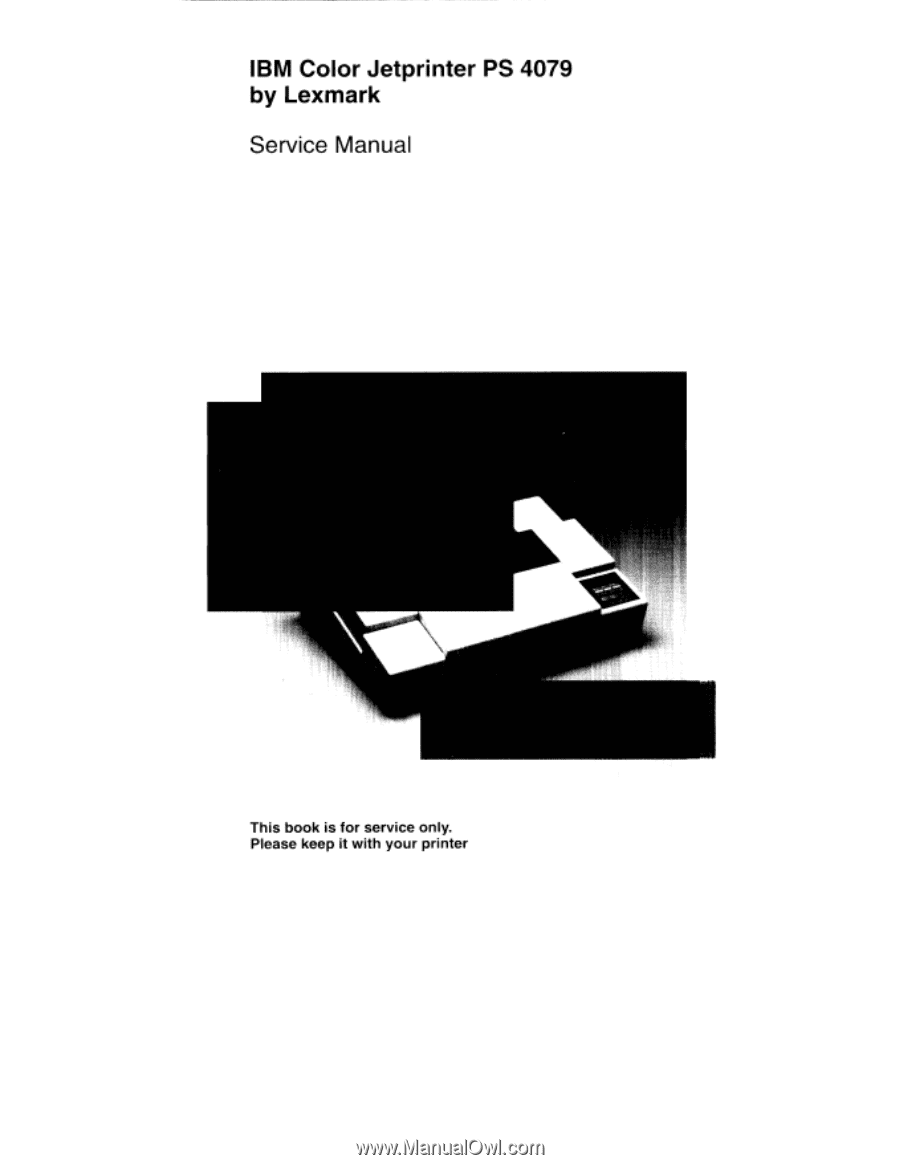
IBM Color Jetprinter PS 4079 by Lexmark Service Manual This book is for service only. Please keep it with your printer - Lexmark 4079 | Service Manual - Page 2
•na'v nct a pnlv 'n • •! ;. io .1 I - c• Los tech-ical I - au:Lira( as or ty Logi apn ma; ••r hal , gPS ; lir pt )ri-ca I, r:rade t:: :he ink "ral•ol 11105 it. .• ;:i fu mtoci :n afar to of :he bull cat*/ < ienIs i•'! • C ',ages in :he oro:Lctis; aroior orn ?rarm • • • :!: 3' Di Tay rna - Lexmark 4079 | Service Manual - Page 3
. Trademarks and Service Marks The following terms, denoted by an asterisk (*) in this publication, are trademarks or registered trademarks of the International Business Machines Corporation in the United States and/or other countres, and are used under l icense: IBM Color Jetprinter The following - Lexmark 4079 | Service Manual - Page 4
V IBM :;olcr JelpriaMe I'S 4079 HMS N.... ...O.. di= .."0, 0•01illi•P SOUSHI ,r "is isses'ilm"IP illiNIE I III'S'''. MS to NMI III I'M 11-1NOWA m: - Lexmark 4079 | Service Manual - Page 5
Information" introduces the IBM Color Jelprinter ""S 4079. • "Diagnostic Information" includes Maintenance Analysis Procedures (MAPs) that give you step-by-step instructions to isolate the failing FRU. Test procedures are also described that are used to diagnose problems and exercise the machine - Lexmark 4079 | Service Manual - Page 6
Fteiated Publicaticms :or more information about printer operations and specifications or 'or detailed programming information, read the: * User's Reference or the IBM Color Jetprinter PS .V79 (Form number SA40-0Eilfic. * Quickr. Reference for the IBM Color Jetprinter PS 4T19 -Form number SA40-066( - Lexmark 4079 | Service Manual - Page 7
the ink cartridges out of reach of children. The ink contains permanent dyes that can stain clothing and furniture. When servicing this machine: • Move the machine to a suitable service area • Use a drop cloth (PN 1280055) under the machine • Never disconnect ink lines while the printer is plugged - Lexmark 4079 | Service Manual - Page 8
- •-•,1 118 III I • • 11 I.' -.P*-4. •Iise4011.110.-f , tviallt DIM all lega -. M.N.,' • - Lexmark 4079 | Service Manual - Page 9
Contents Special Notices Trademarks and Service Marks . About This Manual Related Publications Safety Information Ink Safety Notice General Information Description of the Printer Coated Paper Ink Cartridges . Operating Temperatures and Humidity Tools Using Printer Emulation Operator Panel Print Head - Lexmark 4079 | Service Manual - Page 10
it MAP 1)300: Operat pr. Panel MAP 0310: 1Powe!. MAP 0320: Hcst Pr int MA,P 0330: RAM I:memory) MAP l)340: Ulndete^rained Problem Ddagnostio Aids testing the Printer Using the Menu Sy i;trgn :.:P0C:Tart0r reSI. Function l -est Print A Print Example Priiil Heed Cleaning ,2 rocedures P ri i np Iviode - Lexmark 4079 | Service Manual - Page 11
Releasing Plastic Latches Ink Tube Servicing Print Head Uncapping and Carriage Centering Manual Carriage Centering (No Power) Manual Print Head Capping ( Electronic Modules (Assembly 4) Purge Unit Purge Unit Replacement Ink Cartridge Assembly Carriage Frame Paper Feed Pinch Roller Base Unit Pickup - Lexmark 4079 | Service Manual - Page 12
12: Carriar:je Drive Frame Assembly 13: Ink S 41ply Unit Assembly 14: Ink Return Unit Assembly 15: Ink Cartridge Interlock. Asserrbly 16: Sheettr ed Entry Assembly 20 f3 3(a 6-30 6-45 6-4.2 X-1 X- I X-7 I BNI Co lo • Jetp r,nte r FS 4079 HMS '1. :I 0.04 :1 km m.0 NI INNIN Iu.NSIN. III III II I - Lexmark 4079 | Service Manual - Page 13
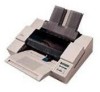
Color Jetprinter PS 4079, the tools needed to repair it, and the customer switch settings that control the features of the printer. Description of the Printer The Color Jetprinter is a table-top four-color inkjet printer the print covet to remove any ink mist that may accumulate and prevent staining - Lexmark 4079 | Service Manual - Page 14
style ifri.Drn an operato , )a..nel on the front of the printer. Ink Cartridges :Etch one contains 31) grams of liquid ink, and Is rated for 3s. much as 77:10 pages ext colicir cartridge i; iiihysically coded to fit in its own color islet. Ms.:). the ini«:;aritridgE has an electronic label which - Lexmark 4079 | Service Manual - Page 15
The removal and adjustment procedures described in this manual require the following tools and equipment: • Phillips Ink leakage can result, and the ink can stain clothing and other items. Make sure the machine is in a suitable service area and place a drop cloth under the machine during servicing - Lexmark 4079 | Service Manual - Page 16
•I r l ' the IF1,,1 .4079 printer C Oles not appear on the iist in 'your )rograrl, niL can Ilse any ("Jill( following printer driver ermilat ons l isted "rpre it the a Fi nn-::occur printer, yow CUtp.it lave oni ' black print.. ,E 4079 FINI E;. 1.4.1i NYaNMin it v II it • .Pi•S•I ..1, 11 - Lexmark 4079 | Service Manual - Page 17
LCD) shows the primer's status, menu items" error messages, and service call messag(ts (..) For example, a Star is displayed when the prirt Check The Check indicator lights up when the printer requiret;. operator intervention. such as ink or paper problems. Ar error message will also he displayed, - Lexmark 4079 | Service Manual - Page 18
Menu and Menu - Pressing Menu displays the mem, system, whethii Jiri the printer is Ready or Not-Rieadt,i. If a job is active, the Ready indicator is on, pressing-Start/Stop turns off the Ready light sand the printer :stops processt rig information. The current job will be interrupted. If the - Lexmark 4079 | Service Manual - Page 19
Information When Alt + Reset is pressed, the printer returns to its power-on status. Print Buffer a Star (*) appears in the display. Do not turn the printer off without the heads being capped. If the heads are left uncapped, the ink dries cut and print quality is affected. General Information 1-7 - Lexmark 4079 | Service Manual - Page 20
. (ler sit!. / on Posit:len 2: Use for copra-rents with ilensehr, inked :•jrap hips. Posiblon Use tor Envelopes or thick paper. or 'for (kr urnents Itf coated parte • is beift:1 used tor bast pri itt 1-8 Be Color Jetp r P.; 4079 HM5 H , • I, l SII VP't Miii.411411lit IIYWA.IiII OIPIR4i44IM - Lexmark 4079 | Service Manual - Page 21
Board and Related Cables MAP 0170- Ink Cartridge MAP 0180: Ink Sensor MAP 019O Ink Flow . MAP 0200 Paper Feed 0300 Operator Panel MAP 0310: Power Supply MAP 0320: Host Print MAP 0330: RAM (Memory) MAP 0340: Undetermined Problem Diagnostic Aids 2 2 10 2 14 2 16 2 18 2 22 2-24 2-26 2.30 2 34 2- - Lexmark 4079 | Service Manual - Page 22
ground unless otherwise specif a J. • ilisually check the machine for obvious problems iiiuch as ink leakage, worn or rin sing parts; reseat all cables, and check Her sequence. iStep 001 continues) :",-2 ins' Color Jetp'in14.≥r Pi 4079 CM'S OOOOOIP Milli:IN Iii It OMB' IF lilt I% • Warn I 4 .• - Lexmark 4079 | Service Manual - Page 23
0310: Power Supply" on page 2-66. 003 1 Does the printer complete the POST, with Ready on the display? Yes No 1_ coated paper if available. Otherw'se, allow for some color convergence on regular paper. Did the test print and or related problem in the chart and follow 1he MAP or procedure. ( - Lexmark 4079 | Service Manual - Page 24
prchharn. 009 Turn alf 1he printer Cortru,)ct the ph mill to the host co rr p Liter. Turn on the printer aid send data from the pa ycul ii.Ve a print quallity r)r the Gal l . 2.4 16Ivl i olar Jett: r inIQr PH 4079 HIVI5H la 11l.IIII. • 1•11l .1:4 MI II dill /M6,61411.4 ',if, MOIR- PM II Ia1111 - Lexmark 4079 | Service Manual - Page 25
Notes Start Diagnostic Informati)n 2-5 - Lexmark 4079 | Service Manual - Page 26
on page 2-1C. • Other codes indicate the printer- is performing i.rt cioe,ration; action is prat em using this index.. go to - MAE 0340: r.iidolermined Problem" on page 2-7 t. Note: if POST fai ls ar d See page ,511,1 Co or Jelprirre,r PH; 4079 HMS 0. 0 0.1. 11441 OP 4.0 .0:010,10,101.11314 HO 0.1 - Lexmark 4079 | Service Manual - Page 27
128 72 No. of Beeps or Symptom 1 Beep - ROM error 1 Action or Failing FRU Logic board. 2 Beeps - RAM error Logic board. 3 Beeps - Printer controller Logic board. 4 Beeps - Logic board. 5 Beeps - 6 Beeps - 7 Beeps No Beeps Operator panel does not work correctly (buttons or display) 8 Beeps - Lexmark 4079 | Service Manual - Page 28
Symptom '0 Beeps - iir)M error 0 Beeps - IRA -1\A error 10 Beeps Printer controller error) 10 Beef:* error mmunications 10 Beeps - mmunication error 10 Beeps - 10 Beeps C !ran head heal-pulse resistance error 10 Beeps Black !dead heat-pulse resistance error 10 Beeps - Yellow head 1.emperatui - Lexmark 4079 | Service Manual - Page 29
- Cyan head 57 heater error 133 10 Beeps - Black head 56 heater error 134 10 Beeps - Yellow head ink 5D sensor error 135 10 Beeps - Magenta head 5C ink sensor error 136 10 Beeps - Cyan head ink 5B sensor error 137 10 Beeps - Black head ink 5A sensor error 901 Insufficient memory to run POST - Lexmark 4079 | Service Manual - Page 30
or 6) ' •MIAP 0343: ,jridc terminad Problem" on ,page 2-74. Operator Codes and Messages are open; tor-oorrectable others [nay require service. Ar error code may require up tO one active.. Paiper feeds into printer 'hen jams; iirror code 4079 HIV S ',PIT • • till • cuimopi Sin • ,111-1111i. I - Lexmark 4079 | Service Manual - Page 31
not feed; POST completes, tries to feed paper when printing Test Print A; Paper feed motor does not rotate. Paper feed problem; more than one sheet feeds into printer; pickup plate repeatedly raises and lowers while printing. No pickup of paper; paper feed roller turning normally. Paper skews. none - Lexmark 4079 | Service Manual - Page 32
( e parameters are clangec: or g.rintar . ; powered off Black ink ( teicge ernoty "MAP 01;30: Ilk tensor' on page 2-26. fit or cage 2-45 Light :mot to lowed t-.1- KAP 0190: Ilk ow" in pri-t. in one color c r all pagii 2-30 balers: jr.; flow :1- .. .. large 'Dung F. waste linos - Lexmark 4079 | Service Manual - Page 33
. none 10 Beeps - POST started; all LEDs on, display blank. none Printer will not print from host compute! . Test Print A runs normally unl isted 2-66 Make sure printer is online 'MAP 0320: Host Print ' on page 2-70. `MAP 0340: Lndetermined Problem" on page ,1-71. Diagnostic 1400 ma tit), 2- - Lexmark 4079 | Service Manual - Page 34
win? Yes No ..I 0IO2 Replace the ldc ic: board. 003 Replace the operator MIN 11•10/1/•••111 1IIINIIIN• 1 1••••MINIMIIIM. 2-14 [Rio or utpriril er PS 4079 .-tIVIS !la *lull' 1.11 soll. 4.min:renal min•Nuilram P1, 11, I ',(MINI PI II owp NI IYIN%fAI•IIIN III hill II Id - Lexmark 4079 | Service Manual - Page 35
Notes Cover Diagnostic Information 2-15 - Lexmark 4079 | Service Manual - Page 36
: Check Paper Symptom Explansdixii Paper insertion problems; Pap, to erter ma.chinei. N"es No Real oaper rr(..):. or cable. Gc. to MA 1)2/:. Paper Feed laic) or" cn pa.ge 2-£1~. 1 fii IBM Color Je /pr if.cr S 4C7c.: HMS .11 IT II 01.4111110 4N41•INIII 141 Yr , .P111.110 4! !II .1.4..41 alp - Lexmark 4079 | Service Manual - Page 37
the paper sensor signal at CNPE pin 1 on the right connector card, with the connector plugged in. (See "Right Connector Card" on page 4-2). You can manually feed paper to check this signal. Push the paper l ift spring clutch plate (Asm. 20-10) to the right, and turn the reap eject roller - Lexmark 4079 | Service Manual - Page 38
. Are characters printed in their correct positions? 7es No IC104 Check the nrir I. timing slit for soiling, breaks, or olds. (Step 004 continJeS) 2-18 rEO41 Color Jel;prince r "'S *J79 HMS ,L,0111114in II I. 41, • I ir 4lIF II I - Lexmark 4079 | Service Manual - Page 39
Carriage Movement 004 (continued) Is the timing slit OK? Yes No 005] Replace the timing slit. 0061 - Check for continuity in the brown carriage cables. Is the continuity correct? Yes No 007 Replace the brown carriage cables. 008 Replace the linear encoder (Asm. 9-2). 009 Replace the logic board. - Lexmark 4079 | Service Manual - Page 40
SeE Liser' Reference for the IBM Cedar Jetprinter PS 4079 for installafic.n standards.. Check. the be 1: and co the followinc IHRUs rrr the order ;,,hown, checKing, the printer alter each replacement to see if tie error cOCle is gone. IBM Color !pr. it t,r 3.5 z1.07c-, Ht.As PINK IN II I III IN.A - Lexmark 4079 | Service Manual - Page 41
Notes Carriage Motor Drive Data D.agnostic !ntormatic 2.2'1 - Lexmark 4079 | Service Manual - Page 42
number- displayed, epl .ce any FRUs in sequence„ l i.asti.Ing the machine after each acti Dr to see it the error was corrected'.. ?-22 !BM Color Jel pr RS 4079 HMS IN ilno il l III MI III iIIij YIFII YY IY114ii1M1YY..!MrN16Y - Lexmark 4079 | Service Manual - Page 43
the right connector card 2. Check for correct connection of the white ribbon cable 1 to the right connector card and the logic board. 3. If the problem persists, check continuity of the white ribbon cable 1 (23 pin) and brown carr iage cable 1 (19 pin), checking pin-for-pin. 4. Replace the carriage - Lexmark 4079 | Service Manual - Page 44
em )ly on a level plane 'vim le servicing with the black cartridge end elevated . Cover any oiler ink l ines with absorber: cli:Dth, secured mr for each cartridge sensor iloins 1 E nd 3 anc 4: 5 and (3. 7 and Si . is not used. (51:ep 003 continues,' 2-24 leivi Color ,Jelp rin e F'S 4079 HhA E], - Lexmark 4079 | Service Manual - Page 45
003 (continued) Is the resistance on each set of pins 15K to 25K Ohms? Yes No 004 Remove the ink cartridge assembly. Check continuity on the sensor cable. Match pin numbers at both ends of the cable. WBLW 9WYWK 12 3 45 6 76 9 hui ILL AL CNID 8 7 I (K') K W 2 1 - (C') - Lexmark 4079 | Service Manual - Page 46
2 Hold ng a :loth cier the sensor end, gently shake tie ink dge. Cian you hear ink or cfEel ink movement in the cartridge? (es No CI02, RiecilacE the irk cidrtridge. 003 :Step 003 cc ntinues 2.26 IBM Color JElpri -:S 4079 HIV, S II , I•1 t II • 0 0 • 1•t+de i • ill,' M P II in Romp NI 000000 - Lexmark 4079 | Service Manual - Page 47
Cyan Magenta Yellow Black pins 1 - 2 pins 3 - 4 pins 5 - 6 pins 7 - 8 BR BLBR R BR Y BR K 1 2 3 4 5 6 7 8 [ I I (K) K / ----17., -\ BL ...J - 7 0 j --",(,C, *) R ....,(V Y _. ./ \ I 6 To push down the ink sensor: insert a thin screwdrver just above the ink cartridge assembly and below - Lexmark 4079 | Service Manual - Page 48
•-- Replace the log board. 005 ChecH( the sensor ,:aal es continuity, matching pins lett cc)nr lector ,carc with wires tc the ink sensor un VI/ EL_ VV R V,' K 1 2 ,"3 4 6 7 8 9 CrslINK ,Er the 13 (K .) K V,' is the conliinuit,y corre des /silo 4 3 Mr) ( '') Reolace the ser r cable. Lhe - Lexmark 4079 | Service Manual - Page 49
Notes Ink Sensor Diagnostic Information 2-29 - Lexmark 4079 | Service Manual - Page 50
of it k. f: minimize in K flow whi e you troubleshoot ink flow problems, i s is helpful to be familia' wilh normal ink flow. If needed, stun y the i , k bow diagram on page 4.7 and the text on the following page. S:art I,vith the flow of ink tram the ink cartridge. kr. is also helpful to be fa - Lexmark 4079 | Service Manual - Page 51
through the large purge waste lines when the purge motor runs? Yes No 0081 Replace the purge unit. 009 Is ink leaking from the ink cartridge assembly or into the bottom pan? Yes No 010 Run a Long Cleaning and go to"MAP 0220: Print Quality - on page 2-46 . 011j -- Check and - Lexmark 4079 | Service Manual - Page 52
nl.; supply assembly (Asrn Perform a L.cnllll Cleaning. Does the ink flow f,:orrectly? 'Yes No 013 Replace tl e print head lo,r Th e color that fz. I) flow, 971'1~11l E LI the cal l . 015 nd the call iai •i Color •..I•CHI)111'Qer 4079 HMS .2$•NI.•.$11N 41YMY11lIYYMNIIIIM4l I.M.III.II. i1I IIIA - Lexmark 4079 | Service Manual - Page 53
Notes Ink Flow Diagnostic Infor malicn 2-33 - Lexmark 4079 | Service Manual - Page 54
Feed Electrical Symptom EExplanation Pape,. eject problems, an error code is displayed when carriage and go to the step .eterenced. Error Code Appears When printer is Lirned en When carriage moves loft to right as the 'S 4079 HMS .1••• MOWN In a MI MI .• 41.6. • • INN, d,o, Ikill !,1 IONS* - Lexmark 4079 | Service Manual - Page 55
board. View the paper-out sensor arm from the rear of the printer under the paper feed roll. Make sure the paper sensor arm operates smoothly the continuity of the paper sensor cabk- by matching wire colors. Check the continuity of the ribbon cables (Step 005 continues) Diagnostic Information 2-35 - Lexmark 4079 | Service Manual - Page 56
the platen for bits at paper, paper dust, or ink so ling. •s the platen soiled or are there pick. up paper, the Dapi,!r width sensor detects the black surface of the platen aid ttie surface of the p f. (Step 010 Gann r I.1 ≥-36 rIM Color Jet pr :r I'S 4079 HMS .1 a *VII tlw ilill■4111110. - Lexmark 4079 | Service Manual - Page 57
Paper Feed Electrical 010 (continued) Is the surface uniformly black and in good condition? Yes No 011 Replace the platen. 012 Replace the linear encoder/paper width sensor and check the printer operation. If the problem is not corrected, go to the beginning of this MAP. 013 Clean the platen with a - Lexmark 4079 | Service Manual - Page 58
encoder (fi,sm. 9-2) 022 - - Remove and replace the following FRUs in sequence, checking printer operation atter each replacimnelt: 1 Ce.rriage boi tn." 2. Logic board. f :3E1 lE3I,A Color „le prwitE 4079 HMS I DC1.1111,1, 111,111,111fil .1'411 IIIIii. 4114,6114 ,111111 HID,/ ell 1111114 - Lexmark 4079 | Service Manual - Page 59
to "MAP 0280: P aper Feed Motor" on page 2-60. 028 - Remove the controller board. - View the paper-out sensor arm from the rear of the printer uncle r the paper feed roll . -- Make sure the paper sensor arm operates smoothly, blocking the light path of the paper-out sensor. Is the light - Lexmark 4079 | Service Manual - Page 60
darrageril r worn rollers. t the paper ''eed rolle's do not .turn, go to "MAP 0280 Pa )er Feed Motor .' on page 2-60. I•-.---- I -.N ___ 1-- _1- --- 2-40 : E C c.klor ?,r 4079 HMS P I:• SW 'KM !I'll II I II r, 'Wilk.: I • t =r INX! ...OM ilmill111111,1 - Lexmark 4079 | Service Manual - Page 61
Notes Paper Feed Electrical Diagnostic Information 2-41 - Lexmark 4079 | Service Manual - Page 62
Could Cause This Symptom • i'breign objects in ow,h • paper 'dust or ink. on rolie K.; • Paper feed motor, ga!iir train • l'paper pickup Remove any foreign olojects from tie paper path. Path'' on page 4-5, ) Turn on the printer. Does the paper motor run? 'Yes No See 'Paper 002 Go to "MAF 023'): - Lexmark 4079 | Service Manual - Page 63
? Yes No 008 Clean the paper feed roller by running a piece of brown cleaning paper through the printer. (Cleaning paper is supplied with each batch of coated printer paper.) - or Replace the paper feed roller (Asm. 18-3). 009 Does only one sheet of paper enter the paper feed rollers? Yes No 010 - Lexmark 4079 | Service Manual - Page 64
Paper Feed IVIectianical 012 (continued) F ass Ed-ibiy or reliarecl parts IA sm. 17-1) or F a.,oer fee,c1 rc E r lilksm. 18-3). 013 Does the paiper move scnoothly through the eject rat( rs and the inner ;ov ler spur E? e C 0"I4 (lllear ar ,- plac: tle eject rol lers (i\ srn 18-2:) or - - - Lexmark 4079 | Service Manual - Page 65
Notes Paper Feed Mechanical 0,agnoslic Irformatiou 2-45 - Lexmark 4079 | Service Manual - Page 66
clots. color:;, or ink smearing. POSSiHe ink supply problern. Conditions Thai: Could Claus'? This Symptom II Clogged ink ilines IN Print head ^^ Cartridge present 005 (Step 005 continUes) 2-46 IBM color JI:tpr n :er F's 4079 HMS olliilliP1411111111.110W di III till 11a. 1.4 NI 1phisi , - Lexmark 4079 | Service Manual - Page 67
coated paper and correct print mode for best results. 0071 - Remove the suspected ink cartridge, cover the sensor end with a cloth, and gently shake the cartridge. Can you hear or feel ink movement in the cartridge? Yes No 008 Replace the ink cartridge. 009 - Make sure the platen is not dirty or - Lexmark 4079 | Service Manual - Page 68
ldge assembly. Are these conditions :nrrect? Yes No --01:2 (3c. 'to "MAIll' Cri ll.1)! Ink FlpiAr on page 2-30. 013 Perform the Pnnt .1mole to cheCt4, rozzle pedal-I-rand y. s the pattern for all ifiior colors correct? Yes N: 014 Gici to Step 016. 015 F no the „al I . I••• 016 Perldrnri Long - Lexmark 4079 | Service Manual - Page 69
017 (continued) Is the test print satisfactory? Yes No 018 Replace the print head that was failing. 019 End the call. -- 1 020 End the call. Print Quality Diagnostic Information 2.49 - Lexmark 4079 | Service Manual - Page 70
Check the carriage motor operation. Does the carriage star; or attempt to move when the printer its turned cn? Yes No 002 Go to ''MAP 015(' Carriage Motor Drive Data'cm carriage cables, 2-:50 11.3s'1 Cc lor Jetoririlte 3 4079 HMS n nog 1114.01..1. !I OH '4 Nil t MI ir 1.11,91c!.IIIVN ', IV' :•1!WM - Lexmark 4079 | Service Manual - Page 71
006 - Remove and replace the following parts in the order shown. checking the printer after each replacement to see if the problem is solved. 1. Linear encoder (Asm. 9-2) 2. Carriage board 3. Logic board 007 Remove the obstruction, run POST to check the printer. Diagnostic Information 2-51 - Lexmark 4079 | Service Manual - Page 72
Head Heater MAP 0240: Head Heater Syrni:dom ExplanatiDr YoL have a tie, ;4d heater error cc,de. Conditions That Could C ause This Sy mpitonn $ Carriage board $ Logic: board Pri nt read Carriage cables 001 - Identity the st.sp.aoted heat Asing the codes in ' IV /1I ! 1 1 10 Error Code/Syrnplorn - Lexmark 4079 | Service Manual - Page 73
L006 --End the call. li _ 007 End the call. Head Heater Diagnostic Intornialt,n 2-53 - Lexmark 4079 | Service Manual - Page 74
3-14;i . Turn bill the pr inter ,. Remove the purge aiiserribly and la!/ it on its side. Prctec" the area ihrith absorbeilt material in case of ink, leakage. ;,Thecic the sensor or the bottom of the purge asserrlbly Is the serial:1r broken., )r are the c..ontacts dirty? Yes No 3 Co to Step - Lexmark 4079 | Service Manual - Page 75
Head Cap Position 006 Make sure all ink lines are connected. - With the purge assembly removed and laying on its side, check the voltage on the contact straps. Voltage should be +5 V with the - Lexmark 4079 | Service Manual - Page 76
. 003 Check. the von:age a the print head as read by the analog swi tch 102 on the car- lege hoard, It) 1' y9 1 -4 , .3 1f1 ram Color JOprintE 4079 HMS , I, SUNNI Ulu!!! +ill I MI lb AI! 11 117 I! V 1 14 - 1111HAIW or. mr.64•II - Lexmark 4079 | Service Manual - Page 77
Head Temp/Heat Pulse Check the resistance and voltage between each pin and frame ground. Head Black Cyan Magenta Yellow Pin Resistance 12 3k-4k O 15 3k-4k O 14 3k-4k O 13 3k-4k O Voltage. 1.02 - 5.03 V 1.02 - 5.03 V 1.02 - 5.03 V 1.02 - 5. - Lexmark 4079 | Service Manual - Page 78
phase. Is the resistance appioximately 0.8 Ohms per phase? Yes No 002 Replace the car rrige drive motor. 003 II Replace the logic bttarc . 2-58 lE3I',A Color Jerpr ra te r 4079 HlMS lit 19, 040,1 IN 19 • - Lexmark 4079 | Service Manual - Page 79
Notes Carriage Drive Diagnostic Information 2-59 - Lexmark 4079 | Service Manual - Page 80
:"aper Feed IVIotor AMP 0280: Paper Feed Motor Symptom Explanation You have an or or .code indicaPng no paper teed roller rotation during POSI. or whi le printin T.e[t Print ,A Conditions That (:oultll CAUSE This Symptom • Paper teed motor • Logic [)oard 001 Check the paper tee. motor winding - Lexmark 4079 | Service Manual - Page 81
Notes Paper Feed Motor Diagnostic Information 2-61 - Lexmark 4079 | Service Manual - Page 82
suspect the purge motor is bad and yot nave no ink flow. • Purge motor • Purge sensor cable • Left 3 .!s grouna; pin 5, I , Fund 7 are windings. Tie black wire is pin 7. lb the resistance about 7II.1-80 Ohms per phase? 4079 HMO • MJ W .:: nepinegi.mit". III IIW 16 , 111,111111riling, 4 ,' IV - Lexmark 4079 | Service Manual - Page 83
Purge Unit 005 (continued) - Check the continuity of the left connector card cable. Begin with the black wire on CNMEC on the logic board and on the left connector card. Is the cable OK? Yes No 006 Replace the cable. I 007 Replace the logic board Diagnostic Informatior, 2-63 - Lexmark 4079 | Service Manual - Page 84
,Ixplanatiicn appear;; the display, butiDris LE. DS fail, out the printer starts POS''[ . Conditions That Could Cause This Symptom • power supply panel . ( St e!lp Cl(l4 irontin JIHS) -6ZI, Color .pr '1.( r PS 4079 H M S I 14 41.1 W:i VII I:V Yi .11 AY 0.411.61.04 i . - Lexmark 4079 | Service Manual - Page 85
) Is the error corrected? Yes No 1 005 Replace the logic hoard. fj-006 End the call. 007 Turn oft the printer. Instal l the controller board and connect J4 Turn on the printer. Check operation of buttons. LEDs, LCD (see "Controller Diagnostics" on page 2-83) Do all buttons, LEDs, and LCDs pass their - Lexmark 4079 | Service Manual - Page 86
Power Supply P' 031 0 P We " 91suppty Symptom Explanatior The pi. nt E r does rice. start POST., the display blarik, and there xre ro beeps or l ichts. Conditions That Could C aus? This Symptom 0 AC outlet 0 Power cord 111 Primary fuse 0 Power supply Contrialler board 0 Controller card EPROIM 0 - Lexmark 4079 | Service Manual - Page 87
V pins 3 -5 (red to yellow) 5 V Are the voltages correct? Yes No 008 Turn off the printer. Make sure the controller card EPROM and memory SIMMS are installed and seated correctly. Turn on the printer. Does the printer complete POST? Yes No 0091 Go to Step 011 on page 2-68 Diagnostic Information 2-67 - Lexmark 4079 | Service Manual - Page 88
012 Go to "MAP 034): Undetermined Problem" on page e-, 4. 013 iernove and replace lh following pails unti l the failure 1. Contfciller boa.rci 2. Corti oIL3r card EPROM :3. (Mein pry S MN./ J5 4. tdemory SIMN1 JFI dorrentedi it.-68 OM Color Jetprirrtur 4079 HMs. 31111 V N.IN NI :;:q• • •Hif - Lexmark 4079 | Service Manual - Page 89
Notes Power Supply Diagnostic Information 2-69 - Lexmark 4079 | Service Manual - Page 90
plug. [tun the wrap test page 2-83 Is the wrap test succeastul? "es No 004 Replace the contrriller board. 005 Check the operatoi printer rruerface menu for corrt)ct l rcitocol election. Is serialiparallel protocol selected correctly? Yes No 006 Select the corral protocol . NI Co or .Jelpriint - Lexmark 4079 | Service Manual - Page 91
007 The printer is OK. End the call. Host Print Diagnostic Intormatioi F 2-71 - Lexmark 4079 | Service Manual - Page 92
irnissing frorn your print job, additional data appears, or error cinci3 960. Conditions That Could Causiii This Symptom RANI SIMM ,J5 or J8 001 The printer requires z. 1.113 of RAM to complele POST. It error code 960 :pnears, replace the SIMM in J3 wh ch !ishcidd be 4 ME, and conlirJe with - Lexmark 4079 | Service Manual - Page 93
Notes RAM (Memory) Diagnostic lnformatio•I 2-73 - Lexmark 4079 | Service Manual - Page 94
or symptom, replace the fol lowing PERMS cne at a time, checking the printer operation after each replacerr(3nt. Logic board Controller board Reinstall the parts thin c.la not fix the problem. ,';!-74 IBM Color Jet pri ntE r S 4079 HMS 4 4.1 , ue a 4110111,11.11 I n 1111,110 *11 MAI 411.1.11 - Lexmark 4079 | Service Manual - Page 95
79 2-81 2-83 2-83 2-83 2-84 2-84 2-84 2-84 2-84 2-85 2-85 2-85 2-85 2-85 2-86 Testing the Printer Diagnostic Aids are divided into two types of functions: Controlier Diagnostics, and Service Adjustment Mode. In addition, some test prints can be run from the operator mode. The tests are provided for - Lexmark 4079 | Service Manual - Page 96
menu terrs, press tail -I- or gillt Liist !;List -) Operator Test FLIIIC:tik:Ins the printer is 'a nt ed on, it goes through a iphecc-iou: roJtinisi and indicates any fai Prunt A • Test Print 3 2-76 Hue • PS 4079 -MS d In. 1.11M*10111.181111MIII01, WM*. NV .1, 11 I I. I* Rum ...114 - Lexmark 4079 | Service Manual - Page 97
use these test procedures without entering Controller Diagnostics or Service Adjustment modes. Test Print A Test Print A prints a sample of machine settings and lines of c4 Jlor in varying densities, and also exercises the printer extensively. The printer completes the test on one sheet of 215.9 by - Lexmark 4079 | Service Manual - Page 98
rest arid pr inting 3 started. After the nozzle ched< is printed, the printer returns to thH men: rrrcde. =.: :t_ 1.:gore Nozzie Printotil In this Procedures rhese procedures clean out the ink l ines during dag lost c orocedtmes or after new ink parts have been Installed. Normal Cleaning - Lexmark 4079 | Service Manual - Page 99
Transparency Use for printing on transparency film. Bold Black Prints bolder black than Quality mode. Use when darker black is needed. High Quality Use for printing graphics or colors on paper other than the recommended coated paper, and when ink starts to run together seriously. Requires longer - Lexmark 4079 | Service Manual - Page 100
OUALI E; TEA SPARE END pRAFI!. END CI:MUM :Nes the bka:IK :oc ,: !alro.7' Does the back 1512' 7 ,o' Nit) l= I Nc ) ..N.. I ENC BO '0 BLACK to thI clots` %.".• fon to ]ettiel WD Yes coated era uc MEM 2-80 IF IA ..1( Ipi • - m'S 41E7 ••• I 444 41411 YlUMli 41114 I. 411 •4411,4 IiW - Lexmark 4079 | Service Manual - Page 101
Aids Power-On Self Test (POST) When the printer power is turned on, the following sequence of capping mechanism rises, lifting and capping the heads 16. Purge unit suctions ink from print heads and pumps ink out through waste ink lines. Display may show 01 Busy briefly 17. 00 Ready is displayed; - Lexmark 4079 | Service Manual - Page 102
capped and a Star ,:") appc ars in the display. Do no L- im off the printer for long per ocis of tirne until the heads are capped and The * appears in the iisplay. 2-82 IBM Color Jet DrniE r 4079 HIVIS .4. 4 II 411 4i41010144, MN.. III I.O Mit. II 114 II I +I go 444INIIIIIc14,141IIIIIIIM - Lexmark 4079 | Service Manual - Page 103
Diagnostic Aids Controller Diagnostics This mode is used by service persons to do FRU isolation and make adjustments to the printed page. To enter Controller Diagnostics, press and hold Menu and Print Buffer while turning on the printer. After the POST is complete, the first item in the Controller - Lexmark 4079 | Service Manual - Page 104
2. Disconr ect 0 parallel or serial interface cable. 3. Install the wrap 4. Pree3 and hold th, ?. Menu and Print I3uffer buttons whi e y.pu rn on the printer , 5. Select. Wrap f rcrn the menu. The test runs contind,:iusly until you press the Menu buttcr.. message is display:cc ludicatine if the test - Lexmark 4079 | Service Manual - Page 105
to the operator menu options, but with the addition of the Refresh option, which uses a greater quantity of ink to refresh the printer ink system. This procedure should be used whenever in ink line is replaced. Software Version Use this option if you need to know the software level of the various - Lexmark 4079 | Service Manual - Page 106
Service Axiljustment Mode are in "Adjustmelt Procedures • on Dage to erter Service Adjus•ment Mode: 'I . Make sure the pri titer power is oh. 2. Press and hold Menu and List + while turning on the printer Adjustment ProceoLres" on page 3-3. .2-86 I EIVI Color Jr;tp inter PS 407,9 HMS , I.... , - Lexmark 4079 | Service Manual - Page 107
Diagnostic Aids Repair Information This chapter contains adjustments and removal procedures. Whenever parts are replaced, make sure that all adjustments are correct by running diagnostics procedures and checking adjustment as needed. Note: Read "Handling ESD-Sensitive Parts" on page 3-2 befoe - Lexmark 4079 | Service Manual - Page 108
Be etxttra caret„il in working with ESD-sensitive parts when cold-weather heatim•g is used because low humidity ino -eases static electricity. 3-2 Color tetprinler 4.079 HMS 114,111 4 111,114111111141111141, 1111,11.1! 411 lit qi44i 4r. :144 ' , II, 411. ,10 441,11 s MAIM. 4111,1, 114/1111N41 - Lexmark 4079 | Service Manual - Page 109
head gap adjustment shaft is replaced • When the carriage ink supply unit is replaced • When the carriage frame platen is replaced • When the right or left printer frame is replaced • If the setting of the the AC outlet. 3. Remove the paper guide, top cover, and inner cover. 4. Set the - Lexmark 4079 | Service Manual - Page 110
that the carriage does not, olio' the feeler gauge as it passes over. Turn the head gap adjust vier t one o ick. lE3M olor Jet;1,rintor 4079 HMS 11.4.11 I IYLYYIpIpIIMIY via.m4 OM 4. !bp, 14.1* If11.1.1. II .1:1111.11. 41.wl.Ilrl 4141 - Lexmark 4079 | Service Manual - Page 111
Diagnostic Aids at a time until the carriage clears the feeler gauge with the least possible clearance. 11. Check the adjustment in the middle and at the right side of the platen, adjusting the head gap for the least clearance at the highest point without touching the feeler gauge. Repair - Lexmark 4079 | Service Manual - Page 112
or exit from any subrrenu I Black Offset is -tot saran as a menu i ltifffri, ycit may neat IN. ye entiereci Service ,Adjustrnent fr ode. Turn off r- enu items. I Black iOlfset is riot sacip as a inienu item, you 'nay nave ant sred 3en/ilce djLstrnel1 cr cyle. Turn oft the printer, wait a 'few - Lexmark 4079 | Service Manual - Page 113
Service Adiustment Mode shows the following items: Table 3-1. Service Adjustment Mode Functions Menu Item Description Black Offset Used as a standard for the )ther colors grams .)f each color ink • Cleaning D - flushes the tubes thoroughly, using 4.5 grams of each color ink Center Head Centers - Lexmark 4079 | Service Manual - Page 114
;, usin 3 the magnifier to view the test print, if necessary. The hest selectidri is when the two color; ...ippear closest to being one line. Print samples are also an dage X-1. 3 ,43 IBM Ipollor Jetprmte- ,E 4079 HMS is Nrnii¢ 014 i1Ne SHIN HMO.III I' ! le.P.MI.IMINIMUlar An.4ime im run mrrrp - Lexmark 4079 | Service Manual - Page 115
Diagnostic Aids DIRECTION OFFSET Pattern CYAN OFFSET Pattern MAGENTA OFFSET Pattern YELLOW OFFSET Pattern YELLOW MAGENTA CYAN 2 'lll ' ii I: d ' 1111111', I I I. I l l' tl ! l i lil I 'I .2 I . 1 IHIIM 1 : I I. a , 15te 6 6666 5 NM 4- 2 NIO UM o Me .1 IN .2 to .3- 4-4 NB .5 .6 On .z PPI - Lexmark 4079 | Service Manual - Page 116
: for corip arisen. Select the value giving the I shift on the test print. Run Test Prim: Ci tc check the color ,and offset oil toe pr nt heart nozzles. See pe.g€ -0 for instructions on running :est prints. If you set a value inco -rii)ctly, or want -to refine the seti ing, select - Lexmark 4079 | Service Manual - Page 117
removal procedure, givinc attention to any special conditions l isted. Service Information • Releasing Plastic Latches Ink Tube Servicing Print Head Uncapping and Carriage Centering Manual Carriage Centering (No Power) Manual Print Head Capping (Disabled Machine) Covers Operator Panel Inner Cover - Lexmark 4079 | Service Manual - Page 118
.ls Ink Cartridge Assemt ly Carriage Frarne Paper Feet, Pinch Roller Ease Jnit Pick.uo Roller, Pap r Lifting Plate Platen . . . . Paper Feed and Ej i?ct Rollers Paper Feed Mat::' Paper Sensor . . Frame .S e pa rati on Sheet 3-44 3-4.7 3-49 3-49 3-50 3-52 3-53 3-54 3-55 3-56 .3-57 3-12 NB M Color - Lexmark 4079 | Service Manual - Page 119
force to release the latches. They are easily broken. Ink Tube Servicing Because ink contains permanent dyes, observe the following when servicing ink tubes: • If possible, move the printer to a suitable service area where any possible damage from ink spillage wi ll be minimized. • Cover the table - Lexmark 4079 | Service Manual - Page 120
servicing .several of the parts. Of the pr .ter has II.] 4Dwer l.':onnected. follow 'Manual Carnage Centering (INio Power).") 1. switch on the pri 2. As :,con as the canoge moves from the horne oc!', itior , switch oft the printer Vie v 3-14 E [VI Color ,Jc'tpri It H. 35 iiir9 HMS x4. .YII~ - Lexmark 4079 | Service Manual - Page 121
away from the purge unit. The print heads are now uncapped. They should not be left uncapped overnight. Manual Print Head Capping (Disabled Machine) If there is no power to the machine and the print heads must can be used under power or to uncap the print heads for servicing. Repair Information 3-15 - Lexmark 4079 | Service Manual - Page 122
Removals Covers Disconnect the I rif cord and printer cable from the. arttler. 2. Re.ninve the prints E paper guide by pul l ing it up arid dui of thl?. machine. 3. •Remcve the front rover and the inner cover. 4. Remove the two cr. lvitr screws 1. sql %% - Lexmark 4079 | Service Manual - Page 123
Removals 6. Remove two rear cover mounting screws, one in each rear corner (only one is shown). 7. Move the rear cover to the rear slightly, flexing the sides outward and tilting the cover back, then lift off the rear cover. Operator Panel 1. Remove the operator panel base and operator panel - Lexmark 4079 | Service Manual - Page 124
Removalist 3. To replace thn ol:)err,,tor panel . it is necessary to saoat ate the , operator parse, fro Ti the. base. Push the latch 2 to release thc, operator panel . ik 4 1. lift the ooenEllOr upwarri 3. Coior ,Joy pr rIt r 'E: 4D79 F., • ' II. rim mid al - Lexmark 4079 | Service Manual - Page 125
Inner Cover Spur Unit 1. Remove the inner cover (Asm. 3-2). 2 0 0 0 Removals 2. Insert a screwdriver under the spur unit and spread the latches to the sides as shown. Be careful not to use excessive force on the plastic latches. Repair informatic., [ 3-19 - Lexmark 4079 | Service Manual - Page 126
latch on each side. Rear View 4 Pull out the four phi heads and lay them aside ir sa e where the ink wil l roil stain anything. Note the location of eacri color, so they cane returned to the same positions, Note: When print heads are removed, be sure the carriage is placed on - Lexmark 4079 | Service Manual - Page 127
Removals Installation Notes: When installing the print heads, be sure to push each print head into the correct slot. The color letters are on the carriage card holder cover. Carriage Card, Carriage Card Holder Cover 1. Center the carriage (see page 3-14). 2. Remove the print heads. 3. Remove - Lexmark 4079 | Service Manual - Page 128
ca -J is se ated in file trout at the card - older 1, then -otate the card [rack mard unti l r locks in olace hi hr ad the guides 2, orly one GI! 'hhiCh I S' 1O4Nn. :3.22 ierY Cclor Jelpr '!i• PS 4C7c1 1-Iliri I P.1, 11111:ill NM, !IP all MN 11131IS PERFPII i IC.IIIIAYI 1$I opme...N4 •ka - Lexmark 4079 | Service Manual - Page 129
Removals 2 When replacing the print head cover: 1. Move the carriage to the end furthest from the purge unit using the drive belt. 2. Attach the cover using the lower hook, align the slots and tabs on each side of the cover, and watch the position of the green orint head position lever. 3. Squeeze - Lexmark 4079 | Service Manual - Page 130
end of l ine r: rint timing sl it 2. 11 ___---5"---- ;,-, ...-..-i.',.l....."Thii_17io LII:lill1111 i„ll.„.._ loolo 6 °-•?.•s 1-2.22 Rear '3-24 :FM Color .,(!'lprinlef PS *079 HMS ilia.II IIlii iI III161IIIdIWIli1IIN' 11664E11r iiiod Ii 116.6, 66 u.qmv.ivel!166166616161,14161666611 - Lexmark 4079 | Service Manual - Page 131
3. Unhook the right end of the timing slit 3. Triangle marks Removals Arrow marks Rear View 4. Draw the print timing slit through the carriage and out of the machine. Installation Notes: When installing the timing slit, note that the purge unit side has triangle marks and arrows, which must point - Lexmark 4079 | Service Manual - Page 132
Ft emova Carriage Encoder arid Paper Width Sensor 1 Folicm these prac ecures: a CeMer the car .inge (see ,page b. F e.move the prix: Liming frbm the carriage. C. Femove the pr I r I heads, Remove the Li age card. 2 RerndvE :the encode r cover A A s 9-4). 3. ,REirr)ove the latcht)s 13 fanct)t ler , - Lexmark 4079 | Service Manual - Page 133
Removals 4. Place a smal l screwdriver behind the paper width sensor A and push it out while releasing the latch B. A 7 ti -7( 5. Remove the encoder from the holder by prying the holder part Encoder Flaps The encoder holder f laps have tabs which fit into holes in the encoder. Repair information 3 - - Lexmark 4079 | Service Manual - Page 134
, first make sure the :;arcl is seated the .front of the card holder 1, then rotate the card backward until it lucks in place behind the guides 2., only one of which i s sh )wri. 3-28 iiii Cc IDr Jet )ri i1e IF - Lexmark 4079 | Service Manual - Page 135
carriage ribbon cables from the two connectors on the carriage card. 5. Release three latches 1 (from the front side of the carriage frame) and remove the ink tube guide (Asm. 11-3) from the carriage frame. Carriage cables 1 Top view Carriage cables 1r Approx. 30mm - Lexmark 4079 | Service Manual - Page 136
Removals Carriage Cable Handing an riiistal l ing the oar iage cable., install the cable cn the ink PI:le guide, and bend it :at •nii≥ specified posilion. Carriage cable 19 'lira m E Kkwnweri Up va I PY'd ' Upward /'bend ', \ •Lc:LIF---------''l ' 1:04 iTw rC belwl Fiend the - Lexmark 4079 | Service Manual - Page 137
Carriage cable 20 pin 0 ,0 rEA 45 4. Upward bend Downward bend 625 5mm Downward bend Removals 40, Upward je bend 1 Bend the cable between the two marks. Repair I iforrna ion 3-31 - Lexmark 4079 | Service Manual - Page 138
cwriage excel:I to re:lace Inc carriage belt. or t) replace the carnage and ink sJpply aSSE!,71bly. CAUTION: Sit possible, move the printer to a suitable service area, aid cover the table with the drop cf)th before servicing ink tubes tali the purge unit. ll . F O1IC VII these proc enures: a. Cenler - Lexmark 4079 | Service Manual - Page 139
Removals 3. Remove the carriage shaft: a. Push latch on the left end of the shaft and remove the shaft stopper (Asm. 11-6). Be careful not to use excessive force N Rear View b. Push latch on the right end of the shaft to release the carriage shaft. Latch Rear View c. Pull the shaft out of the - Lexmark 4079 | Service Manual - Page 140
iri) Lib() end.s., secured with rubber bar ds, to essen t 70 chance a ink. spJ lage. Lea Side View IDiscormect the irk I i ,as from the carriage to drain joint holder in the holen on carriage trait • • EM Color Jelprirrthr 4()?'9 HNiS 10.6.0HIMMIIIIIINIIlb MOO MIR P. II ..11, 111.40 op i I - Lexmark 4079 | Service Manual - Page 141
holder and the carriage card. 11. Remove the encoder and paper width sensor assembly. 12. Separate the ink joint holder (Asm. 11-2) from the end of the ink supply joint (Asm. 10-2). When possible, wrap ends of ink lines in a cloth or packet of paper towels and secure with a rubber band to prevent - Lexmark 4079 | Service Manual - Page 142
notched end must be tr.: the left side 3. Turn the carraDe o'er and snap the carriage shaft guide irt::, plate - I I ii I I Hi II o NMI Lip C Bottom Vial4' 4.. With the on the left end plate. :3-36 IEVI Color PS 4079 I. , ..1, 44.114.1,11.1.0111 H 'ill 111ll $411 4 ,1 *NM IIMN.II N 441 - Lexmark 4079 | Service Manual - Page 143
Removals Power Supply 1. Remove the controller board: a. Disconnect power supply connector from controller board J b. Remove controller board mounting screws. c. Lift controller board out of machine. 2. Remove two power supply mounting screws at front of power supply. End plate screw Switch section - Lexmark 4079 | Service Manual - Page 144
4. the end plai.D by loosening the screw and slid rig he plate pit This wiH rE, veal the 3.15/5. 1:Jse. I ;: 1,133 rr r n • Wnistabati lm INIotes: '!1't replacing the Ipovver SUpply, reM 3M bar lc Ir[ iJoir up the pi e - Lexmark 4079 | Service Manual - Page 145
Removals . . Controller Board and Logic Board 1 Disconnect the power supply connector from the controller boat 1. 2. Remove the screws from the controller board and remove he board. 3. Remove the card cover a. Release latches 1 while pushing down the right side eat 'he card cover. Rear View - Lexmark 4079 | Service Manual - Page 146
of the hoar f is heid by metal grounding cl pn. You wi ll need to pull firmly to rerncve the hoard from these c :3-40 ce Color ,Jet)rir le' IIS 4079 FAMS V 11.1116m 411 III11• .rlo • m4 IX 0.. W. 1 - Lexmark 4079 | Service Manual - Page 147
Removals Electronic Modules (Assembly 4) Memory SIMMS and the control card EPROM plug into the controller board and lock into place. Release the latches as shown to remove the modules. N When installing a module, make sure the latches click into place. Repair Information 3-41 - Lexmark 4079 | Service Manual - Page 148
, move the printer to a suitabile service aret , anid cover the table with the &on betore ii,ervicing ink tubes or the re/ug the . The purge unit can De , ng serviced. tubes norrnai maintenanc6 SEI rvicinv. l ifted and laid aside while o. her parts lE3f.t1 Color ,Jel ill( 4)79 HMS I. ,• ,11 ii. - Lexmark 4079 | Service Manual - Page 149
tube joint from the purge unit ty spreading both black latches outward. Be careful rot to sp II ,nl< from the tubes. Wrap the ink tube ends in cleaning cloth ar d secure with a rubber band. 3. Unplug the large purge waste line from the ink cartridge assembly. Wrap the nk tube ends in cleaning cloth - Lexmark 4079 | Service Manual - Page 150
Rernova Is Ink Cartridge Ass,arnbly 1. Make sure the paper lilting plate is in its NID. PI --_ „.„ , ii i sksis % ,:•S r,r,ijor- ' !, ,'" - 3-4,1 Ely! CalOr ...letprini et PS ,4079 HMIS . • .1*.i...4111.1•11.1. AIM,:II fi ll 41ri 'MAK.irg 141f ig r • 41 awl, aipram .allkItla It... - Lexmark 4079 | Service Manual - Page 151
the side frame and hook it to the top of the carriage frame as shown below. 7 -1t 5. Remove the ink cartridges. Lay them in a safe place where they will not stain furniture or clothing. The ink cartridges are color-coded and can only be installed in their correct positions. Repair Information 3-45 - Lexmark 4079 | Service Manual - Page 152
. ihe unit, and st de the unit out 8. Insert the ink cartr dges into the ink compartment. .n a oloih over the connector eld and secure imth a rubber b and Placis the cartridge asseirnbly on a leve, plane with the black cartridge e • slightly elevated to p -event. k leakage. Nolo: It ou work on - Lexmark 4079 | Service Manual - Page 153
The carriage frame (with the carriage and carriage drive insta ledl can be tilted away from the printer to allow servicing of other parts without removing the carriage or disconnecting the ink tubes. 1. Follow these procedures: a. Center the carriage (see page 3-14). b. Remove the operator panel and - Lexmark 4079 | Service Manual - Page 154
printer. In this position, the carriage motor should be on to a, w rich will prevent the driainage cif ink it the print heads are rE MO\ ed. • Leave the ink heads can be easily damaged ancl tf ai the ink contains permanent c yes 3-48 itit\ii Color Jelorinte I'S 4079 HMS 41.• $ $44 • • .4 4•4 44 - Lexmark 4079 | Service Manual - Page 155
sure the carriage frame has been laid aside, following the instructions in "Carriage Frame" on page 3-47 before servicirg the each side of the pinch roller base unit. Left Side View 2. Carefully pull the two guide arms on the pinch roller base .snit away from the pickup roller, lift the unit off - Lexmark 4079 | Service Manual - Page 156
, release the latch oin the bottocia of the shafii and rerni: va the bearing. 5. Lilt out the plektip roller shaft toward the right. 3-50 IF:'M color JEIpr E,r DS 4079 1-TAIS hrobiiem. lAk. IANFA.1 AMIN tA sin I.NI WenimiliAA•Am :i.11, 1r.4FI 100,1 01111 ',MOHO MS! ',AA IRO* 4111nIA il ONO I - Lexmark 4079 | Service Manual - Page 157
6. Raise the paper lifting plate and remove it. Removals Installation Notes: When installing the pickup roller shaft, line up the holes in the pinch roller base unit with the pins on the side frames. Attach the tension springs using needle-nose pliers. Repair information 3-51 - Lexmark 4079 | Service Manual - Page 158
: a. Lay the carriaget::arne aside, following the inst -Lcitdris in "Carriage Frame" on page 3-47. b. Remove the put go unit part way, without removing he Ink, tubes c. Remove the pinch roller base LinU:. :2. Remove the screws holding the platen to each sick: fraire. .-- , /I \ 'c -.., r7 ri - Lexmark 4079 | Service Manual - Page 159
Paper Feed and Eject Rollers 1. Follow these procedures: a. Lay the carriage frame aside, following the instructions in "Carriage Frame" on page 3-47. b. Remove the purge unit, leaving the ink tubes connected. c. Remove the pinch roller base unit. d. Remove the platen. 2. Squeeze the latch 1 while - Lexmark 4079 | Service Manual - Page 160
1.1,1 NAMIIM AIM ft I Na im ICA. .11.41.41. .*11. I., 1.1 :I ..40. "P .1141111111111,111101411... • ON Si^.1.. 6!.(1'`::r 4:4 II I 41 [ 1-----.1 /:_[, t? ( [ A 3ME1.4: 1011. I - 11 (1/0 ':)(44 U .Ej)0 / 4.ON CC, "..113!.0 11 i3tl. 3)AD j al.11 1rI sjew(Y) 31isodda u(.) L s.AacIf.) 3 DAN] - Lexmark 4079 | Service Manual - Page 161
Removals Paper Sensor 1. Remove the card cover. 2. Remove the controller board and logic board. 3. Remove the mounting screw to release the paper sensor holder Rear View /1 T7 4. Squeeze the latches A on the bottom of the sensor holder, at the same end as the connector. .31 Bottom View 5. - Lexmark 4079 | Service Manual - Page 162
the lower 'Frame n place. 4 Ti lt the frame n the rear mova it back slight . 5, Lift the frame p"f • hit base plate. 3-56 1'3 F:Clor Jetprir tel PS 4079 S NI I MI II* loll • 141•111-Mi awe. •I• lb .1,41,114,11111101.04 - Lexmark 4079 | Service Manual - Page 163
Removals Separation Sheet 1. Lay the carriage frame aside, following the instructions in "Carriage Frame" on page 3-47. 2. Remove the pinch roller base unit. 3. Remove the pickup roller. 4. Remove the separation sheet by pushing a screwdriver in at each end. Repair Information 3-57 - Lexmark 4079 | Service Manual - Page 164
Removals 3-58 'BM Color It- PS 4079 IMS • IF. t 'le- PPM I Illeiniernik MIMI Itell till +-, e1.11, MI In. -I . - - 11.4,11. .4% • all.. .00 4411.1 .1 - Lexmark 4079 | Service Manual - Page 165
Parts and Test Point Locations Parts and Test Point Locations The following pages show the location of specific test points and major parts of the printer Illustrations of the paper path and the rnk supply system are also included. Carriage Card 9 IC2- 8 18 -' CNPW Lf I 1 ___ __I 2 as' Cl LC) - Lexmark 4079 | Service Manual - Page 166
L c'iCAR1 2 C: ,4CAR2 L. 26 ai z Left connector Card c C uj n; al c C :a1 C in C r, C C C /i? 1 B 6 't 3 21 OOOOO: IOOO C::t.1I NI,: B 76 64 1 O O C. D 1-2 Color Jetp.rinte, F;S 4079 HIS I. r .1 III.:111.0.11.1.1 POI. ,18.110 . 1,1 HAHN! 'ill IOUs ' , ORM, IIYULw Y WNW.. Alma •.. - Lexmark 4079 | Service Manual - Page 167
Control Card O ▪-3 Parts and Test Point Locations 0 0 0 0 0 0 0 0 0 0 0 0 0 El 0 0 0 0 0 0 0 0 0 0 -3 cO CO Parts and Test Point Locations 4-3 - Lexmark 4079 | Service Manual - Page 168
o c4 C, C: Ci O !!? a!, o p o ocP po C w c F' .0 C: >C o G 0. CNIMEC I1 2 3 4 E. 8 I' 6 0 10 11 12 13 14 -5 0.Dc,:)000 30/030030 1113kr Cc: lor "FS 4079 HMS -I, 4 , hi. fig, 01.41041IIIIIIIIII4.4..II61141 1lel• 1.4.4110 4.4./16404.40 I , II 4, AI M. IMMO 11.110144.1.111eillOMI ...IX 4 . - Lexmark 4079 | Service Manual - Page 169
C' M' sf' pL) ,e4 ] Printer head I 3L (K) LLit Linear encoder I Carnage card aper w do sensor ENCODER UNIT KEY: WIRE COLORS BL = Blue BR = Brown G = Gray K = BlaCk 0 = Orange R = Red V = Violet W = White Y = Yellow KEY: INK LINE COLORS • = Cyan (Blue) • = Black W = Magenta • = Yellow Parts - Lexmark 4079 | Service Manual - Page 170
Parts arid Tes,' Point Locations Paper Path / / /01-4. IFtect root / / Piper lead roller ;:4Oro ]IF TB II \-r -/` 1 ')) „ Pi(;., L./.3 role, / a)e lifting plate fib0 1;4 :≥etting papers Paper rfood ,Icarr Paper 9011317, sensor 4-6 IfiftA CD'or ',into' PS .1079 HMS 11 II, I , I .13: - Lexmark 4079 | Service Manual - Page 171
Parts and Test Point Locations Ink Supply Diagram Carriage Bubble jet head Sub lank Air valve ' Head cap Capping Open -/ (Purge \) motor 1. Pump r Purge Ink sensor Off On(No ink) ink cartridge Parts and Test Point Locations 4-7 - Lexmark 4079 | Service Manual - Page 172
ink, diagram illus:rates the ink flow for a single color ttf ink. Each color of ink has thE, sarrie ink flow pattern. ▪ The irk Cartridge si ,pplies the ink 'C) the sensor i t les Ind also absorbs waste Ink of the ink :t'arti idge, where it Is itsorbec. 1-8 ir.in/i color JEkiiririei F. 3 4079 HM l3 - Lexmark 4079 | Service Manual - Page 173
that are being inspected for a Maintenance Agreement Each machine has needed items installed to provide the operators and service personnel with an acceptable level of safety. This guide lists only these items. Good judgement should be used to identify possible safety conditions not covered by this - Lexmark 4079 | Service Manual - Page 174
Safety Inspection Guide 5-2 I a NI Co,or Jetpri,Ite ::S 4079 HI'VIS Y.111.111111111111111•1 III (1,1 411.111, 111.11111, 14 .4.1.11,111011.4 , ...II. I 4111111, 10L II e 14i .14.4111,10 150•I4 1.1.11 1 - Lexmark 4079 | Service Manual - Page 175
Parts Catalog Parts Catalog How To Use This Parts Catalog • SIMILAR ASSEMBLIES: If two assemblies contain a majoriti of identical parts, they are broken down on the same list. Common parts are shown by one index number. Parts peculiar to one or the other of the assemblies are listed separately and - Lexmark 4079 | Service Manual - Page 176
Parts Catalog Assembly 1: Corers Sof 3 2 , .. 4 C z::>4 / ' 4' "/ // /,...i v"-- --....A i ....."" 6-2 IBM Color Joprintt r PS 4079 HMS II.. -4H. •ofnroma...8 dom. OM - • iiik•SOMISI OP II tr. WIN IN41, I/ I NM 1,0 ewe Nem Silk a Lru 04.44.16 - Lexmark 4079 | Service Manual - Page 177
Parts Catalog Asm - Index 1 -1 -2 3 -4 Part Number 1321701 1321703 1321704 1321707 Units 1 1 1 1 Description Support, Paper Guide, Printed Paper Cover, Front Label, Serial Number Parts Catalog 6-3 - Lexmark 4079 | Service Manual - Page 178
601,elec) sped M Cc•Ior Jetorinte • I'S 4079 HMS /// \-),/ ,' /, l / . • • . . hp 1,.,. , iy 4. - N,\Fe-' ; ,///ec,, .-,,J, A i i o • - / , I V // ''`.., 4:•• / / - Lexmark 4079 | Service Manual - Page 179
1331690 1 1321861 2 1321863 2 Description Top Cover (with logo) Plate, Upper Cover Coupler Cover, Ink Cartridge (also order refs. 5 and 6) Label, Ink Cartridge, Left Label, Ink Cartridge, Right Cover, Rear w/U.S. Electrical label Cover, Rear w/W.T Electrical label Label. FCC Screw Screw Parts - Lexmark 4079 | Service Manual - Page 180
Parts Cala loc. Assembly 3: Inner Cover I 0- ::: • I ... ., I .....' Z.. . a .1-• -. j•-o nt...•1"t. „... • 6-5 .svi colo1 .Jetprinter PS .1079 HMS . l.1 ■. l>AL *Mu • roaaia-••. 40,6 ..111116146 a, *MIMI* - Lexmark 4079 | Service Manual - Page 181
Parts Catalog Asm Index 3- 1 -2 Part Number 1321717 1321716 Units 1 1 Description Spur Unit Assembly Cover , Inner (Access Cover) Parts Catalog 6-7 - Lexmark 4079 | Service Manual - Page 182
Aiquuesslir 1/ Ii all / 1 11) .'4( ) / ,, Z (' ct k V A 11 / I . ' I ., YTh.---; 22 MO 1 --- 22' ' \/ A i4.M ,,5. _ i i.jAs f.it::///\ .r\m/ * 11I11 /-/ `:((71_:,'-1-, - /: ?. :17•/-7/./,1/4,f - ,-,r./.!..„ -,7/ h, y, ,a ''.v 1 ,7i.xt ,r _ 1 r\ 45 \Y /5Cli, A ' "1 - Lexmark 4079 | Service Manual - Page 183
Parts Catalog Asm - Index 4- 1 -2 - 3 - 4 - 4 5 - 6 -7 - 8 -9 - NS Part Number 1321719 1321825 1321880 1321882 1321883 1621171 1321824 1321861 1321718 1321864 1321866 Units 1 1 1 1 1 3 1 5 3 1 Description Logic Board Controller Board (does not include Controller Card or Memory SIMM) EPROM, - Lexmark 4079 | Service Manual - Page 184
/•• • .; j /.4 ./` • a \ . 4 , . .', :..-.•,S. r ..5 z.. : 7••• a a ...:;-a-..;•.. r.::::-E:::i, --es` 11 ›=- '` 7 7 - Lexmark 4079 | Service Manual - Page 185
Parts Catalog - 7- Asm - Part Index Number 5 -1 -1 -2 -2 - 3 -4 - 5 - 6 1321884 1321885 1321726 1321727 1321858 1321863 1321729 1321832 -7 1321728 -8 1342514 - 8 1339520 - 8 1339525 - 8 1339524 -8 1339521 - 8 1339523 -8 1339522 -8 1339519 -9 1321827 Units 1 1 1 - Lexmark 4079 | Service Manual - Page 186
F arts Catalog Assembly 6: Carriage and Printhead x. ..----- ...-.....-- 4......,.00 i . „.0.. - -•. 2 i .3 ,,,- j../..-1'rte r..7 - ;. ••o: ya , - Lexmark 4079 | Service Manual - Page 187
Parts Catalog Asm - Index 6 -1 -2 -3 -4 -5 -6 Pad Number 1321731 1321833 1321834 1321730 1321732 1321863 Units Description 1 t Print Head 1 Clip, Head Cover Stabilizer 1 Clip, Head Cover Stabilizer 1 Cover Print Head Cable, Connector Card Left Screw Parts Catalog 6-13 - Lexmark 4079 | Service Manual - Page 188
'arts Catalog assembly 7: Base • ! ., 4 1•15, .....,4•7; ~.."e • - 11. • • ,.[t:' 10 5-14 B\+ Color Jel.pr int. ;2:3 4079 I-4.1$ I 1.41, 411, IGNOMPONIIIINN IMMO till ON II 111.1111.M.P111. *4-16..1.•4 *OW , * 44.10-.... • cW ow IA. r ass.. 111 ... • - Lexmark 4079 | Service Manual - Page 189
1321733 1321734 1321735 I 1321736 I 1321836 -6 -7 -8 -9 -10 11 -12 -13 1321737 1321738 1321739 1321741 1321740 1321860 Units 1 1 1 1 1 1 1 NP 1 1 2 2 1 Description Guide. Ribbon Cable Ribbon Cable Motor Cable Holder. Logic Card Plate, Grounding (also in Pkg 1321820) Arm, Power Switch Actuating - Lexmark 4079 | Service Manual - Page 190
Parts Catalog Assembly 8: Purge! Unit 2 +6 7 r. Y 10 I 11 eJ 6.16 IBM Color Jet')rinlei PS 4079 HMS I ..Ifil • Imo a• Ii HO I roatilifINONII0 IINiuN OM • ferNORNI•IIIII 1••fellal PHI Ilp Milling, RINIMP H la adliHti l nal.", • - Lexmark 4079 | Service Manual - Page 191
1321746 1321744 1321837 1321747 1321857 1321865 1321859 Units 1 1 1 1 1 1 1 1 1 1 2 Description Purge Unit Assembly Motor, Purge Unit • Gear, Worm Purge Maintenance Kit • Spring • Spring • Ink Absorber • Spring • Spring Sensor and Cable Screw Cover, Purge Unit Hose Screw Parts Catalog 6-17 - Lexmark 4079 | Service Manual - Page 192
Parts Catalog Assembly 9: Print Timing Encoder r< 1 !.! .4 2 . . •41 I 5 \ I 0 4 04 .o Rear View E -18 ii r i Color Jet::riri:e. • 4079 -IMS 6... • ge. I.I F.4p. dime • ielennisw.10. •-1.1,11.1, 111 It I IIIII • Mahe Mill I m ammonium maimm31.48IIMMI - Lexmark 4079 | Service Manual - Page 193
Parts Catalog Asm - Index 9- 1 -2 3 -4 - 5 - 6 - 7 - 8 Part Number 1321752 1321754 1321838 1321878 1321749 1321750 1321751 1321753 Units 1 1 1 1 1 1 Description Cable, Carriage (inc. ref 1 1.3) Linear Encoder/Paper Width Sensor Holder, Encoder Cover, Sensor Slit, Print Timing Cover, Carriage - Lexmark 4079 | Service Manual - Page 194
Catalog Assembly 10: Carriage Ink Supply : ti - - --: ,C ...."' --' 5', _, , i 1 .-------- e• ,• 5 • ., 5 ..... . -atlxi ' - ,,,--- .• ..,•4,-., \':'\h;; ---> 1$13. ,..p„!:..... 6 • ---- Rear View 6-20 IHM Cclor Jetori ie • f: S 4079 HMS plr.1. I/ 1, 111111,10111INIMP - Lexmark 4079 | Service Manual - Page 195
Parts Catalog Asm - Index 10- 1 - 2 3 -4 -5 - 6 -- 7 Part Number 1321755 1321756 1321757 1321839 1321840 1321759 1321758 Units 1 1 1 1 1 1 1 Description Ink Supply Assembly • Joint, Supply • Joint, Pump • Shaft, Head Gap Adjustment • Clamp, Head Gap Adjustment • Lever, Head Gap Adjustment • - Lexmark 4079 | Service Manual - Page 196
r -Ns • .44)::-., A i , ....>1 ii k•N '-•,! s z;.i. 7 •• "i sW. 51,.,) 4:7 .----' .1: . -.. ''.'.".N 1:.'Dal. ....,,..., ...,,, ......., ≤~\ g" 3 ON 4-• I .0 Rear V.aw 6-22 IBM Color .let: - 40;',F.. HMS 4'- -4.• I II 110-4 -.TEMA T•I! I IIINT MUM, • I. eta ali - Lexmark 4079 | Service Manual - Page 197
Parts Catalog Asm - Index 11 1 2 3 4 5 -6 -7 8 Part Number I Units 1321764 1321762 1321761 1321765 1321760 1321763 1321863 1321819 Description Shaft, Carriage Holder, Joint Guide, Ink Tube Cable, Ground Motor, Carriage Drive Stopper Screw Screw Parts Catalog 6-23 - Lexmark 4079 | Service Manual - Page 198
Assembly 12: CE r-iage Drive Frame crii;-2> , , I / - -:.-:..r.,, / '.N... ., / • -1A3-•e. .1 Q • • k •^ • • • 1:••• 4 z1 •-• X-').• Rear View ..s 9 Ni 6-24 IBM Color Jetprirre - PS 4(179 HMS I. pl. • -I • • ''.1*.D.N.N. • .141...11, da "III 1.•11Mil. .4 ..141111I p6.40,,Ht , - Lexmark 4079 | Service Manual - Page 199
Number 1321766 1321772 1321842 1321863 1321770 1321769 1321767 1321773 1321774 1321843 1321771 1321768 1321841 Units Description 1 Guide, Carriage 1 Label, Carriage Instructions 1 Spring 1 Screw 1 Idler Assembly, Carriage Belt 1 Plate, Right Frame 1 Lever, Carriage Lock 1 ' Frame, Carriage 1 Belt - Lexmark 4079 | Service Manual - Page 200
Parts Catalog Assembly 13: Ink Supply Unit 3 % • • . - ``) ' • 4 Rear View 6-26 IFNI C.:floc ..14qprirr ei FS 4079 HMS 4.4.-04.. ifisoirmemileppp Ille aea .. -"u. 14,4. -i4 $1 • I44•41441. .11.1.111. M=r.4 On • .• *4! !U1.Ie r wrt, II . MLu.w1 4 . - Lexmark 4079 | Service Manual - Page 201
Parts Catalog Asm - Index 13 -1 -2 3 -4 Part Number 1321775 1321776 1321777 1321779 Units 1 1 1 1 Description Ink Cartridge Assembly, including mech. 14 • Sensor Cable Unit • Ink Sensor Assembly, Complete • Ink Supply Hose Kit, Compete Parts Cataloi. 6-27 - Lexmark 4079 | Service Manual - Page 202
Parts Catalog Assembly 14: Ink Return Unit ..N....• .1 ... L.--;-->--'. ' ....1 ''--.... - Z'..i.'. , ::..., .`t•'::- ''-,,, '''' / .`,... 5 "'... `..., s-. ... : , '''''''' s'` '. . II t--'4t. . "•%.'. S-28 IBM Color Jetprint ar 25 4079 HMS II • I I 10, w. •-• .10. I ea - Lexmark 4079 | Service Manual - Page 203
Catalog Asm - Index 14 - 1 -2 -3 -4 - 5 Part Number 1321775 Units 1 1321780 I 1 1321781 1 1321782 1 1321783 Description Ink Cartridge Assembly, including Mech. 13 • Holder, Drain Tube • Drain Tube Assembly • Base, Ink Compartment (also order ref. 5) • Ink Absorber Parts Catalog 6-29 - Lexmark 4079 | Service Manual - Page 204
Parts Catalog Assembly 115: Ink Cartridge Interlock e0 4 clear view 4 s4, C-30) I,3N4 Co.at IY , 401 t 4079 HIv'S .I. IMMO, PO .11. on • pn, II gin., I,*qui job I umg. NI minim IYI - Lexmark 4079 | Service Manual - Page 205
Parts Catalog Asm - Index 15- 1 -2 - 2 -3 Part Number 1321784 1321844 1321845 1321846 Units 1 2 1 1 Description Spring, Leaf Plate, Lock Spring Needle Protector Parts Catalog 6-31 - Lexmark 4079 | Service Manual - Page 206
Parts Catalog Assembly 16: Sheeffeed Entry 3 -- 3 See Aeri. 17.1 r- 9 I.- Iv! \ `1 • 5 8 / (1-32 IBM Color JelDrink r ''S 4079 HMS •• I 14. • I I. ..kin•M.0100.11341111111411.11 ow • 11....14111... .6 M A , •-wN......WM M. Ile SO. - Lexmark 4079 | Service Manual - Page 207
Parts Catalog Asm Index 16-1 -2 -3 -4 -5 -6 -7 -8 -9 -10 -11 Part Number I Units 1321795 1 1321818 1 1321855 1 1321821 2 1321789 1 1321786 1 1321788 1 1321787 2 1321867 2 1321790 1 1321785 I 1 Description Pickup Roller Assembly • E-Clip (also order ref. 9) • Pin • Spring - Lexmark 4079 | Service Manual - Page 208
Pans CatalcPg Assembly 17: Slieeffeed Pinch Roller •• i ?? 4 1 3'. 3'" 4 ' t t..-, •-•-t. 3 7 •..., , ..7::::::: 4 2 C..4. •:--1`,/ / ? \ •5 6-34 ISM Color Jetprpn ei PS 4079 HMS •.'-. OM 111.-.0.110111111 fWq111111•11. NI WTI P HIM Milli • i• WO 11.6 41.618•S • • - Lexmark 4079 | Service Manual - Page 209
Parts Catalog Asm Index 17 - 1 -2 -3 - 4 5 Part Number 1321791 1321794 1321792 1321793 1321868 Units 1 1 2 1 1 Description Pinch Roller Base • Plate. Pressure • Arm, Base • Pinch Roller Assembly • Spring Parts Catalog 6-35 - Lexmark 4079 | Service Manual - Page 210
Parts Catalog Assembly 18: Paper Feed/Eject Roller 2 6-36 IBM Color Jetp-illiu PS 4079 HMS ilim•OltsaNO.NONNUS SlINNINIII N 'OONOIONNINtol ppm.* mom 'mom. 4 WM MO.• P• 44 as - - Lexmark 4079 | Service Manual - Page 211
Parts Catalog Asm - Index 18-1 -2 -3 -4 -5 -6 - 7 Part Number 1321798 1321799 1321802 1321801 1321819 1321803 1321800 Units 1 1 1 1 2 1 1 Description Platen Roller, Eject (also order ret. 7) Roller, Paper Feed (also order ref. 6) Cover. Dust Screw Holder, Feed Shaft Holder, Eject Shaft Parts - Lexmark 4079 | Service Manual - Page 212
13;Artsi Cr alaloci Assernbriy Sheetteed Separation 2 (I * tip 5-38 IBM C;ol or Jel1v 4079 HIN71:.', Mal on ,.14,1I **Me 0104 - Lexmark 4079 | Service Manual - Page 213
Parts Catalog Asm - Index 19 -1 -2 -3 4 -5 -6 - Part Number 1321805 1321869 1321850 1321806 1321819 1321851 1321804 Units 1 2 1 1 1 2 Description Sheetfeed Separation Assembly Spring Arm, Paper Sensor Photosensor Screw Holder, Paper Sensor Base Sheetfeed Separation Parts Catalog 6-39 - Lexmark 4079 | Service Manual - Page 214
20: Papet Feed Frame /1 1 \ .,...-, i S%'- , 4 '. 1 :.. 1.:; / ...t. 1 "97 L i ..., I 3 I ., ,,•2 , ....../.../ i • 4 .- 12\.• 5\ f r 1-D , 15 L.A.' ../.* 1 13 / 10 9 6 -40 lEiM Color Jet!)ride F'5 4079 HMS "IN 1ININS III,. II III 'WI r. 4. in . - '... 04.. 44 . •4 lani - Lexmark 4079 | Service Manual - Page 215
Parts Catalog Asm - Index 20- 1 - 2 - 3 -4 - 5 - 6 -7 -8 -9 -10 -11 12 - 13 -14 -15 -16 Part Number 1321862 1321809 1321807 1321852 1321808 1321856 1321853 1321812 1321811 1321810 1321854 Units 2 1 1 2 1 2 1 1 1 1 3 1 1 Description Screw Frame, Center Cable, Paper Sensor Clamp Motor, Paper Feed - Lexmark 4079 | Service Manual - Page 216
41 ;•,,,-, /P4 fir. -.. ...... .••.,... ' ..."--.... , ,-- ...". ..d „.....4...:;, , /C.-. / . :;:j 7 2-•-1 ..,-/ • - --:•I"V 7--/ /7 r , 4. / -." ..." •"" ,,- -- z 7,- -- V, ,/7 - --. 5 6-42 IBM Color Jetp nt ?.r •'S 4079 HMS • • P. iv. Pill 11.001/110i - Lexmark 4079 | Service Manual - Page 217
Parts Catalog Asm - Index 21-1 -2 -3 -4 -5 -NS -NS Part Number 1749245 1477752 1321875 1280055 2108930 452642 Units 1 1 1 1 1 1 1 Description Guage, Feeler, mm Syringe, Ink Grease Drop Cloth Cleaning Cloth Wrap Plug Magnifier Parts Catalog 6-43 - Lexmark 4079 | Service Manual - Page 218
IPilarts 4-44 !ElIV Color Jel:pr !r RS 4079 HMS WI, ICI IN .nomv.111 •fa finn, An a t ror • ,O11.1.• l„11+±1101111 - Lexmark 4079 | Service Manual - Page 219
samples of Print Test A, Test Print B. Test Print C, and Test Print D. Print Test A is available in any mode. The other test prints were made in Service Adjustment Mode; they are used for making the Print Position adjustment. Appendix A X-1 - Lexmark 4079 | Service Manual - Page 220
Appendix A (-2 IBM Color Jetr nolo PS 4079 HMS 4.• w 0 4. M.O.., •* , 1.-.1141a • .15 ..141.P.' ..AM •*VP ...M... - - Lexmark 4079 | Service Manual - Page 221
Hardware Environment _ Controller ROM Version = 1.00 Engine ROM Version = 1.16 Current Settings Printing Mode = MODE-A Country Code = ENGLISH Media Select = NORMAL PAPER Dump Mode = DUMP OFF === > -ED a X - Lexmark 4079 | Service Manual - Page 222
Controller ROM : Native (L) Ver. 1.00 / Engine Vec. L.16 I IBM Color Jetprinter PS 4079 t IMS 14Ft !?tiih!itt 11' Wir,14441.1 u t 4444;WV- ':;; n. iu r. - • IA II -- I He III• 4-11.4114-.140. talell•Mitibie•,IMAM MI. amsammusesumaaass m..iniellallIPSOIIII MAIM' et x .I• - Lexmark 4079 | Service Manual - Page 223
A;Ape' A psi Pl• int I . = == == F== == = == = == = = == • • -- -- -- -- = -,,.. r,_ __ =, - • -,-a-: == co N .o tr) Tr N ri 0 I-1 N f7 4:r in t0 N I I I i I I I I Appendix A X-5 - Lexmark 4079 | Service Manual - Page 224
Contr*. lier ROM. : Native ( L) 1.00 / Engine Ver. 1.16 Printing Mode = MODE-A. Conntry Code ENGLISH ROM Mode = OPTION Offset K= 0, C:= 0, M= 0, Y= 0, .44 NV-RAM data = 3F D2 00 1.8 28 FF FF FF FF FF FF F FF FF FF ▪;N! CD C. I .11.1..NIIIIIPINWW I.NI 'II MI 1:1. id o:■µYL lin, 'WOKS MOM OMNI* - Lexmark 4079 | Service Manual - Page 225
16 cleaning procedures, print head 2-78 coated paper, using 1-1 Color Jetprinter, description 1-1 controller diagnostics tests button test 2-84 clean 2-56 Ink Cartridge MAP 2-24 ink cartridges 1-2 Ink Flow MAP 2-30 Ink Sensor MAP 2-26 inter lock, cover 2-2 introduction to the printer L locations - Lexmark 4079 | Service Manual - Page 226
.2-41 print sampie 2-77 print sampres X-1 Printer emulation 1.-4 printer test 2-/7 printing rroce, operator 2-79 printing guide 5service adjustment mode 3-6 service information ink tube servicing 3-12 releasinq plastic, I atc ies 3-12 special papier, using Start MAP 2-2 X-8 IBM Color J tp r:er 4079 - Lexmark 4079 | Service Manual - Page 227
T test prints X-1 tests long cleaning 2-78 normal cleaning 2-78 nozzle check 2-77 operator test menu 2-76 printer test 2-75 test print A 2-77 tests in operator mode 2-76 tools needed 1-3 U Undetermined Problem. 2-74 Index X-9 - Lexmark 4079 | Service Manual - Page 228
NDIN I IN l•NNI • *** WO, •• "INNNe4.-WINNIrtNININ•Nri-INNINIONNINNOS M. NgKopp iNiempu44 n .. ,w-.-.. - Lexmark 4079 | Service Manual - Page 229
IBM Color Jetprinter PS 4079 Service Manual Order Number SA40-06E1-00 Reader's (Comment Form You may use this form to communicate your comments about this publication, with the understanding that Lexmark may use or distribute whatever information you supply in any way it believes appropriate - Lexmark 4079 | Service Manual - Page 230
DOSTAGE El: SSAHY F IVIAI rNI THE AVIT 61-A'ES BUS NIESS REPLY MAIL CLASS PIE MI.F NO. 2659 LEXINGTON, KY POSTAGE W. E E PAID BY ADDRESSEE ark I nterr a al Inc 1..) partment F9E Building 035- 3 740 IN EUV CIRC._..1,; E3()AD 1A/ LExil\K3-rorq K f 405'11 9954- Mil _ Mi l l i Lil l . 1 1 1 . 11. - Lexmark 4079 | Service Manual - Page 231
- Lexmark 4079 | Service Manual - Page 232
HeAniark intercational . Inc. is a vorldwidc inf -ormation produc:s ;..ornpany. Lexmark is lorrner unit of the 113,111 L orporation. vairlli more than years .. nanufaeture and ITIa.r.ket state-or-fiLe-art ypewri ..ers, printers, keyboard artll ...elated .si.tpplies. oat411% -fhis publication is
-
 1
1 -
 2
2 -
 3
3 -
 4
4 -
 5
5 -
 6
6 -
 7
7 -
8
-
9
-
10
-
11
-
12
-
13
-
14
-
15
-
16
-
17
-
18
-
19
-
20
-
21
-
22
-
23
-
24
-
25
-
26
-
27
-
28
-
29
-
30
-
31
-
32
-
33
-
34
-
35
-
36
-
37
-
38
-
39
-
40
-
41
-
42
-
43
-
44
-
45
-
46
-
47
-
48
-
49
-
50
-
51
-
52
-
53
-
54
-
55
-
56
-
57
-
58
-
59
-
60
-
61
-
62
-
63
-
64
-
65
-
66
-
67
-
68
-
69
-
70
-
71
-
72
-
73
-
74
-
75
-
76
-
77
-
78
-
79
-
80
-
81
-
82
-
83
-
84
-
85
-
86
-
87
-
88
-
89
-
90
-
91
-
92
-
93
-
94
-
95
-
96
-
97
-
98
-
99
-
100
-
101
-
102
-
103
-
104
-
105
-
106
-
107
-
108
-
109
-
110
-
111
-
112
-
113
-
114
-
115
-
116
-
117
-
118
-
119
-
120
-
121
-
122
-
123
-
124
-
125
-
126
-
127
-
128
-
129
-
130
-
131
-
132
-
133
-
134
-
135
-
136
-
137
-
138
-
139
-
140
-
141
-
142
-
143
-
144
-
145
-
146
-
147
-
148
-
149
-
150
-
151
-
152
-
153
-
154
-
155
-
156
-
157
-
158
-
159
-
160
-
161
-
162
-
163
-
164
-
165
-
166
-
167
-
168
-
169
-
170
-
171
-
172
-
173
-
174
-
175
-
176
-
177
-
178
-
179
-
180
-
181
-
182
-
183
-
184
-
185
-
186
-
187
-
188
-
189
-
190
-
191
-
192
-
193
-
194
-
195
-
196
-
197
-
198
-
199
-
200
-
201
-
202
-
203
-
204
-
205
-
206
-
207
-
208
-
209
-
210
-
211
-
212
-
213
-
214
-
215
-
216
-
217
-
218
-
219
-
220
-
221
-
222
-
223
-
224
-
225
-
226
-
227
-
228
-
229
-
230
-
231
-
232
 |
 |
IBM
Color
Jetprinter
PS
4079
by
Lexmark
Service
Manual
This
book
is
for
service
only.
Please
keep
it
with
your
printer