Lexmark C925 Lexmark Document Producer - Page 45
Changing the IP address on a configuration 1 system, Rebooting the LDD system, Enter
 |
View all Lexmark C925 manuals
Add to My Manuals
Save this manual to your list of manuals |
Page 45 highlights
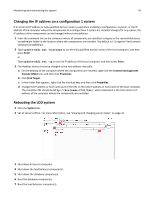
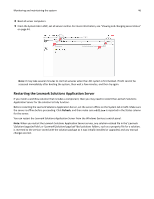
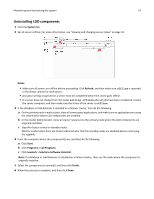
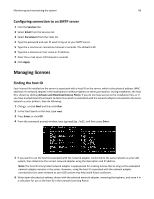
Monitoring and maintaining the system 45 Changing the IP address on a configuration 1 system If an incorrect IP address or fully qualified domain name is used when installing a configuration 1 system, or the IP address of the computer where the components of a configuration 1 system are installed changes for any reason, the IP address of the components can be changed without reinstallation. 1 From the command line on the computer where all components are installed, navigate to the Lexmark\Solutions \InstallHelper folder in the location where the components are installed. The default is C:\Program Files\Lexmark \Solutions\InstallHelper. 2 Type update‑addr.bat ‑hostname to use the fully qualified domain name of the local computer, and then press Enter or Type update‑addr.bat ‑ip to use the IP address of the local computer, and then press Enter. 3 The desktop shortcut must be changed to the new address manually: a On the desktop of the computer where the components are installed, right click the Lexmark Management Console (LMC) icon, and then click Properties. b Click Find Target. c In the folder that appears, right click the shortcut lmc, and then click Properties. d Change the IP address or host name part of the URL to the new IP address or host name of the local computer. The complete URL should be http://hostname:9780/lmc/, where hostname is the host name or IP address of the computer where the components are installed. Rebooting the LDD system 1 Click the System tab. 2 Set all servers offline. For more information, see "Viewing and changing server status" on page 44. 3 Shut down all server computers. 4 Shut down the load balancer computer(s). 5 Shut down the database computer(s). 6 Boot the database computer(s). 7 Boot the load balancer computer(s).
-
 1
1 -
2
-
3
-
4
-
5
-
6
-
7
-
8
-
9
-
10
-
11
-
12
-
13
-
14
-
15
-
16
-
17
-
18
-
19
-
20
-
21
-
22
-
23
-
24
-
25
-
26
-
27
-
28
-
29
-
30
-
31
-
32
-
33
-
34
-
35
-
36
-
37
-
38
-
39
-
 40
40 -
 41
41 -
 42
42 -
 43
43 -
 44
44 -
 45
45 -
 46
46 -
 47
47 -
 48
48 -
 49
49 -
 50
50 -
51
-
52
-
53
-
54
-
55
-
56
-
57
-
58
-
59
-
60
-
61
-
62
-
63
-
64
 |
 |