Lexmark CX727 Users Guide PDF
Lexmark CX727 Manual
 |
View all Lexmark CX727 manuals
Add to My Manuals
Save this manual to your list of manuals |
Lexmark CX727 manual content summary:
- Lexmark CX727 | Users Guide PDF - Page 1
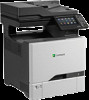
CX725, CX725R, CX727 MFPs User's Guide June 2019 Machine type(s): 7528 Model(s): 576, 5A6, 578, 5A8 www.lexmark.com - Lexmark CX727 | Users Guide PDF - Page 2
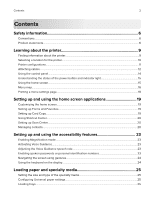
Contents 2 Contents Safety information 6 Conventions...6 Product statements...6 Learning about the printer 9 Finding information about the printer...9 Selecting a location for the printer...10 Printer configurations...11 Attaching cables...12 Using the control panel...14 Understanding the status - Lexmark CX727 | Users Guide PDF - Page 3
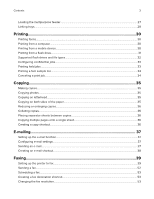
Linking trays...28 Printing...30 Printing forms...30 Printing from a computer...30 Printing from a mobile device...30 Printing from a flash drive...31 Supported flash drives and file types...32 Configuring confidential jobs...33 Printing held jobs...33 Printing a font sample list...34 Canceling a print - Lexmark CX727 | Users Guide PDF - Page 4
Contents 4 Adjusting the fax darkness...53 Viewing a fax log...53 Blocking junk faxes...54 Holding faxes...54 Forwarding a fax...54 Scanning...55 Scanning to an FTP server...55 Creating an FTP shortcut...55 Scanning to a flash drive...55 Sending scanned documents to a computer 56 Securing the - Lexmark CX727 | Users Guide PDF - Page 5
door A...100 Troubleshooting 105 Network connection problems...105 Hardware options problems...107 Issues with supplies...109 Paper feed problems...111 Printing problems...115 Color quality problems...136 Faxing problems...138 Scanning problems...141 Contacting customer support...145 Upgrading and - Lexmark CX727 | Users Guide PDF - Page 6
that is properly connected between the printer and the power cord provided with the printer may be used with this product. The use of non-Lexmark surge protection devices may result in a risk of fire, property damage, or poor printer performance. CAUTION-POTENTIAL INJURY: To reduce the risk of fire - Lexmark CX727 | Users Guide PDF - Page 7
of fire or electrical shock results. Inspect the power cord regularly for signs of such problems. Remove the power cord from the electrical outlet before inspecting it. CAUTION-SHOCK HAZARD: To possible injury. For more information on supported configurations, see www.lexmark.com/multifunctionprinters. - Lexmark CX727 | Users Guide PDF - Page 8
than those specified in the User's Guide may result in hazardous radiation exposure. CAUTION- service representative. This product uses a printing process that heats the print media, and the heat may cause the media to release emissions. You must understand the section in your operating instructions - Lexmark CX727 | Users Guide PDF - Page 9
the printer • Troubleshooting and solving problems Information on setting up and configuring the accessibility features of your printer Help using the printer software Find it here See the setup documentation that came with the printer or go to http://support.lexmark.com. Information Center - Lexmark CX727 | Users Guide PDF - Page 10
support: • Documentation • Driver downloads • Live chat support • E‑mail support • Voice support Find it here Go to http://support.lexmark.com the printer. Product Information Guide-See the documentation that came with the printer or go to http://support.lexmark.com. Selecting a location for - Lexmark CX727 | Users Guide PDF - Page 11
may require a caster base, furniture, or other feature to prevent instability causing possible injury. For more information on supported configurations, see www.lexmark.com/multifunctionprinters. CAUTION-TIPPING HAZARD: To reduce the risk of equipment instability, load each tray separately. Keep all - Lexmark CX727 | Users Guide PDF - Page 12
Learning about the printer 12 1 Automatic document feeder (ADF) 2 ADF tray 3 ADF bin 4 Control panel 5 650‑sheet duo tray 6 Optional 550‑sheet trays 7 Standard bin Attaching cables CAUTION-SHOCK HAZARD: To avoid the risk of electrical shock, do not set up this product or make any electrical or - Lexmark CX727 | Users Guide PDF - Page 13
printer and the telephone line. Use this port if you do not have a dedicated fax line for the printer and if this connection method is supported in your country or region. Note: Remove the plug to access the port. 2 LINE port Connect the printer to an active telephone line through a standard - Lexmark CX727 | Users Guide PDF - Page 14
Learning about the printer 14 Using the control panel Use the To 1 Display • View the printer messages and supply status. • Set up and operate the printer. 2 Home button Go to the home screen. 3 Power button • Turn on or turn off the printer. Note: To turn off the printer, press and hold - Lexmark CX727 | Users Guide PDF - Page 15
Learning about the printer 15 Understanding the status of the power button and indicator light Indicator light Off Blue Red Printer status The printer is off or in Hibernate mode. The printer is ready or processing data. The printer requires user intervention. Power button light Off Solid amber - Lexmark CX727 | Users Guide PDF - Page 16
from the home screen. Menu map Device • Preferences • Remote Operator Panel • Notifications • Power Management • Information Sent to Lexmark Print • Layout • Finishing • Setup • Quality • Job Accounting • XPS • Accessibility • Restore Factory Defaults • Maintenance • Visible Home Screen Icons - Lexmark CX727 | Users Guide PDF - Page 17
Learning about the printer 17 Paper • Tray Configuration • Media Configuration • Bin Configuration Copy Copy Defaults Fax • Fax Mode • Analog Fax Setup • Fax Server Setup E‑mail • E‑mail Setup • E‑mail Defaults • Web Link Setup Network/Ports • Network Overview • Wireless • AirPrint • Ethernet - Lexmark CX727 | Users Guide PDF - Page 18
Help • Print All Guides • Color Quality Guide • Connection Guide • Copy Guide • E‑mail Guide • Fax Guide Troubleshooting • Basic Print Quality Samples • Shortcuts • Fax • Network • Information Guide • Media Guide • Moving Guide • Print Quality Guide • Scan Guide • Supplies Guide • Advanced Print - Lexmark CX727 | Users Guide PDF - Page 19
Setting up and using the home screen applications 19 Setting up and using the home screen applications Customizing the home screen 1 Open a web browser, and then type the printer IP address in the address field. Notes: • View the printer IP address on the printer home screen. The IP address appears - Lexmark CX727 | Users Guide PDF - Page 20
Setting up and using the home screen applications 20 3 Configure the output options and scan settings. Notes: • When scanning a card, make sure that the scan resolution does not exceed 200 dpi for color and 400 dpi for black and white. • When scanning multiple cards, make sure that the scan - Lexmark CX727 | Users Guide PDF - Page 21
Setting up and using the home screen applications 21 3 From the Contacts section, add a contact. Note: You can assign the contact to one or more groups. 4 If necessary, specify a login method to allow application access. 5 Apply the changes. Adding groups 1 Open a web browser, and then type the - Lexmark CX727 | Users Guide PDF - Page 22
Setting up and using the home screen applications 22 3 Do either of the following: • From the Contacts section, select a contact that you want to delete. • From the Contact Groups section, select a group name that you want to delete. - Lexmark CX727 | Users Guide PDF - Page 23
Setting up and using the accessibility features 23 Setting up and using the accessibility features Enabling Magnification mode 1 From the control panel, press and hold the 5 key until you hear a voice message. 2 Select Magnification. 3 Select OK. For more information on navigating a magnified screen, - Lexmark CX727 | Users Guide PDF - Page 24
Setting up and using the accessibility features 24 Navigating the screen using gestures Notes: • The gestures are applicable only when Voice Guidance is activated. • A physical keyboard is required for typing characters and adjusting certain settings. Gesture Double‑tap Triple‑tap Swipe right - Lexmark CX727 | Users Guide PDF - Page 25
. Keep all other trays closed until needed. 1 Remove the tray. Note: To avoid jams, do not remove trays while the printer is busy. 2 Adjust the guides to match the size of the paper you are loading. Note: Use the indicators on the bottom of the tray to position the - Lexmark CX727 | Users Guide PDF - Page 26
Loading paper and specialty media 26 3 Flex, fan, and align the paper edges before loading. 4 Load the paper stack with the printable side faceup. Notes: • For one‑sided printing, load letterhead faceup with the header toward the front of the tray. • For two‑sided printing, load letterhead - Lexmark CX727 | Users Guide PDF - Page 27
Loading paper and specialty media 27 Loading the multipurpose feeder 1 Open the multipurpose feeder. 2 Adjust the guide to match the size of the paper you are loading. 3 Flex, fan, and align the paper edges before loading. - Lexmark CX727 | Users Guide PDF - Page 28
side facedown and the top edge entering the printer first. • Load envelopes with the flap side up and against the right side of the paper guide. Load European envelopes with the flap entering the printer first. Warning-Potential Damage: Do not use envelopes with stamps, clasps, snaps, windows, coated - Lexmark CX727 | Users Guide PDF - Page 29
the settings. Note: You can also change the paper size and type settings from the printer control panel. Warning-Potential Damage: The temperature of the fuser varies according to the specified paper type. To avoid printing issues, match the paper type settings in the printer with the paper loaded in - Lexmark CX727 | Users Guide PDF - Page 30
Mobile Print allows you to send documents and images directly to a supported Lexmark printer. 1 Open the document, and then send or share the document to Lexmark Mobile Print. Note: Some third‑party applications may not support the send or share feature. For more information, see the documentation - Lexmark CX727 | Users Guide PDF - Page 31
Mopria‑certified printer. Note: Before printing, make sure that the Mopria Print Service is enabled. 1 From the home screen of your mobile device, launch a printer. Notes: • This application is supported only in some Apple devices. • This application is supported only in some printer models. 1 From - Lexmark CX727 | Users Guide PDF - Page 32
the flash drive in the area shown while actively printing, reading, or writing from the memory device. Loss of data or a malfunction can occur. Supported flash drives and file types Flash drives • Lexar JumpDrive S70 (16GB and 32GB) • SanDisk Cruzer (16GB and 32GB) • PNY Attaché (16GB and 32GB) Notes - Lexmark CX727 | Users Guide PDF - Page 33
automatically deleted from the printer memory. Note: Confidential held jobs are stored in the printer until you log in and release or delete them manually. Repeat Job Expiration Set the amount of time before repeat jobs are deleted from the printer memory. Note: Repeat held jobs are stored so extra - Lexmark CX727 | Users Guide PDF - Page 34
Printing 34 Printing a font sample list 1 From the home screen, touch Settings > Reports > Print > Print Fonts. 2 Touch PCL Fonts or PostScript Fonts. Canceling a print job From the printer control panel 1 From the home screen, touch Job Queue. Note: You can also access this setting by touching - Lexmark CX727 | Users Guide PDF - Page 35
Copying 35 Copying Making copies 1 Load an original document into the ADF tray or on the scanner glass. Note: To avoid a cropped image, make sure that the original document and output have the same paper size. 2 From the home screen, touch Copy, and then specify the number of copies. If necessary, - Lexmark CX727 | Users Guide PDF - Page 36
Copying 36 Reducing or enlarging copies 1 Load an original document into the ADF tray or on the scanner glass. 2 From the home screen, navigate to: Copy > Scale > specify a scale value Note: Changing the size of the original document or output after setting Scale restores the scale value to Auto. - Lexmark CX727 | Users Guide PDF - Page 37
E-mailing 37 E-mailing Setting up the e‑mail function 1 From the home screen, touch Settings > Device > Preferences > Run Initial Setup. 2 Turn off the printer, wait for about 10 seconds, and then turn it back on. 3 From the Before You Begin screen, select Change the Settings and Continue with the - Lexmark CX727 | Users Guide PDF - Page 38
E-mailing 38 Creating an e-mail shortcut 1 From the home screen, touch E‑mail. 2 Configure the settings, and then touch . 3 Enter a shortcut name. 4 Apply the changes. - Lexmark CX727 | Users Guide PDF - Page 39
Faxing 39 Faxing Setting up the printer to fax Notes: • The following connection methods are applicable only in some countries or regions. • During the initial printer setup, clear the fax function check box and any other function you plan to set up later, and then touch Continue. • The indicator - Lexmark CX727 | Users Guide PDF - Page 40
Faxing 40 Choosing a fax connection Setting up fax using a standard telephone line CAUTION-SHOCK HAZARD: To avoid the risk of electrical shock, do not set up this product or make any electrical or cabling connections, such as the power cord, fax feature, or telephone, during a lightning storm. - Lexmark CX727 | Users Guide PDF - Page 41
the printer to receive faxes automatically (Auto Answer On) or manually (Auto Answer Off). • If you want to receive faxes sharing the line with an answering machine Note: If you subscribe to a distinctive ring service, then make sure that you set the correct ring pattern for the printer. Otherwise - Lexmark CX727 | Users Guide PDF - Page 42
Faxing 42 Connected to different wall jacks 1 Connect one end of the telephone cable to the line port of the printer. 2 Connect the other end of the cable to an active analog wall jack. Notes: • If you have only one telephone number on your line, then set the printer to receive faxes - Lexmark CX727 | Users Guide PDF - Page 43
sharing the line with a telephone subscribed to voice mail service 1 Connect one end of the telephone cable to the , and if you subscribe to a distinctive ring service. • When you answer the telephone and you hear fax tones, press *9* or the manual answer code on the telephone to receive the fax - Lexmark CX727 | Users Guide PDF - Page 44
Faxing 44 Setting up fax using digital subscriber line CAUTION-SHOCK HAZARD: To avoid the risk of electrical shock, do not set up this product or make any electrical or cabling connections, such as the power cord, fax feature, or telephone, during a lightning storm. CAUTION-SHOCK HAZARD: To avoid - Lexmark CX727 | Users Guide PDF - Page 45
printer, remove any installed adapter plug from the telephone port of the printer, and then connect the telephone. Setting up fax using VoIP telephone service CAUTION-SHOCK HAZARD: To avoid the risk of electrical shock, do not set up this product or make any electrical or cabling connections, such - Lexmark CX727 | Users Guide PDF - Page 46
Faxing 46 1 Connect one end of the telephone cable to the line port of the printer. 2 Connect the other end of the cable to the port labeled Phone Line 1 or Phone Port on the VoIP adapter. Note: The port labeled Phone Line 2 or Fax Port is not always active. VoIP providers may charge extra cost - Lexmark CX727 | Users Guide PDF - Page 47
Faxing 47 Setup 1: Printer is connected directly to a cable modem 1 Connect one end of the telephone cable to the line port of the printer. 2 Connect the other end of the cable to the port labeled Phone Line 1 or Phone Port on the cable modem. 3 Connect your analog telephone to the telephone port - Lexmark CX727 | Users Guide PDF - Page 48
Faxing 48 Setup 2: Printer is connected to a wall jack; cable modem is installed elsewhere in the facility 1 Connect one end of the telephone cable to the line port of the printer. 2 Connect the other end of the cable to an active analog telephone wall jack. 3 Connect your analog telephone to the - Lexmark CX727 | Users Guide PDF - Page 49
. Do not remove the adapter plug from the telephone port of the printer if you are connecting to a serial or cascaded telephone system. Part name Lexmark adapter plug Part number 40X8519 - Lexmark CX727 | Users Guide PDF - Page 50
Faxing 50 Connecting the printer to a non‑RJ11 wall jack 1 Connect one end of the telephone cable to the line port of the printer. 2 Connect the other end of the cable to the RJ11 adapter, and then connect the adapter to the wall jack. 3 If you want to connect another device with a non‑RJ11 - Lexmark CX727 | Users Guide PDF - Page 51
connect a telephone and answering machine to the same wall jack, then connect the devices as shown. Connecting to a distinctive ring service A distinctive ring service lets you have multiple telephone numbers on one telephone line. Each telephone number is assigned a different ring pattern. 1 From - Lexmark CX727 | Users Guide PDF - Page 52
Faxing 52 Setting the fax date and time 1 From the home screen, touch Settings > Device > Preferences > Date and Time > Configure. 2 Configure the settings. Configuring daylight saving time 1 From the home screen, touch Settings > Device > Preferences > Date and Time > Configure. 2 In the Time Zone - Lexmark CX727 | Users Guide PDF - Page 53
Faxing 53 Scheduling a fax 1 Load the original document into the ADF tray or on the scanner glass. 2 From the home screen, navigate to: Fax > enter the fax number > Send Time 3 Configure the date and time to send the fax. 4 If necessary, configure other fax settings. 5 Send the fax job. Creating a - Lexmark CX727 | Users Guide PDF - Page 54
Faxing 54 Notes: • View the printer IP address on the printer home screen. The IP address appears as four sets of numbers separated by periods, such as 123.123.123.123. • If you are using a proxy server, then temporarily disable it to load the Web page correctly. 2 Click Settings > Reports > Fax. - Lexmark CX727 | Users Guide PDF - Page 55
Scanning 55 Scanning Scanning to an FTP server 1 Load the original document into the ADF tray or on the scanner glass. 2 From the home screen, touch FTP, and then enter the needed information. 3 If necessary, configure other FTP settings. 4 Send the FTP job. Creating an FTP shortcut 1 From the home - Lexmark CX727 | Users Guide PDF - Page 56
Scanning 56 Sending scanned documents to a computer 1 Load an original document into the ADF tray or on the scanner glass. 2 From the home screen, touch Scan Profiles > Scan To Computer. 3 Select the scan profile where you want to save the document. - Lexmark CX727 | Users Guide PDF - Page 57
printer hard disk memory 1 From the home screen, touch Settings > Device > Maintenance > Out of Service Erase. 2 Select the Sanitize all information on hard disk check box, and then touch ERASE. 3 Follow the instructions on the display. Note: This process can take from several minutes to more than - Lexmark CX727 | Users Guide PDF - Page 58
. • The printer is being moved to a different department or location. • The printer is being serviced by someone from outside your organization. • The printer is being removed from your premises for service. • The printer is being sold to another organization. Disposing of a printer hard disk Note - Lexmark CX727 | Users Guide PDF - Page 59
Maintaining the printer 59 Maintaining the printer Warning-Potential Damage: Failure to maintain optimum printer performance, or to replace parts and supplies, may cause damage to your printer. Adjusting the speaker volume Adjusting the default internal speaker volume The speaker volume will reset - Lexmark CX727 | Users Guide PDF - Page 60
, see the documentation that came with your access point. • A wireless network adapter is installed in your printer. For more information, see the instructions that came with the adapter. Using the Push Button method 1 From the control panel, navigate to: Settings > Network/Ports > Wireless > Wi‑Fi - Lexmark CX727 | Users Guide PDF - Page 61
Maintaining the printer 61 3 Configure the port from the list. 4 Update the IP address. 5 Apply the changes. For Macintosh users 1 From System Preferences in the Apple menu, navigate to the list of printers, and then select + > IP. 2 Type the IP address in the address field. 3 Apply the changes. - Lexmark CX727 | Users Guide PDF - Page 62
Maintaining the printer 62 Notes: • Do not use household cleaners or detergents, as they may damage the finish of the printer. • Make sure that all areas of the printer are dry after cleaning. 5 Connect the power cord to the electrical outlet, and then turn on the printer. CAUTION-POTENTIAL INJURY: - Lexmark CX727 | Users Guide PDF - Page 63
Maintaining the printer 63 • ADF glass pad • Scanner glass • Scanner glass pad 3 Close the scanner cover. - Lexmark CX727 | Users Guide PDF - Page 64
results if third-party parts and supplies are used. Imaging component usage beyond the intended life may damage your Lexmark printer or its associated components. Ordering toner cartridges Notes: • The estimated cartridge yield is based on the ISO/IEC 19798 standard. • Extremely low print coverage - Lexmark CX727 | Users Guide PDF - Page 65
74C6SM0 Yellow 74C1SY0 74C2SY0 74C3SY0 74C4SY0 74C5SY0 74C6SY0 Lexmark CX725 and CX725R Regular cartridges Item High yield regular toner cartridges Black Cyan Magenta Worldwide 84C0H10 84C0H20 84C0H30 Yellow 84C0H40 Lexmark CX727 Return Program cartridges Item United States and Canada - Lexmark CX727 | Users Guide PDF - Page 66
74C0ZK0 74C0ZV0 74C0Z10 74C0Z50 Ordering a waste toner bottle Item Waste toner bottle Part number 74C0W00 Ordering a fuser maintenance kit Fuser maintenance kit type Fuser maintenance kit, type 00, 110-120 V Fuser maintenance kit, type 01, 220-240 V Fuser maintenance kit, type 02, 100 V Part - Lexmark CX727 | Users Guide PDF - Page 67
Maintaining the printer 67 Replacing parts and supplies Replacing a toner cartridge 1 Open door B. 2 Remove the toner cartridge. 3 Unpack the new toner cartridge. - Lexmark CX727 | Users Guide PDF - Page 68
Maintaining the printer 68 4 Insert the new toner cartridge. 5 Close door B. Replacing the imaging unit 1 Open door B. - Lexmark CX727 | Users Guide PDF - Page 69
Maintaining the printer 69 2 Remove the waste toner bottle. 3 Remove the imaging kit. - Lexmark CX727 | Users Guide PDF - Page 70
Maintaining the printer 70 4 Remove the black toner cartridge. 5 Remove the imaging unit. Warning-Potential Damage: Do not expose the photoconductor unit to direct light for more than 10 minutes. Extended exposure to light may cause print quality problems. Warning-Potential Damage: Do not touch - Lexmark CX727 | Users Guide PDF - Page 71
Maintaining the printer 71 8 Insert the black toner cartridge. 9 Insert the imaging kit. - Lexmark CX727 | Users Guide PDF - Page 72
Maintaining the printer 72 10 Insert the waste toner bottle. 11 Close door B. Replacing the imaging kit 1 Open door B. - Lexmark CX727 | Users Guide PDF - Page 73
Maintaining the printer 73 2 Remove the waste toner bottle. 3 Remove the imaging kit. - Lexmark CX727 | Users Guide PDF - Page 74
Maintaining the printer 74 4 Remove the toner cartridges. 5 Unpack the new imaging kit, and then remove direct light for more than 10 minutes. Extended exposure to light may cause print quality problems. Warning-Potential Damage: Do not touch the shiny photoconductor drum under the imaging unit. - Lexmark CX727 | Users Guide PDF - Page 75
Maintaining the printer 75 8 Insert the toner cartridges. 9 Insert the new imaging kit. - Lexmark CX727 | Users Guide PDF - Page 76
Maintaining the printer 76 10 Insert the waste toner bottle. 11 Close door B. Replacing the waste toner bottle 1 Open door B. - Lexmark CX727 | Users Guide PDF - Page 77
Maintaining the printer 77 2 Remove the waste toner bottle. 3 Unpack the new waste toner bottle. 4 Insert the new waste toner bottle. 5 Close door B. Replacing the fuser 1 Turn off the printer, and then unplug the power cord from the electrical outlet. 2 Open doors A and D. CAUTION-HOT SURFACE: - Lexmark CX727 | Users Guide PDF - Page 78
electrical shock, connect the power cord to an appropriately rated and properly grounded electrical outlet that is near the product and easily accessible. 8 Reset the fuser maintenance counter. For more information, see "Resetting the maintenance counter" on page 92. - Lexmark CX727 | Users Guide PDF - Page 79
Maintaining the printer 79 Replacing the pick roller Replacing the pick roller in the 550‑sheet tray 1 Turn off the printer, and then unplug the power cord from the electrical outlet. 2 Remove the tray. 3 Remove the pick roller. 4 Unpack the new pick roller. - Lexmark CX727 | Users Guide PDF - Page 80
Maintaining the printer 80 5 Insert the new pick roller until it clicks into place. 6 Insert the tray. 7 Connect the power cord to the electrical outlet, and then turn on the printer. CAUTION-POTENTIAL INJURY: To avoid the risk of fire or electrical shock, connect the power cord to an - Lexmark CX727 | Users Guide PDF - Page 81
Maintaining the printer 81 3 Remove the pick roller. 4 Unpack the new pick roller. 5 Insert the new pick roller until it clicks into place. 6 Close the multipurpose feeder. 7 Connect the power cord to the electrical outlet, and then turn on the printer. CAUTION-POTENTIAL INJURY: To avoid the - Lexmark CX727 | Users Guide PDF - Page 82
Maintaining the printer 82 2 Remove the separator pad. 3 Unpack the new separator pad. 4 Insert the new separator pad until it clicks into place. 5 Insert the tray. - Lexmark CX727 | Users Guide PDF - Page 83
Maintaining the printer 83 Replacing the ADF input tray 1 Open door E. 2 Remove the ADF input tray. 3 Unpack the new ADF input tray. - Lexmark CX727 | Users Guide PDF - Page 84
Maintaining the printer 84 4 Insert the new ADF input tray until it clicks into place. 5 Close door E. Replacing the ADF scan pad 1 Open the scanner cover. 2 Remove the ADF scan pad. 3 Unpack the new ADF scan pad. - Lexmark CX727 | Users Guide PDF - Page 85
Maintaining the printer 85 4 Lay the white area of the ADF scan pad facedown on the scanner glass. 5 Close the scanner cover to stick the ADF scan pad to the cover. 6 Open the scanner cover to check if the ADF scan pad is properly attached to the cover. 7 Close the scanner cover. - Lexmark CX727 | Users Guide PDF - Page 86
Maintaining the printer 86 Replacing the ADF separator roller 1 Open door E. 2 Remove the ADF separator roller. 3 Unpack the new ADF separator roller. - Lexmark CX727 | Users Guide PDF - Page 87
Maintaining the printer 87 4 Insert the new ADF separator roller until it clicks into place. 5 Close door E. - Lexmark CX727 | Users Guide PDF - Page 88
Maintaining the printer 88 Replacing the transfer module 1 Turn off the printer, and then unplug the power cord from the electrical outlet. 2 Open door B. 3 Remove the waste toner bottle. - Lexmark CX727 | Users Guide PDF - Page 89
Maintaining the printer 89 4 Remove the imaging kit. 5 Open door A. CAUTION-HOT SURFACE: The inside of the printer might be hot. To reduce the risk of injury from a hot component, allow the surface to cool before touching it. - Lexmark CX727 | Users Guide PDF - Page 90
Maintaining the printer 90 6 Remove the transfer module. 7 Unpack the new transfer module, and then remove the packing material. 8 Insert the new transfer module. 9 Close door A. - Lexmark CX727 | Users Guide PDF - Page 91
Maintaining the printer 91 10 Insert the imaging kit. 11 Insert the waste toner bottle. 12 Close door B. 13 Connect the power cord to the electrical outlet, and then turn on the printer. CAUTION-POTENTIAL INJURY: To avoid the - Lexmark CX727 | Users Guide PDF - Page 92
> Device > Maintenance > Configuration Menu > Supply Usage And Counters. 2 Select Fuser Reset or ITM Reset. Moving the printer Moving the printer to another location CAUTION-POTENTIAL printer warranty. Shipping the printer For shipping instructions, go to http://support.lexmark.com or contact customer - Lexmark CX727 | Users Guide PDF - Page 93
of the paper. Note: Two-sided printing is the default setting in the print driver. • Print multiple pages on a single sheet of paper. • Use the preview for accuracy. Recycling Recycling Lexmark products To return Lexmark products for recycling: 1 Go to www.lexmark.com/recycle. 2 Select the product - Lexmark CX727 | Users Guide PDF - Page 94
.com/recycle, and then choose your country or region. Information on available packaging recycling programs is included with the information on product recycling. Lexmark cartons are 100% recyclable where corrugated recycling facilities exist. Facilities may not exist in your area. The foam used in - Lexmark CX727 | Users Guide PDF - Page 95
below the maximum paper fill indicator. • Do not slide paper into the tray. Load paper as shown in the illustration. • Make sure that the paper guides are positioned correctly and are not pressing tightly against the paper or envelopes. • Push the tray firmly into the printer after loading paper. Use - Lexmark CX727 | Users Guide PDF - Page 96
for blank pages. • When Jam Recovery is set to On or Auto, the printer reprints jammed pages. Jam locations 1 Standard bin 2 Automatic document feeder (ADF) 3 Fuser 4 Trays 5 Duplex unit 6 Multipurpose feeder - Lexmark CX727 | Users Guide PDF - Page 97
Clearing jams 97 Paper jam in trays 1 Pull out the tray. Warning-Potential Damage: A sensor inside the optional tray is easily damaged by static electricity. Touch a metal surface before removing the jammed paper in the tray. 2 Remove the jammed paper. Note: Make sure that all paper fragments are - Lexmark CX727 | Users Guide PDF - Page 98
Clearing jams 98 Paper jam behind door E 1 Open door E. 2 Remove the jammed paper. Note: Make sure that all paper fragments are removed. 3 Close door E. Paper jam in the multipurpose feeder 1 Remove paper from the multipurpose feeder. 2 Pull out the tray. 3 Remove the jammed paper. Note: Make - Lexmark CX727 | Users Guide PDF - Page 99
Clearing jams 99 4 Insert the tray. Paper jam in the standard bin 1 Remove the jammed paper. Note: Make sure that all paper fragments are removed. 2 Open doors A and D, and then remove any paper fragments. CAUTION-HOT SURFACE: The inside of the printer might be hot. To reduce the risk of injury - Lexmark CX727 | Users Guide PDF - Page 100
Clearing jams 100 3 Close doors D and A. Paper jam in door A Paper jam in the fuser 1 Open door A. CAUTION-HOT SURFACE: The inside of the printer might be hot. To reduce the risk of injury from a hot component, allow the surface to cool before touching it. - Lexmark CX727 | Users Guide PDF - Page 101
Clearing jams 101 2 Remove the jammed paper. Note: Make sure that all paper fragments are removed. - Lexmark CX727 | Users Guide PDF - Page 102
Clearing jams 102 3 Open the fuser access door. 4 Remove the jammed paper. Note: Make sure that all paper fragments are removed. 5 Close door A. Paper jam in the duplex unit 1 Open door A. - Lexmark CX727 | Users Guide PDF - Page 103
Clearing jams 103 2 Open the duplex cover. 3 Remove the jammed paper. Note: Make sure that all paper fragments are removed. - Lexmark CX727 | Users Guide PDF - Page 104
Clearing jams 104 4 Close the duplex cover and door A. - Lexmark CX727 | Users Guide PDF - Page 105
105 Troubleshooting Network connection problems Cannot open Embedded Web Server Action Step 1 Check if you are using a supported browser: • Internet Explorer® version 9 or later • Safari version 8.0.3 or later • Google ChromeTM • Mozilla Firefox Yes Go to step 2. Is your browser supported? Step - Lexmark CX727 | Users Guide PDF - Page 106
Troubleshooting 106 Action Step 6 Check if the web proxy servers are disabled. Are the web proxy servers disabled? Step 7 Access the Embedded Web Server. Did the Embedded Web Server open? Yes Go to step 7. No Contact your administrator. The problem is solved. Contact customer support. Unable - Lexmark CX727 | Users Guide PDF - Page 107
. Note: If necessary, manually add the internal option in the print driver to make it available for print jobs. For more information, see "Adding available options in the print driver" on page 160. b Resend the print job. The problem is solved. Does the internal option operate correctly? No Go - Lexmark CX727 | Users Guide PDF - Page 108
Troubleshooting 108 Internal solutions port does not operate correctly Action Yes Step 1 an internal solutions port" on page 148. Note: Use a supported ISP. The problem is solved. Does the ISP operate correctly? Step 3 The problem is Check the cable and the ISP connection. solved. a Use - Lexmark CX727 | Users Guide PDF - Page 109
Troubleshooting 109 with supplies Replace cartridge, printer region mismatch To correct this problem, purchase a cartridge with the correct region that matches the 42 indicates the region of the cartridge. Printer and toner cartridge regions Region Worldwide or Undefined region North America - Lexmark CX727 | Users Guide PDF - Page 110
toner cartridge, print the print quality test pages. From the control panel, navigate to: Settings > Troubleshooting > Print Quality Test Pages. Non‑Lexmark supply The printer has detected a non‑Lexmark http://support.lexmark.com or contact your service representative, and then report the message. - Lexmark CX727 | Users Guide PDF - Page 111
Troubleshooting 111 Paper feed problems Envelope seals when printing Action Yes 1 Use envelopes flaps. 2 Resend the print job. Does the envelope seal when printing? Contact customer support. No The problem is solved. Collated printing does not work Action Step 1 a From the home screen, - Lexmark CX727 | Users Guide PDF - Page 112
Troubleshooting 112 Paper curl Action Step 1 Move the paper guides in the tray to the correct position for the paper loaded. Yes Go to step 2. No The problem to use it. b Resend the print job. Contact customer The problem is support. solved. Is the paper still curled? Tray linking does not - Lexmark CX727 | Users Guide PDF - Page 113
Type. b Set the paper size and type to match the paper loaded in the linked trays. c Print the document. The problem is solved. Do the trays link correctly? No Contact customer support. Check tray connection Try one or more of the following: • Turn off the printer, wait for about 10 seconds, and - Lexmark CX727 | Users Guide PDF - Page 114
Troubleshooting 114 Paper frequently jams Action Yes Step 1 a Pull out the tray. b Check if the paper is loaded correctly. Go to step 2. Notes: • Make sure that the paper guides . b Print the document. Contact customer The problem is support. solved. Do paper jams still occur frequently? - Lexmark CX727 | Users Guide PDF - Page 115
Troubleshooting 115 Printing problems Confidential and other held documents do not print Action Yes Step 1 The problem is a From the control panel, check if the documents appear in the solved. Held Jobs list. Note: If the documents are not listed, then print - Lexmark CX727 | Users Guide PDF - Page 116
Troubleshooting 116 Action Step 5 a Add printer memory. b Resend the print job. Are the documents printed? Yes The problem is solved. Slow slow? No Contact customer support. No The problem is solved. The problem is solved. The problem is solved. The problem is solved. The problem is solved. - Lexmark CX727 | Users Guide PDF - Page 117
Troubleshooting 117 Action Step 6 a From the Quality menu on the control panel, set the Print Resolution to 4800CQ. b Print the document. Yes Go to step 7. No The problem The problem is support. solved. Is the printer printing slow? Print jobs do not print Action Yes Step 1 The problem is - Lexmark CX727 | Users Guide PDF - Page 118
The printer software is available at http://support.lexmark.com. b Resend the print job. The problem is solved. Is the document printed? support. Note: Before solving the problem, print the quality sample pages to determine the missing color. From the home screen, touch Settings > Troubleshooting - Lexmark CX727 | Users Guide PDF - Page 119
underside of the imaging unit or imaging kit. b Print a document. No The problem is solved. Is the printer still printing blank or white pages? Step 2 a Replace the imaging unit or imaging kit. Contact customer support. Warning-Potential Damage: Do not expose the imaging unit or imaging kit to - Lexmark CX727 | Users Guide PDF - Page 120
Troubleshooting 120 Action Yes Step 2 a Depending on your operating system, reduce the toner darkness from the Printing Preferences or Print dialog. Go to step 3. Note: You can also change the settings on the printer control panel. b Resend the print job. No The problem The problem is solved - Lexmark CX727 | Users Guide PDF - Page 121
Troubleshooting 121 Ghost images Leading edge AABBCCDD AABBCCDD Trailing edge Action Step 1 a Load the tray with the correct paper type and weight. b Resend the print job. Yes Go to step 2. No The problem job. Contact customer The problem is support. solved. Do ghost images still - Lexmark CX727 | Users Guide PDF - Page 122
Troubleshooting 122 Action Step 1 a From the home screen, touch Settings > Print > Quality. b Adjust the toner darkness. c Print the document. Yes Go to step 2. No The problem is solved. Does gray background still appear on prints? Step 2 a From the home screen, touch Settings > Print > Quality - Lexmark CX727 | Users Guide PDF - Page 123
Troubleshooting on the printer control panel. b Resend the print job. No The problem is solved. Do horizontal dark lines still appear on prints? Step 3 and then reinstall the imaging unit or imaging kit. Contact customer support. Warning-Potential Damage: Do not expose the imaging unit or - Lexmark CX727 | Users Guide PDF - Page 124
Troubleshooting on the printer control panel. b Resend the print job. No The problem is solved. Do horizontal white lines still appear on prints? Step 2 Go then reinstall the imaging unit or imaging kit. Contact customer support. Warning-Potential Damage: Do not expose the imaging unit or - Lexmark CX727 | Users Guide PDF - Page 125
Troubleshooting 125 Action Yes Step 1 The problem is a Squeeze and slide the paper guides to the correct position for solved. the size of the paper you are loading. b Resend the print job. Are the margins correct? Step 2 The problem No Go to step 2. Go to step 3. Contact customer support. - Lexmark CX727 | Users Guide PDF - Page 126
is not supported, then install a supported font. For more information, contact your administrator. c Resend the print job. No The problem is too light? Step 2 a Depending on your operating system, increase the toner darkness from the Printing Preferences or Print dialog. Go to step 3. Note - Lexmark CX727 | Users Guide PDF - Page 127
Troubleshooting Go to step 6. The problem is solved. Is the print still too light? Step 6 a Remove, and then reinstall the waste toner bottle. b From the problem is solved. Is the print still too light? Step 7 Remove, and then reinstall the imaging kit. Contact customer The problem is support - Lexmark CX727 | Users Guide PDF - Page 128
Troubleshooting 128 Action Step 1 Check the printer for leaked toner contamination. Yes Go to step 2. No Contact customer support. Is the printer free of leaked toner in the tray. b Print the document. Go to step 4. The problem is solved. Is the print still mottled? Step 4 a Replace the - Lexmark CX727 | Users Guide PDF - Page 129
paper. b Resend the print job. Contact customer The problem is support. solved. Is the print still crooked or skewed? Repeating defects ) ) ) Note: Before solving the problem, print the Maintenance Defect Ruler from the Troubleshooting section of the Settings menu. Action Step 1 a Print - Lexmark CX727 | Users Guide PDF - Page 130
Troubleshooting 130 Action Yes Step 2 Take note of the a Using the supply item that matches the measurement on the support or your affected color page. service representative. Transfer module • 37.70 mm (1.48 in.) • 78.50 mm (3.09 in.) • 55 mm (2.17 in.) Fuser • 95 mm (3.74 in.) • 110 - Lexmark CX727 | Users Guide PDF - Page 131
Troubleshooting 131 Action Yes a Remove, and then reinstall the imaging unit or imaging kit. Contact customer Warning-Potential Damage: Do not expose the imaging unit support. or imaging kit to direct light for more than 10 minutes. Extended exposure to light may cause print quality problems. - Lexmark CX727 | Users Guide PDF - Page 132
Troubleshooting 132 Action Yes Step 3 a Remove, and then reinstall the imaging unit or imaging kit. Contact customer support. Warning-Potential Damage: Do not . 2 Resend the print job. Does the toner still rub off? Yes Contact customer support. No The problem is solved. Uneven print density - Lexmark CX727 | Users Guide PDF - Page 133
Troubleshooting 133 Action Yes Replace the imaging unit or imaging kit, and then resend the print Contact customer job. support. the imaging unit support. or imaging kit to direct light for more than 10 minutes. Extended exposure to light can cause print quality problems. Warning-Potential - Lexmark CX727 | Users Guide PDF - Page 134
Troubleshooting 134 Action Yes a Remove, and then reinstall the imaging unit or imaging kit. Contact customer Warning-Potential Damage: Do not expose the imaging unit support. or imaging kit to direct light for more than 10 minutes. Extended exposure to light may cause print quality problems. - Lexmark CX727 | Users Guide PDF - Page 135
Troubleshooting 135 Action Yes Step 6 The problem is Turn off the printer, reinstall the hardware options, and then turn it solved back on. For more information, see the documentation that came with the option. Is the printer responding? Step 7 Install the correct print driver. The problem - Lexmark CX727 | Users Guide PDF - Page 136
Troubleshooting 136 Color quality problems Adjusting toner darkness 1 From the home screen, touch Settings > Print > Quality. 2 Adjust the toner darkness. 3 Apply the changes. Modifying the colors in printed output 1 From the home screen, touch Settings > Print > Quality > Advanced Imaging > - Lexmark CX727 | Users Guide PDF - Page 137
conversion table for the particular object. Selecting which Color Samples set to use for a particular color‑matching problem depends on: • The Color Correction setting being used (Auto, Off, or Manual) • The type of object being printed (text, graphics, or images) • How the color of the object is - Lexmark CX727 | Users Guide PDF - Page 138
> Advanced Imaging > Color Balance. b Adjust the setting. c Resend the print job. Does the print still appear tinted? No The problem is solved. Yes Contact customer support. Faxing problems Cannot send or receive faxes Action Step 1 Resolve any error messages that appear on the display. Yes The - Lexmark CX727 | Users Guide PDF - Page 139
Troubleshooting 139 Action Yes Step 4 Check the telephone wall jack. The problem is solved. a Connect the analog lter or router that supports analog use. For more information, contact your DSL provider. • If you are using a private branch exchange (PBX) telephone service, then make sure - Lexmark CX727 | Users Guide PDF - Page 140
the telephone number manually. The problem is solved. problem is solved. Can you receive faxes? Step 3 Replace the toner cartridge. The problem is solved. For more information, see the instruction sheet that came with the supply. Can you receive faxes? No Go to step 2. Contact customer support - Lexmark CX727 | Users Guide PDF - Page 141
Step 3 Replace the toner cartridge. The problem is solved. For more information, see the instruction sheet that came support. Scanning problems Adjusting scanner registration 1 From the control panel, navigate to: Settings > Maintenance > Configuration Menu > Scanner Configuration > Scanner Manual - Lexmark CX727 | Users Guide PDF - Page 142
Troubleshooting 142 Adjusting ADF registration 1 From the control panel, navigate to: Settings > Maintenance > Configuration Menu > Scanner Configuration > Scanner Manual computer Action Yes Step 1 The problem is a Turn off the printer, print server are secure. The problem is solved. For more - Lexmark CX727 | Users Guide PDF - Page 143
Troubleshooting 143 Partial copies of document or photo Action Yes Step 1 The problem is a Make sure that the document or photo is loaded facedown on solved job. Is the scan job successful? No Go to step 2. Contact customer support. No Go to step 2. Contact customer support. No Go to step 2. - Lexmark CX727 | Users Guide PDF - Page 144
Troubleshooting 144 Action Yes Step 2 Check the file you want to scan. The problem is solved. a Make sure that the fi scan. Does scanning take too long or freeze the computer? Yes Contact customer support. No The problem is solved. Scanner does not respond Action Step 1 a Check if the printer - Lexmark CX727 | Users Guide PDF - Page 145
following information: • Printer problem • Error message • Printer model type and serial number Go to http://support.lexmark.com to receive e‑mail or chat support, or browse through the library of manuals, support documentation, drivers, and other downloads. Technical support via telephone is also - Lexmark CX727 | Users Guide PDF - Page 146
Hardware Available internal options • Memory card - DDR3 DIMM - Flash memory • Fonts - Application cards • Forms and Bar Code • PRESCRIBE • IPDS • Lexmark Internal Solutions Port (ISP) - MarkNetTM N8360 (802.11 b/g/n/a wireless print server bundled with LEX‑M06‑001 Mobile Solutions Module) - IEEE - Lexmark CX727 | Users Guide PDF - Page 147
Upgrading and migrating 147 3 Unpack the memory card. Warning-Potential Damage: Avoid touching the connection points along the edge of the card. 4 Insert the memory card until it clicks into place. - Lexmark CX727 | Users Guide PDF - Page 148
Upgrading and migrating 148 5 Reattach the access cover. 6 Connect the power cord to the electrical outlet, and then turn on the printer. CAUTION-POTENTIAL INJURY: To avoid the risk of fire or electrical shock, connect the power cord to an appropriately rated and properly grounded electrical - Lexmark CX727 | Users Guide PDF - Page 149
Upgrading and migrating 149 3 Unpack the internal solutions port (ISP) kit. 1 ISP 2 Mounting bracket 3 Thumbscrews 4 Housing - Lexmark CX727 | Users Guide PDF - Page 150
Upgrading and migrating 150 5 ISP extended cable 4 Install the ISP into its housing. - Lexmark CX727 | Users Guide PDF - Page 151
Upgrading and migrating 151 5 Attach the housing to the controller board access cover. - Lexmark CX727 | Users Guide PDF - Page 152
Upgrading and migrating 152 6 Connect the ISP extended cable to the ISP connector in the controller board. 7 Reattach the controller board access cover. 8 Connect the power cord to the electrical outlet, and then turn on the printer. CAUTION-POTENTIAL INJURY: To avoid the risk of fire or - Lexmark CX727 | Users Guide PDF - Page 153
Upgrading and migrating 153 Installing an optional card CAUTION-SHOCK HAZARD: To avoid the risk of electrical shock, if you are accessing the controller board or installing optional hardware or memory devices sometime after setting up the printer, then turn the printer off, and unplug the power - Lexmark CX727 | Users Guide PDF - Page 154
Upgrading and migrating 154 4 Push the card firmly into place. Note: The entire length of the connector on the card must touch and be flush against the controller board. Warning-Potential Damage: Improper installation of the card may cause damage to the card and the controller board. - Lexmark CX727 | Users Guide PDF - Page 155
Upgrading and migrating 155 5 Reattach the access cover. 6 Connect the power cord to the electrical outlet, and then turn on the printer. CAUTION-POTENTIAL INJURY: To avoid the risk of fire or electrical shock, connect the power cord to an appropriately rated and properly grounded electrical - Lexmark CX727 | Users Guide PDF - Page 156
Upgrading and migrating 156 3 Unpack the hard disk. 4 Attach the hard disk to the controller board. Warning-Potential Damage: Do not touch or press the center of the hard disk. - Lexmark CX727 | Users Guide PDF - Page 157
Upgrading and migrating 157 5 Open door B. 6 Open door C. - Lexmark CX727 | Users Guide PDF - Page 158
Upgrading and migrating 158 7 Secure the hard disk to the printer using the thumbscrews. 8 Close doors C and B. 9 Reattach the controller board access cover. 10 Connect the power cord to the electrical outlet, and then turn on the printer. CAUTION-POTENTIAL INJURY: To avoid the risk of fire or - Lexmark CX727 | Users Guide PDF - Page 159
appropriately rated and properly grounded electrical outlet that is near the product and easily accessible. 6 Turn on the printer. Add the tray in the print driver to make it available for print jobs. For more information, see "Adding available options in the print - Lexmark CX727 | Users Guide PDF - Page 160
installer package. • From the software CD that came with your printer. • Go to http://support.lexmark.com, and then select your printer and operating system. 2 Run the installer, and then follow the instructions on the computer screen. 3 For Macintosh users, add the printer. Note: Obtain the printer - Lexmark CX727 | Users Guide PDF - Page 161
click Export Configuration or Import Configuration. b Follow the instructions on the screen. Updating firmware Some applications require a minimum correctly. For more information on updating the device firmware, contact your Lexmark representative. 1 From the Embedded Web Server, click Settings > Device - Lexmark CX727 | Users Guide PDF - Page 162
Product name: Lexmark CX725de, Lexmark CX725dhe, Lexmark CX725dthe, Lexmark CX725R, Lexmark CX727de MFPs Machine services, except those expressly designated by the manufacturer, are the user's responsibility. For Lexmark technical support, go to http://support.lexmark.com. For information on Lexmark - Lexmark CX727 | Users Guide PDF - Page 163
terms and conditions herein. Trademarks Lexmark, the Lexmark logo, and MarkNet are trademarks or registered trademarks of Lexmark International, Inc. in the Mopria® logo, and the Mopria® Alliance logo are registered trademarks and service marks of Mopria Alliance, Inc. in the United States and other - Lexmark CX727 | Users Guide PDF - Page 164
of the European Union. We encourage the recycling of our products. If you have further questions about recycling options, visit the Lexmark Web site at www.lexmark.com for your local sales office phone number. India E-Waste notice This product complies with the India E-Waste (Management and - Lexmark CX727 | Users Guide PDF - Page 165
the printer even if the symbol is not present. ENERGY STAR Any Lexmark product bearing the ENERGY STAR® emblem on the product or on a start- in the wavelength region of 650-670 nanometers and enclosed in a non-serviceable printhead assembly. The laser system and printer are designed so there is never - Lexmark CX727 | Users Guide PDF - Page 166
table represent time-averaged measurements. Instantaneous power draws may be substantially higher than the average. Values are subject to change. See www.lexmark.com for current values. Sleep Mode This product is designed with an energy-saving mode called Sleep Mode. The Sleep Mode saves energy - Lexmark CX727 | Users Guide PDF - Page 167
order for you to make necessary modifications to maintain uninterrupted service. If you experience trouble with this equipment, for repair or warranty information, contact Lexmark International, Inc. at www.lexmark.com or your Lexmark representative. If the equipment is causing harm to the telephone - Lexmark CX727 | Users Guide PDF - Page 168
serviceable parts. For repair and warranty information, contact Lexmark International, Inc. See the previous paragraph for contact information. Connection to party line service network The following are special conditions for the Facsimile User Instructions. The grant of a telepermit for any item of - Lexmark CX727 | Users Guide PDF - Page 169
your point of purchase if a BT adapter is required. The Lexmark part number is 80D1873. Some parameters required for compliance with Telecom's 10 call attempts to the same number within any 30 minute period for any single manual call initiation, and • The equipment shall go on-hook for a period of - Lexmark CX727 | Users Guide PDF - Page 170
ber die in der Schweiz Zeitsteuertakte übertragen werden. Uso del prodotto in Svizzera Questo prodotto richiede un filtro toni Billing svizzero, (codice Lexmark 80D1877) da installare su tutte le linee che ricevono impulsi remoti in Svizzera. Regulatory notices for RFID products This section contains - Lexmark CX727 | Users Guide PDF - Page 171
or may be obtained at www.lexmark.com/en_us/about/regulatory-compliance/ all CX725, CX725R, and CX727 printer models with the following machine used in accordance with the instructions, may cause harmful interference to your point of purchase or service representative for additional suggestions. The - Lexmark CX727 | Users Guide PDF - Page 172
grounded may result in a violation of FCC regulations. Any questions regarding this compliance information statement should be directed to: Director of Lexmark Technology & Services Lexmark International, Inc. 740 West New Circle Road Lexington, KY 40550 Telephone: (859) 232-2000 E-mail: regulatory - Lexmark CX727 | Users Guide PDF - Page 173
only to the CX725, CX725R, and CX727 printer models with the following machine types and installed and used in accordance with the instruction manual, may cause harmful interference to radio should be directed to: Director of Lexmark Technology & Services Lexmark International, Inc. 740 West New - Lexmark CX727 | Users Guide PDF - Page 174
if it was originally purchased for your use, and not for resale, from Lexmark or a Lexmark Remarketer, referred to in this statement as "Remarketer." Limited warranty Lexmark warrants that this product: -Is manufactured from new parts, or new and serviceable used parts, which perform like new parts - Lexmark CX727 | Users Guide PDF - Page 175
, are substantially used up, depleted, or consumed. Fuser Units, Transfer/Transport Units, Paper Feed items, if Lexmark). For further explanation of your warranty alternatives and the nearest Lexmark authorized servicer in your area contact Lexmark on the World Wide Web. Remote technical support - Lexmark CX727 | Users Guide PDF - Page 176
Notices 176 -Accidents, misuse, abuse or use inconsistent with Lexmark user's guides, manuals, instructions or guidance -Unsuitable physical or operating environment -Maintenance by anyone other than Lexmark or a Lexmark authorized servicer -Operation of a product beyond the limit of its duty - Lexmark CX727 | Users Guide PDF - Page 177
service 51 connecting to a wireless network using PIN method 60 using Push Button method 60 conservation settings Eco‑Mode 93 hibernate mode 93 sleep mode 93 conserving supplies 93 contacting customer support 145 contacts adding 20 deleting 21 editing 21 control panel using 14 copy troubleshooting - Lexmark CX727 | Users Guide PDF - Page 178
53 fax resolution changing 53 fax setup country‑ or region‑specific 48 digital telephone service 46 DSL connection 44 standard telephone line connection 40 VoIP 45 fax speaker settings configuring 59 fax troubleshooting cannot receive faxes 140 cannot send faxes 140 cannot send or receive faxes 138 - Lexmark CX727 | Users Guide PDF - Page 179
port installing 148 troubleshooting 108 J jam, clearing behind door E 98 multipurpose feeder 98 trays 97 jams avoiding 95 locating jam areas 96 locations 96 jams, clearing in the duplex unit 100 in the fuser 100 K keyboard on the display using 24 L letterhead copying on 35 Lexmark Mobile Print using - Lexmark CX727 | Users Guide PDF - Page 180
off 131 toner easily rubs off 132 uneven print density 132 vertical dark lines or streaks appear on prints 133 white pages 118 print troubleshooting confi Windows 33 Push Button method 60 R recycling Lexmark packaging 94 Lexmark products 93 toner cartridges 94 reducing copies 36 repeat print jobs 33 - Lexmark CX727 | Users Guide PDF - Page 181
supported file types 32 supported flash drives 32 T temperature around the printer 165 toner cartridge replacing 67 toner cartridges ordering 64 recycling 94 toner darkness adjusting 136 transfer module ordering 66 replacing 88 trays installing 159 linking 28 loading 25 unlinking 28 troubleshooting - Lexmark CX727 | Users Guide PDF - Page 182
35 U unable to read flash drive troubleshooting, print 106 understanding the status of the power USB port 12 enabling 106 using genuine Lexmark parts 64 genuine Lexmark supplies 64 using the ADF copying 35 57 volatility statement of 58 W waste toner bottle ordering 66 replacing 76 white pages 118
-
 1
1 -
 2
2 -
 3
3 -
 4
4 -
 5
5 -
 6
6 -
 7
7 -
8
-
9
-
10
-
11
-
12
-
13
-
14
-
15
-
16
-
17
-
18
-
19
-
20
-
21
-
22
-
23
-
24
-
25
-
26
-
27
-
28
-
29
-
30
-
31
-
32
-
33
-
34
-
35
-
36
-
37
-
38
-
39
-
40
-
41
-
42
-
43
-
44
-
45
-
46
-
47
-
48
-
49
-
50
-
51
-
52
-
53
-
54
-
55
-
56
-
57
-
58
-
59
-
60
-
61
-
62
-
63
-
64
-
65
-
66
-
67
-
68
-
69
-
70
-
71
-
72
-
73
-
74
-
75
-
76
-
77
-
78
-
79
-
80
-
81
-
82
-
83
-
84
-
85
-
86
-
87
-
88
-
89
-
90
-
91
-
92
-
93
-
94
-
95
-
96
-
97
-
98
-
99
-
100
-
101
-
102
-
103
-
104
-
105
-
106
-
107
-
108
-
109
-
110
-
111
-
112
-
113
-
114
-
115
-
116
-
117
-
118
-
119
-
120
-
121
-
122
-
123
-
124
-
125
-
126
-
127
-
128
-
129
-
130
-
131
-
132
-
133
-
134
-
135
-
136
-
137
-
138
-
139
-
140
-
141
-
142
-
143
-
144
-
145
-
146
-
147
-
148
-
149
-
150
-
151
-
152
-
153
-
154
-
155
-
156
-
157
-
158
-
159
-
160
-
161
-
162
-
163
-
164
-
165
-
166
-
167
-
168
-
169
-
170
-
171
-
172
-
173
-
174
-
175
-
176
-
177
-
178
-
179
-
180
-
181
-
182
 |
 |

CX725, CX725R, CX727 MFPs
User's Guide
June 2019
www.lexmark.com
Machine type(s):
7528
Model(s):
576, 5A6, 578, 5A8