Lexmark E352DN User's Guide - Page 39
Photoconductor kit end-of-life - photoconductor reset
 |
View all Lexmark E352DN manuals
Add to My Manuals
Save this manual to your list of manuals |
Page 39 highlights
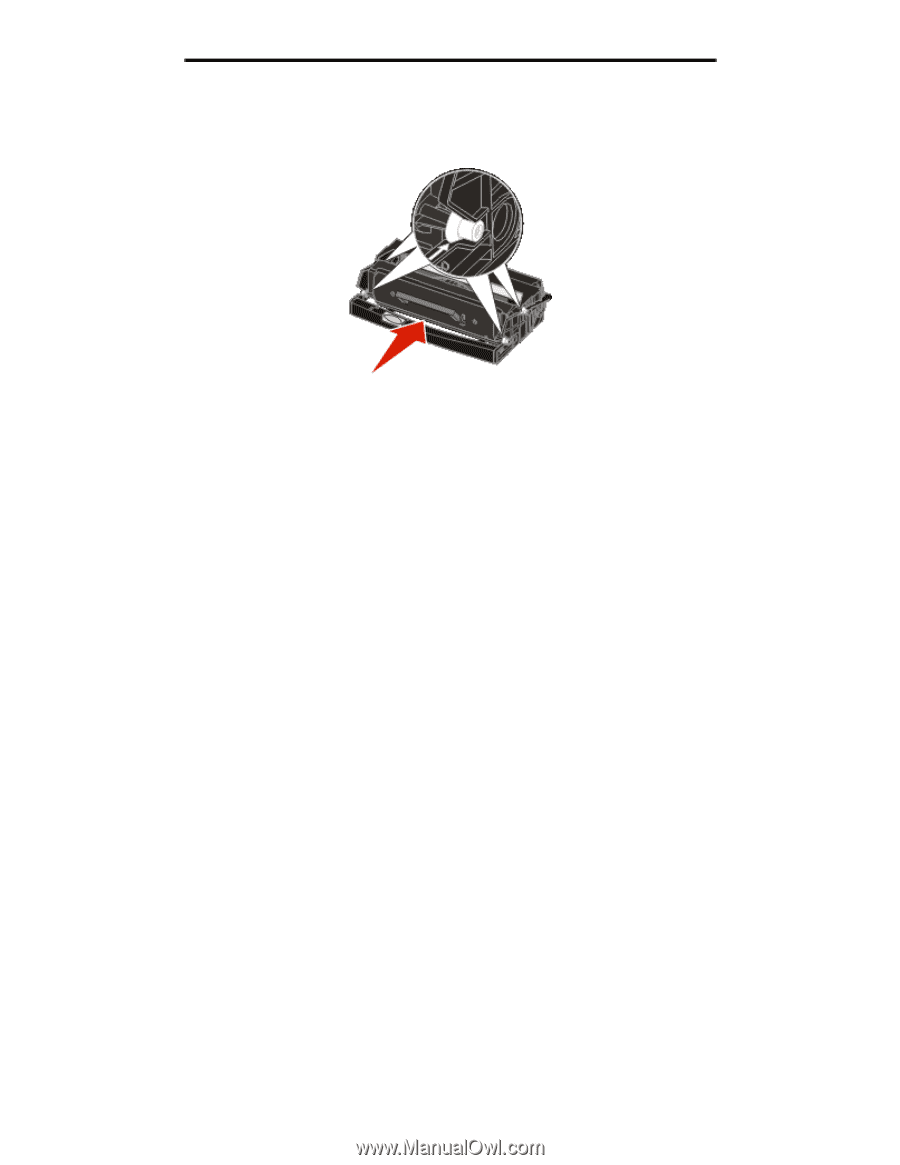
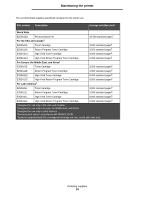
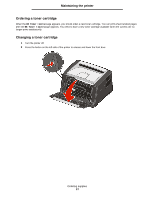
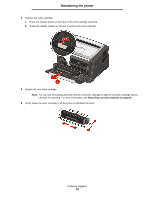
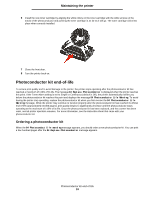
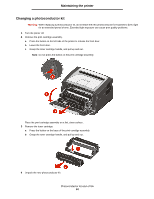
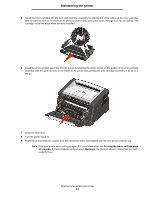
Maintaining the printer 6 Install the new toner cartridge by aligning the white rollers on the toner cartridge with the white arrows on the tracks of the photoconductor and pushing the toner cartridge in as far as it will go. The toner cartridge clicks into place when correctly installed. 7 Close the front door. 8 Turn the printer back on. Photoconductor kit end-of-life To ensure print quality and to avoid damage to the printer, the printer stops operating after the photoconductor kit has reached a maximum of 110% of its life. The message 84 Replace Photoconductor is displayed when the printer reaches this point. If the Toner Alarm setting is set to Single or Continuous (default is Off), the printer automatically notifies you before the photoconductor kit reaches this point and displays the message 84 Photoconductor Life Warning. To avoid having the printer stop operating, replace the photoconductor kit when you first receive the 84 Photoconductor Life Warning message. While the printer may continue to function properly after the photoconductor kit has reached its official end-of-life (approximately 30,000 pages), print quality begins to significantly decrease until the photoconductor stops operating at the maximum of 110% of its life. Once the photoconductor kit has been replaced, and the counter has been reset, normal printer operation resumes. For more information, see the instruction sheet that came with your photoconductor kit. Ordering a photoconductor kit When the 84 Photoconduct life warning message appears, you should order a new photoconductor kit. You can print a few hundred pages after the 84 Replace Photoconductor message appears. Photoconductor kit end-of-life 39
-
 1
1 -
2
-
3
-
4
-
5
-
6
-
7
-
8
-
9
-
10
-
11
-
12
-
13
-
14
-
15
-
16
-
17
-
18
-
19
-
20
-
21
-
22
-
23
-
24
-
25
-
26
-
27
-
28
-
29
-
30
-
31
-
32
-
33
-
 34
34 -
 35
35 -
 36
36 -
 37
37 -
 38
38 -
 39
39 -
 40
40 -
 41
41 -
 42
42 -
 43
43 -
 44
44 -
45
-
46
-
47
-
48
-
49
-
50
-
51
-
52
-
53
-
54
-
55
-
56
-
57
-
58
-
59
-
60
-
61
-
62
-
63
-
64
-
65
-
66
-
67
-
68
-
69
-
70
-
71
-
72
 |
 |