Lexmark MX6500e Print Drivers for UNIX and LINUX Systems - Page 27
Changing the orientation of a print job, Changing the Lines Per setting
 |
View all Lexmark MX6500e manuals
Add to My Manuals
Save this manual to your list of manuals |
Page 27 highlights
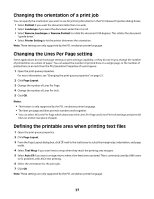
Changing the orientation of a print job You can specify the orientation you want to use for printing documents in the Print Queue Properties dialog boxes. • Select Portrait if you want the document taller than it is wide. • Select Landscape if you want the document wider than it is tall. • Select Reverse Landscape or Reverse Portrait to rotate the document 180 degrees. This rotates the document "upside down." • Select Printer Setting to let the printer determine the orientation. Note: These settings are only supported by the PCL emulation printer language. Changing the Lines Per Page setting Some applications do not have page settings or print settings capability, or they do not let you change the number of printed lines on a sheet of paper. You can adjust the number of printed lines on a single page, or the number of printed lines in an inch from the PCL Emulation Properties of a print queue. 1 Open the print queue properties. For more information, see "Changing the print queue properties" on page 21. 2 Click Page Layout. 3 Change the number of Lines Per Page. 4 Change the number of Lines Per Inch. 5 Click OK. Notes: • This feature is only supported by the PCL emulation printer language. • The lines per page and lines per inch numbers work together. • You can select 66 Lines Per Page which deactivates the Lines Per Page and Lines Per Inch settings and prints 66 lines on a letter-size piece of paper. Defining the printable area when printing text files 1 Open the print queue properties. 2 Click Page Layout. 3 From the Page Layout dialog box, click next to the text boxes to select the margin size, indentation, and page width. 4 Select Text Wrap if you want lines to wrap when they reach the printing area margins. 5 Select Auto CR if you want carriage returns when a line feed is encountered. This is commonly used by UNIX users to fix problems with ASCII text printing. 6 Select the orientation for the print job. 7 Click OK. Note: These settings are only supported by the PCL emulation printer language. 27
-
 1
1 -
2
-
3
-
4
-
5
-
6
-
7
-
8
-
9
-
10
-
11
-
12
-
13
-
14
-
15
-
16
-
17
-
18
-
19
-
20
-
21
-
 22
22 -
 23
23 -
 24
24 -
 25
25 -
 26
26 -
 27
27 -
 28
28 -
 29
29 -
 30
30 -
 31
31 -
 32
32 -
33
-
34
-
35
-
36
-
37
-
38
-
39
-
40
-
41
-
42
-
43
-
44
-
45
-
46
-
47
-
48
-
49
 |
 |
