Lexmark Monochrome Laser Clearing Jams
Lexmark Monochrome Laser Manual
 |
View all Lexmark Monochrome Laser manuals
Add to My Manuals
Save this manual to your list of manuals |
Lexmark Monochrome Laser manual content summary:
- Lexmark Monochrome Laser | Clearing Jams - Page 1
Lexmark™ W820 Clearing Jams When a print media jam occurs, the printer displays a two-line 2xx Paper Jam message, and then stops operating. Clear jams by opening each door, cover, and tray on the printer and carefully removing any jammed print media. Note: Use the following illustration to identify - Lexmark Monochrome Laser | Clearing Jams - Page 2
the finisher back into place. © Copyright 2002 Lexmark International, Inc. All rights reserved. Printed in lever Left lever Left knob Bin 2 Right knob 10 Push the left green lever down and to the clear. If the printer continues to display a paper jam message: 1 Turn the printer off and then back
-
 1
1 -
 2
2
 |
 |
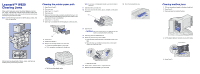
Lexmark™ W820
Clearing Jams
When a print media jam occurs, the printer displays a two-line
2xx Paper Jam
message, and then stops operating. Clear jams
by opening each door, cover, and tray on the printer and carefully
removing any jammed print media.
Note:
Use the following illustration to identify doors, covers, and
trays on the printer.
After all jams are cleared and all doors, covers, and trays are
closed, printing automatically resumes.
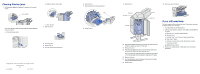
Clearing the printer paper path
1
Open Doors B and C.
2
Clear any jams.
3
Open trays 1, 2, 3, and 4.
4
Clear any jams.
5
Make sure the print media is properly loaded in the trays. The
paper guides should be lightly touching the print media so the
stack cannot move in any direction.
6
Close trays 1, 2, 3, and 4.
7
Open tray 5 and check the see-through grid. Clear any jams.
8
Close tray 5.
9
Close Doors B and C.
10
Remove the envelope feeder if you have one.
a
Grasp the envelope feeder on each side.
b
Tilt it up slightly, and then pull it straight out.
c
Set the envelope feeder aside.
Note:
If you have a multipurpose feeder, you do not need to
remove it.
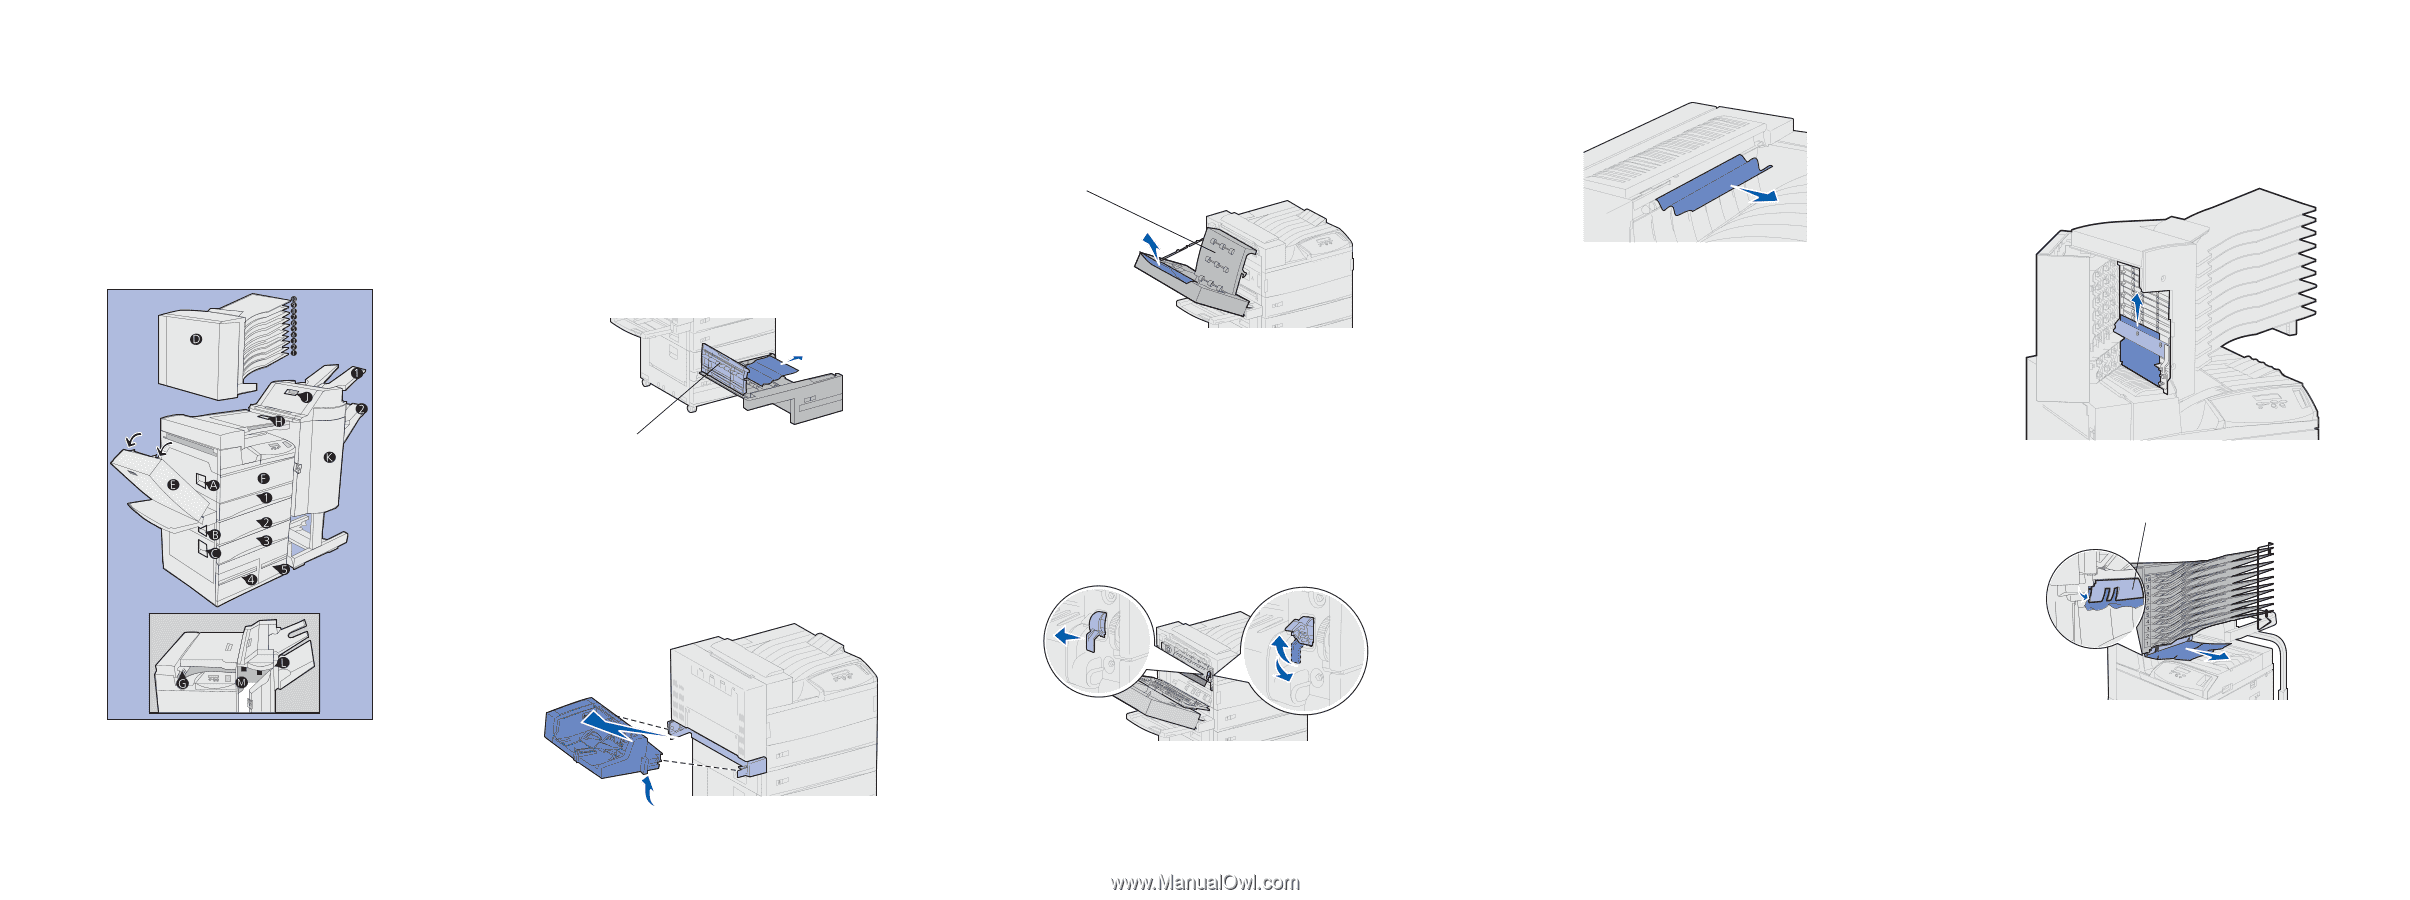
11
Open Door E if you have one.
12
Clear any jams from the rollers, gears, and grid. Lift the grid if
necessary.
13
Open Door A.
CAUTION!
The fuser may be hot. If so, allow time for the
fuser to cool down before continuing.
14
Clear any jams from behind Door A.
15
Check for jams that may not be visible:
a
Push the lever toward the back of the printer to lock it into
gear.
b
Move the lever up and down several times to force print
media out of the fuser area.
c
Release the lever.
16
Close Door A, and then Door E if you have one.
17
Replace the envelope feeder if you have one.
18
Clear the standard bin area.
Clearing mailbox jams
1
Pull any jammed print media in the bins straight out.
2
Open Door D.
3
Clear any jams from behind the door.
4
Lift the plastic deflector and pull out any print media.
5
Close Door D.
Grid
Grid
Plastic deflector