Lexmark Optra T616 Maintenance Kit Installation Instructions - Page 1
Lexmark Optra T616 Manual
 |
View all Lexmark Optra T616 manuals
Add to My Manuals
Save this manual to your list of manuals |
Page 1 highlights
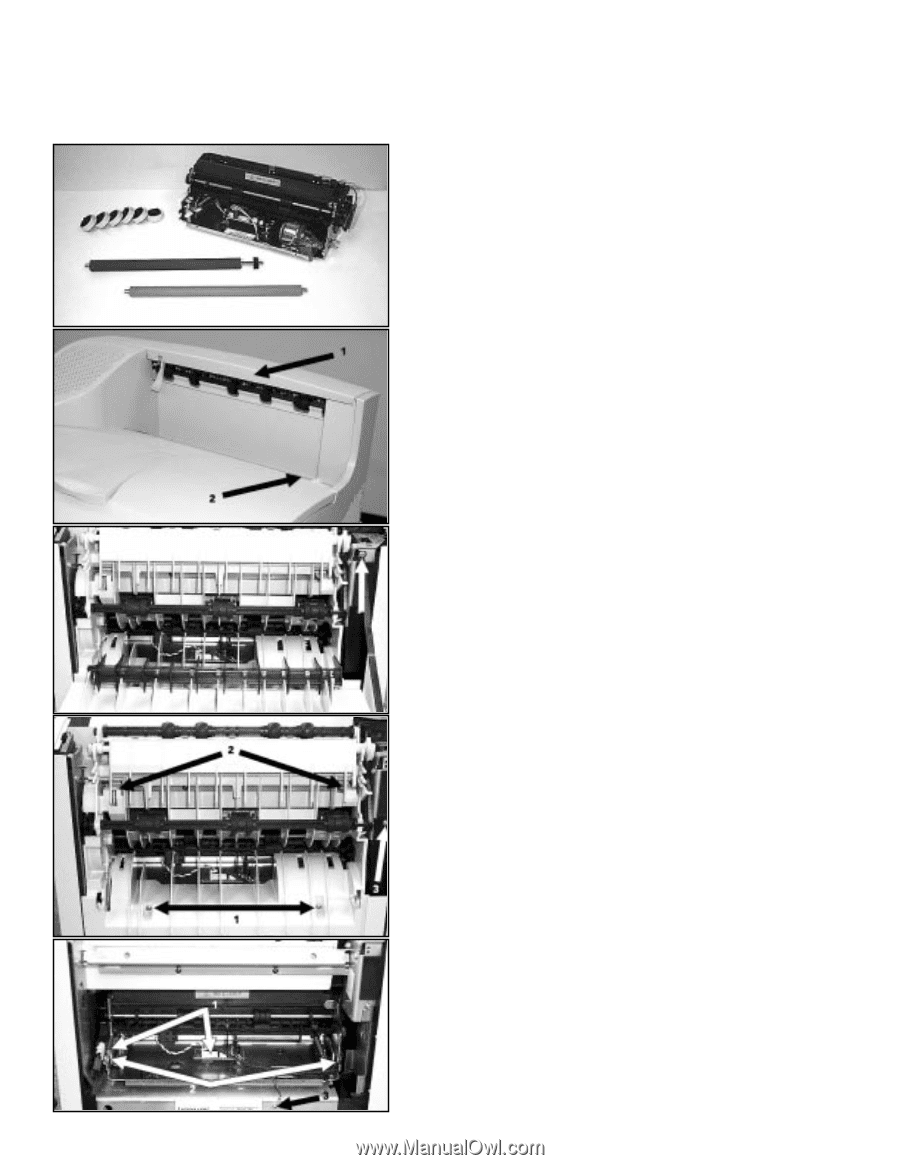
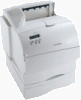
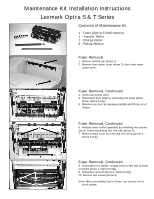
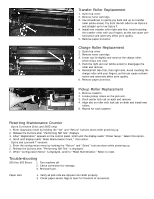
Maintenance Kit Installation Instructions Lexmark Optra S & T Series Contents of Maintenance Kit 1 - Fuser (Optra S 2450 shown) 1 - Transfer Roller 1 - Charge Roller 6 - Pickup Rollers Fuser Removal 1. Remove redrive cap (arrow 1). 2. Remove fuser wiper cover (arrow 2), then fuser wiper under cover. Fuser Removal, Continued 3. Open rear printer door. 4. Disconnect door strap by removing one screw (white arrow, Optra S only). 5. Remove rear door by opening partially and lifting out of hinges. Fuser Removal, Continued 6. Remove inner redrive assembly by removing two screws (arrow 1) and depressing two lock tabs (arrow 2). 7. Remove black cover by removing one screw (arrow 3, Optra S only). Fuser Removal, Continued 8. Disconnect two cables-a large 2-pin on left and an 8-pin on board (arrow 1, Optra S only). 9. Disconnect ground (arrow 3, Optra S only). 10. Remove two screws (arrow 2). Note: When reinstalling Optra S fuser, use caution not to pinch cables.
-
 1
1 -
 2
2
 |
 |