Lexmark T642 Clearing Jams Guide - Page 5
Clearing staple jams
 |
UPC - 734646722001
View all Lexmark T642 manuals
Add to My Manuals
Save this manual to your list of manuals |
Page 5 highlights
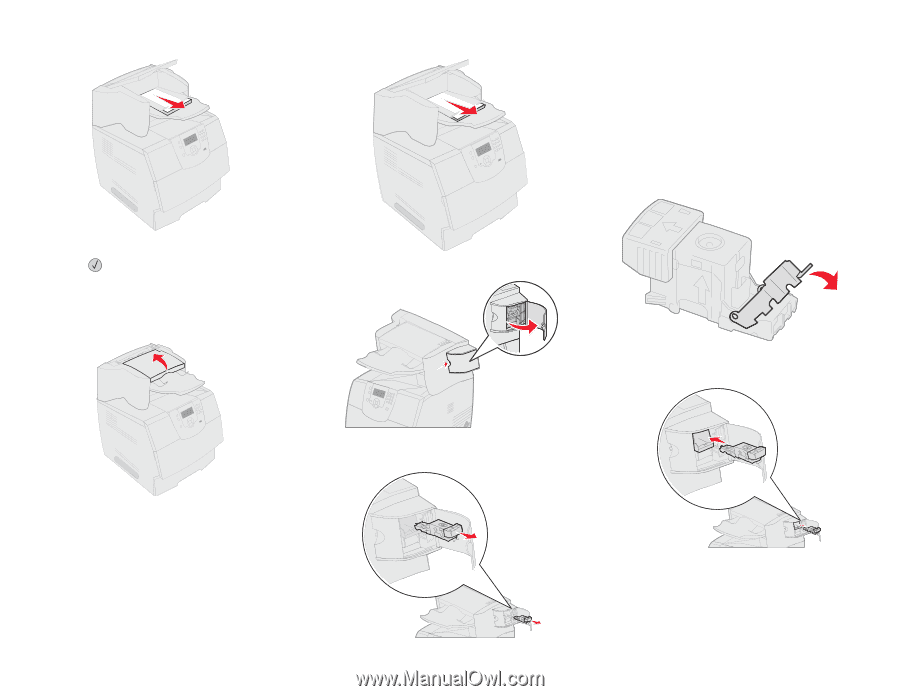
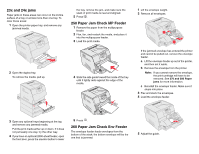
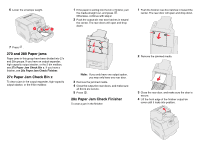
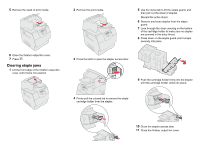
5 Remove the stack of print media. 6 Close the finisher output bin cover. 7 Press . Clearing staple jams 1 Lift the front edge of the finisher output bin cover until it locks into position. 2 Remove the print media. 5 Use the metal tab to lift the staple guard, and then pull out the sheet of staples. Discard the entire sheet. 6 Remove any loose staples from the staple guard. 7 Look through the clear covering on the bottom of the cartridge holder to make sure no staples are jammed in the entry throat. 8 Press down on the staple guard until it snaps securely into place. 3 Press the latch to open the stapler access door. 9 Push the cartridge holder firmly into the stapler until the cartridge holder clicks into place. 4 Firmly pull the colored tab to remove the staple cartridge holder from the stapler. 10 Close the stapler access door. 11 Close the finisher output bin cover.
-
 1
1 -
 2
2 -
 3
3 -
 4
4 -
 5
5
 |
 |