Lexmark T644 Quick Reference - Page 1
Lexmark T644 Manual
 |
UPC - 845307525920
View all Lexmark T644 manuals
Add to My Manuals
Save this manual to your list of manuals |
Page 1 highlights
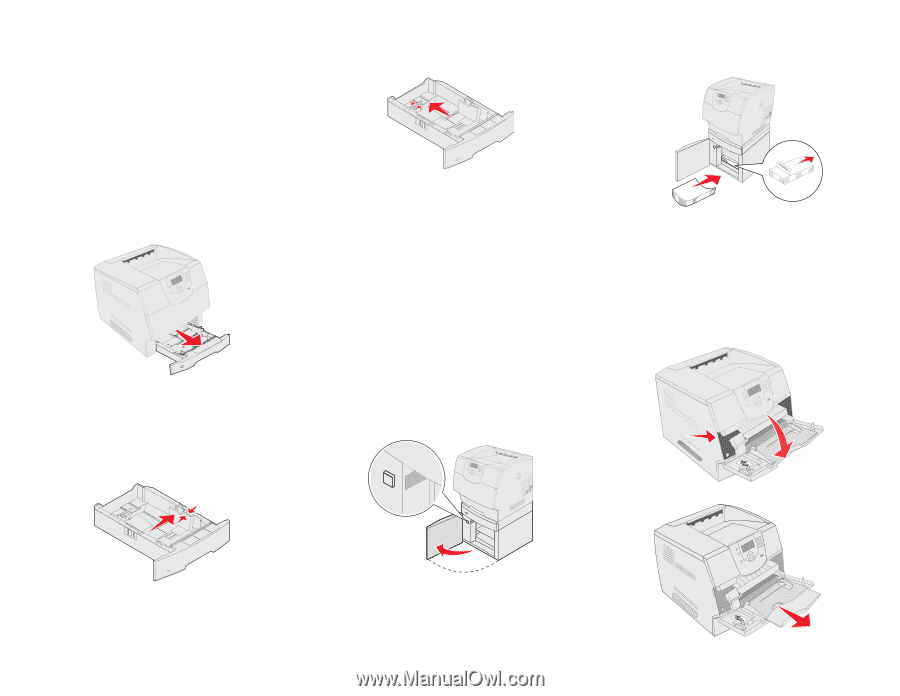
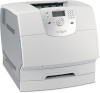
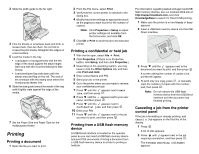
Lexmark™ T64x Quick Reference 3 Squeeze the rear guide tab, and slide the guide to the correct position for the size media you are loading. 3 Slightly bend the stack of print media as shown, and place it on the elevator tray with the preferred print side facing down. Loading paper and specialty media Loading standard trays and optional trays 1 Remove the tray from the printer, and place it on a flat, level surface. Duplex 4 Flex the sheets back and forth to loosen them, then fan them. Do not fold or crease the print media. Straighten the edges on a level surface. 5 Place the print media in the tray: • Print side facedown for simplex (single-sided) printing • Print side faceup for duplex printing 6 Squeeze the side guide tab, and slide the guide toward the inside of the tray until it lightly rests against the edge of the media. 7 Insert the tray into the printer. Simplex (single sided) 4 Carefully align each stack as you load it to ensure a smooth edge where the stacks meet. Do not load print media above the load line. 5 Close the loading door. Loading the multipurpose feeder 1 Push the release latch, and lower the multipurpose feeder. Note: Do not remove a tray when a job is printing or when the control panel green indicator light is blinking. Doing so may cause a jam. 2 Squeeze the side guide tab, and slide the guide to the outer edge of the tray. Loading the 2000-sheet drawer 1 Open the loading door. If the elevator tray is not already in the lowered position, push the elevator button to lower the tray. 2 Pull the tray extension out. 2 Flex the sheets back and forth to loosen them, then fan them. Do not fold or crease the print media. Straighten the edges on a level surface.
-
 1
1 -
 2
2
 |
 |