Lexmark X2450 User's Guide - Page 11
Using the control panel, Use the, Press - all in one printer
 |
View all Lexmark X2450 manuals
Add to My Manuals
Save this manual to your list of manuals |
Page 11 highlights
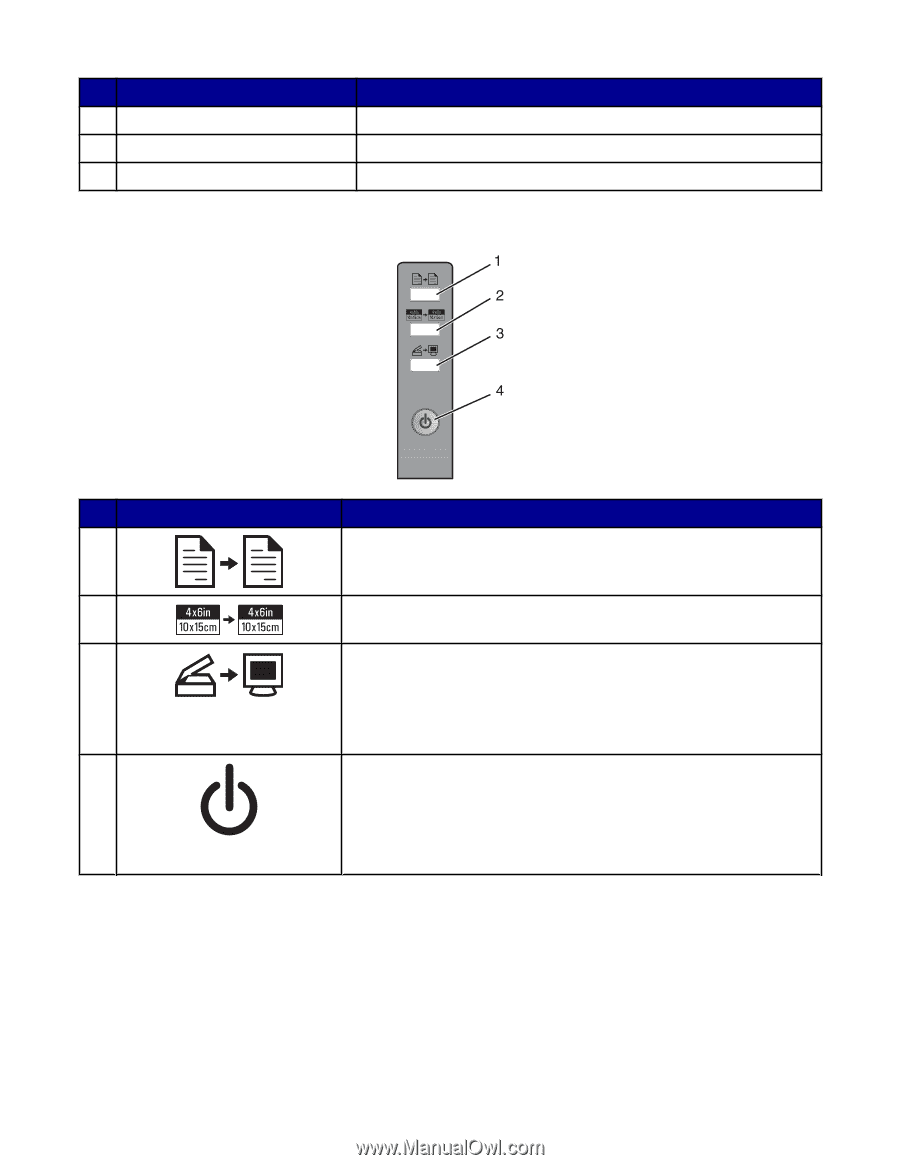
Use the 3 Scanner unit 4 Power supply port 5 USB port To Raise to access the print cartridge carrier. Connect the printer to a power source. Connect the printer to a computer using a USB cable. Using the control panel Press 1 2 3 4 To Make a color copy. Make a 4 x 6 in. or 10 x 15 cm borderless, color copy of a photo. • Open the All-In-One Center and preview the scan on the computer screen. • Print an alignment page if the button is held down for three seconds. Note: To complete the scan back alignment process, follow the instructions on the computer screen. • Turn the printer on and off. • Cancel a copy, scan, or print job. • Reset the printer. • Feed or eject paper. Note: If the power light blinks, see "Error messages" on page 60. 11
-
 1
1 -
2
-
3
-
4
-
5
-
 6
6 -
 7
7 -
 8
8 -
 9
9 -
 10
10 -
 11
11 -
 12
12 -
 13
13 -
 14
14 -
 15
15 -
 16
16 -
17
-
18
-
19
-
20
-
21
-
22
-
23
-
24
-
25
-
26
-
27
-
28
-
29
-
30
-
31
-
32
-
33
-
34
-
35
-
36
-
37
-
38
-
39
-
40
-
41
-
42
-
43
-
44
-
45
-
46
-
47
-
48
-
49
-
50
-
51
-
52
-
53
-
54
-
55
-
56
-
57
-
58
-
59
-
60
-
61
-
62
-
63
-
64
-
65
-
66
-
67
-
68
-
69
-
70
 |
 |
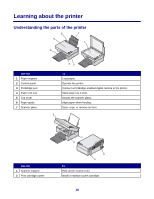
Use the
To
3
Scanner unit
Raise to access the print cartridge carrier.
4
Power supply port
Connect the printer to a power source.
5
USB port
Connect the printer to a computer using a USB cable.
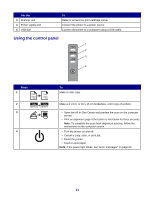
Using the control panel
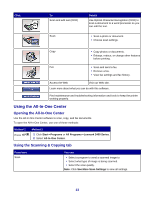
Press
To
1
Make a color copy.
2
Make a 4 x 6 in. or 10 x 15 cm borderless, color copy of a photo.
3
•
Open the All-In-One Center and preview the scan on the computer
screen.
•
Print an alignment page if the button is held down for three seconds.
Note:
To complete the scan back alignment process, follow the
instructions on the computer screen.
4
•
Turn the printer on and off.
•
Cancel a copy, scan, or print job.
•
Reset the printer.
•
Feed or eject paper.
Note:
If the power light blinks, see “Error messages” on page 60.
11