Lexmark X5070 User's Guide (Mac) - Page 67
Customizing scan settings from the Scan dialog, Invert Colors, Lexmark 5000 Series, Preview/Edit
 |
View all Lexmark X5070 manuals
Add to My Manuals
Save this manual to your list of manuals |
Page 67 highlights
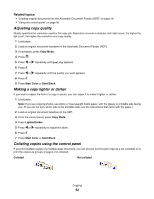
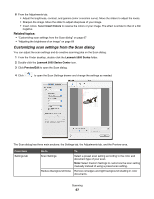
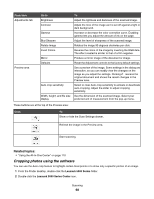
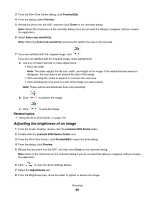
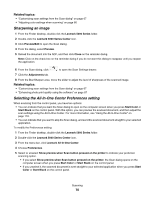
6 From the Adjustments tab: • Adjust the brightness, contrast, and gamma (color correction curve). Move the sliders to adjust the levels. • Sharpen the image. Move the slider to adjust sharpness of your image. • Invert colors. Select Invert Colors to reverse the colors of your image. The effect is similar to that of a film negative. Related topics: • "Customizing scan settings from the Scan dialog" on page 67 • "Adjusting the brightness of an image" on page 69 Customizing scan settings from the Scan dialog You can adjust the scan settings and do creative scanning jobs on the Scan dialog. 1 From the Finder desktop, double-click the Lexmark 5000 Series folder. 2 Double-click the Lexmark 5000 Series Center icon. 3 Click Preview/Edit to open the Scan dialog. 4 Click to open the Scan Settings drawer and change the settings as needed. The Scan dialog has three main sections: the Settings tab, the Adjustments tab, and the Preview area. From here Settings tab Go to To Scan Settings Select a preset scan setting according to the color and document type of your scan. Note: Select Custom Settings to customize the scan setting manually instead of using a preset scan setting. Reduce Background Noise Remove smudges and light background shading in color documents. Scanning 67
-
 1
1 -
2
-
3
-
4
-
5
-
6
-
7
-
8
-
9
-
10
-
11
-
12
-
13
-
14
-
15
-
16
-
17
-
18
-
19
-
20
-
21
-
22
-
23
-
24
-
25
-
26
-
27
-
28
-
29
-
30
-
31
-
32
-
33
-
34
-
35
-
36
-
37
-
38
-
39
-
40
-
41
-
42
-
43
-
44
-
45
-
46
-
47
-
48
-
49
-
50
-
51
-
52
-
53
-
54
-
55
-
56
-
57
-
58
-
59
-
60
-
61
-
 62
62 -
 63
63 -
 64
64 -
 65
65 -
 66
66 -
 67
67 -
 68
68 -
 69
69 -
 70
70 -
 71
71 -
 72
72 -
73
-
74
-
75
-
76
-
77
-
78
-
79
-
80
-
81
-
82
-
83
-
84
-
85
-
86
-
87
-
88
-
89
-
90
-
91
-
92
-
93
-
94
-
95
-
96
-
97
-
98
-
99
-
100
-
101
-
102
-
103
-
104
-
105
-
106
-
107
-
108
-
109
-
110
-
111
-
112
-
113
-
114
-
115
-
116
-
117
-
118
-
119
-
120
-
121
-
122
-
123
-
124
-
125
-
126
-
127
-
128
-
129
-
130
-
131
-
132
-
133
-
134
-
135
-
136
-
137
-
138
-
139
-
140
-
141
-
142
-
143
-
144
-
145
-
146
-
147
-
148
-
149
-
150
-
151
-
152
-
153
-
154
-
155
-
156
-
157
-
158
-
159
-
160
-
161
-
162
-
163
-
164
-
165
-
166
-
167
-
168
-
169
-
170
-
171
-
172
-
173
-
174
-
175
-
176
-
177
-
178
-
179
-
180
-
181
-
182
-
183
-
184
-
185
-
186
 |
 |