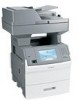
Lexmark X651DE Troubleshooting Guide - Page 7
Solving paper feed problems, Solving print quality problems - software
 |
UPC - 734646093729
View all Lexmark X651DE manuals
Add to My Manuals
Save this manual to your list of manuals |
Page 7 highlights
Internal Solutions Port If the LexmarkTM Internal Solutions Port (ISP) does not operate correctly, then these are possible solutions. Try one or more of the following: CHECK THE ISP CONNECTIONS • Make sure the ISP is securely attached to the printer system board. • Make sure the cable is securely connected to the correct connector. CHECK THE CABLE Make sure you are using the correct cable and that it is securely connected. MAKE SURE THE NETWORK SOFTWARE IS CONFIGURED CORRECTLY For information about installing software for network printing, see the Networking Guide on the Software and Documentation CD Memory card Make sure the memory card is securely connected to the printer system board. Solving paper feed problems Paper frequently jams These are possible solutions. Try one or more of the following: CHECK THE PAPER Use recommended paper and specialty media. For more information, see the chapter about paper and specialty media guidelines. MAKE SURE THERE IS NOT TOO MUCH PAPER IN THE PAPER TRAY Make sure the stack of paper you load does not exceed the maximum stack height indicated in the tray or on the multipurpose feeder. CHECK THE PAPER GUIDES Move the guides in the tray to the correct positions for the paper size loaded. THE PAPER MAY HAVE ABSORBED MOISTURE DUE TO HIGH HUMIDITY • Load paper from a fresh package. • Store paper in its original wrapper until you use it. Paper jam message remains after jam is cleared CHECK THE PAPER PATH The paper path is not clear. Clear jammed paper from the entire paper path, and then touch Continue. Page that jammed does not reprint after you clear the jam TURN ON JAM RECOVERY In the Setup menu, Jam Recovery is set to Off. Set Jam Recovery to Auto or On: 1 Make sure the printer is on and Ready appears. 2 On the home screen, touch . 3 Touch Settings. 4 Touch General Settings. 5 Touch the down arrow until Print Recovery appears. 6 Touch Print Recovery. 7 Touch the right arrow next to Jam Recovery until On or Auto appears. 7 8 Touch Submit. 9 Touch . Solving print quality problems The information in the following topics may help you solve print quality problems. If these suggestions still do not correct the problem, contact Customer Support. You may have a printer part that requires adjustment or replacement. Isolating print quality problems To help isolate print quality problems, print the print quality test pages: 1 Turn the printer off. 2 Load Letter- or A4-size paper in the tray. 3 Hold down and while turning the printer on. 4 Release the buttons when the screen with the progress bar appears. The printer performs a power-on sequence, and then the Configuration menu appears. 5 Touch the down arrow until Print Quality Pages appears. 6 Touch Print Quality Pages. The print quality test pages print. 7 Touch Back. 8 Touch Exit Configuration. Blank pages These are possible solutions. Try one or more of the following:
-
 1
1 -
 2
2 -
 3
3 -
 4
4 -
 5
5 -
 6
6 -
 7
7 -
 8
8 -
 9
9 -
 10
10 -
 11
11 -
 12
12
 |
 |
