Lexmark X738de User's Guide - Page 309
Manual Color menu
 |
View all Lexmark X738de manuals
Add to My Manuals
Save this manual to your list of manuals |
Page 309 highlights
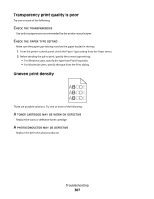
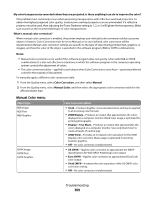
My color transparencies seem dark when they are projected. Is there anything I can do to improve the color? This problem most commonly occurs when projecting transparencies with reflective overhead projectors. To obtain the highest projected color quality, transmissive overhead projectors are recommended. If a reflective projector must be used, then adjusting the Toner Darkness setting to 1, 2, or 3 will lighten the transparency. Make sure to print on the recommended type of color transparencies. What is manual color correction? When manual color correction is enabled, the printer employs user-selected color conversion tables to process objects. However, Color Correction must be set to Manual, or no user-defined color conversion will be implemented. Manual color correction settings are specific to the type of object being printed (text, graphics, or images), and how the color of the object is specified in the software program (RGB or CMYK combinations). Notes: • Manual color correction is not useful if the software program does not specify colors with RGB or CMYK combinations. It is also not effective in situations in which the software program or the computer operating system controls the adjustment of colors. • The color conversion tables-applied to each object when Color Correction is set to Auto-generate preferred colors for the majority of documents. To manually apply a different color conversion table: 1 From the Quality menu, select Color Correction, and then select Manual. 2 From the Quality menu, select Manual Color, and then select the appropriate color conversion table for the affected object type. Manual Color menu Object type RGB Image RGB Text RGB Graphics CMYK Image CMYK Text CMYK Graphics Color conversion tables • Vivid-Produces brighter, more saturated colors and may be applied to all incoming color formats. • sRGB Display-Produces an output that approximates the colors displayed on a computer monitor. Black toner usage is optimized for printing photographs. • Display-True Black-Produces an output that approximates the colors displayed on a computer monitor. Uses only black toner to create all levels of neutral gray. • sRGB Vivid-Provides an increased color saturation for the sRGB Display color correction. Black usage is optimized for printing business graphics. • Off-No color correction is implemented. • US CMYK-Applies color correction to approximate the SWOP (Specifications for Web Offset Publishing) color output. • Euro CMYK-Applies color correction to approximated EuroScale color output. • Vivid CMYK-Increases the color saturation of the US CMYK color correction setting. • Off-No color correction is implemented. Troubleshooting 309
-
 1
1 -
2
-
3
-
4
-
5
-
6
-
7
-
8
-
9
-
10
-
11
-
12
-
13
-
14
-
15
-
16
-
17
-
18
-
19
-
20
-
21
-
22
-
23
-
24
-
25
-
26
-
27
-
28
-
29
-
30
-
31
-
32
-
33
-
34
-
35
-
36
-
37
-
38
-
39
-
40
-
41
-
42
-
43
-
44
-
45
-
46
-
47
-
48
-
49
-
50
-
51
-
52
-
53
-
54
-
55
-
56
-
57
-
58
-
59
-
60
-
61
-
62
-
63
-
64
-
65
-
66
-
67
-
68
-
69
-
70
-
71
-
72
-
73
-
74
-
75
-
76
-
77
-
78
-
79
-
80
-
81
-
82
-
83
-
84
-
85
-
86
-
87
-
88
-
89
-
90
-
91
-
92
-
93
-
94
-
95
-
96
-
97
-
98
-
99
-
100
-
101
-
102
-
103
-
104
-
105
-
106
-
107
-
108
-
109
-
110
-
111
-
112
-
113
-
114
-
115
-
116
-
117
-
118
-
119
-
120
-
121
-
122
-
123
-
124
-
125
-
126
-
127
-
128
-
129
-
130
-
131
-
132
-
133
-
134
-
135
-
136
-
137
-
138
-
139
-
140
-
141
-
142
-
143
-
144
-
145
-
146
-
147
-
148
-
149
-
150
-
151
-
152
-
153
-
154
-
155
-
156
-
157
-
158
-
159
-
160
-
161
-
162
-
163
-
164
-
165
-
166
-
167
-
168
-
169
-
170
-
171
-
172
-
173
-
174
-
175
-
176
-
177
-
178
-
179
-
180
-
181
-
182
-
183
-
184
-
185
-
186
-
187
-
188
-
189
-
190
-
191
-
192
-
193
-
194
-
195
-
196
-
197
-
198
-
199
-
200
-
201
-
202
-
203
-
204
-
205
-
206
-
207
-
208
-
209
-
210
-
211
-
212
-
213
-
214
-
215
-
216
-
217
-
218
-
219
-
220
-
221
-
222
-
223
-
224
-
225
-
226
-
227
-
228
-
229
-
230
-
231
-
232
-
233
-
234
-
235
-
236
-
237
-
238
-
239
-
240
-
241
-
242
-
243
-
244
-
245
-
246
-
247
-
248
-
249
-
250
-
251
-
252
-
253
-
254
-
255
-
256
-
257
-
258
-
259
-
260
-
261
-
262
-
263
-
264
-
265
-
266
-
267
-
268
-
269
-
270
-
271
-
272
-
273
-
274
-
275
-
276
-
277
-
278
-
279
-
280
-
281
-
282
-
283
-
284
-
285
-
286
-
287
-
288
-
289
-
290
-
291
-
292
-
293
-
294
-
295
-
296
-
297
-
298
-
299
-
300
-
301
-
302
-
303
-
 304
304 -
 305
305 -
 306
306 -
 307
307 -
 308
308 -
 309
309 -
 310
310 -
 311
311 -
 312
312 -
 313
313 -
 314
314 -
315
-
316
-
317
-
318
-
319
-
320
-
321
-
322
-
323
-
324
-
325
-
326
-
327
-
328
-
329
-
330
-
331
-
332
-
333
-
334
-
335
-
336
-
337
-
338
 |
 |
